The establishment of robust server infrastructure is a pivotal requirement for developers aiming to deliver scalable and immersive multiplayer experiences with Unreal Engine 5 (UE5). This comprehensive guide outlines the essential steps for constructing and configuring a dedicated server, a foundational element for any ambitious online game, from competitive shooters to expansive cooperative survival titles and dynamic social sandboxes. Unlike peer-to-peer (P2P) hosting models, dedicated servers offer unparalleled advantages in performance, security, and reliability, ensuring a consistent and equitable gameplay environment for all participants. The process, encompassing project preparation, server compilation, and local deployment, represents a critical phase in transforming a multiplayer concept into a fully operational online game.
The evolution of multiplayer gaming has seen a significant shift from player-hosted "listen servers" or peer-to-peer connections to the industry-standard dedicated server model. In the early days of online gaming, particularly with many console titles and smaller PC games, P2P networking was a common and cost-effective solution. In this setup, one player’s console or PC acts as the host, managing game logic and synchronizing data with other connected clients. While suitable for small player counts (typically 2-16 players) and reducing development overhead by eliminating the need for dedicated server hardware, P2P systems are fraught with inherent limitations. These include susceptibility to "host advantage," where the host player benefits from zero latency; significant security vulnerabilities, making games prone to cheating and exploitation; and a lack of scalability, as the host’s internet connection and processing power become bottlenecks for increasing player numbers. Furthermore, if the host disconnects, the entire game session often terminates or must undergo a disruptive host migration.
Dedicated servers emerged as the definitive solution to these challenges, providing a centralized, independent game instance that operates autonomously from any player’s device. This separation of concerns is fundamental: the dedicated server focuses solely on processing game world logic and server code, rather than rendering graphics or managing a player character. This architectural choice delivers a multitude of benefits, solidifying its status as indispensable for modern multiplayer titles.
The Indispensable Advantages of Dedicated Servers
For games built on a powerful engine like Unreal Engine 5, with its capacity for highly detailed environments and complex mechanics, dedicated servers are not merely an option but a necessity. The advantages are multifaceted:
- Superior Performance and Consistency: Dedicated servers run on optimized hardware in data centers, boasting high bandwidth connections and robust processing capabilities. This minimizes latency, ensures consistent tick rates (the frequency at which the server updates the game state), and offloads computationally intensive tasks from individual player machines. The result is smoother gameplay, reduced desynchronization issues, and a more responsive experience, critical for fast-paced genres like competitive shooters where milliseconds can determine victory or defeat.
- Enhanced Security and Anti-Cheat: By centralizing game logic on a server inaccessible to players, dedicated servers significantly mitigate the risk of client-side manipulation and cheating. The server acts as the authoritative source of truth for all game events, validating player actions and preventing illicit modifications to game state. This centralized control allows for more effective implementation of anti-cheat measures, fostering a fairer and more trustworthy competitive environment.
- Reliability and Scalability: A dedicated server can run 24/7, providing persistent game worlds or readily available sessions. This ensures players can connect at any time without relying on another player being online to host. Furthermore, dedicated server infrastructures can be scaled dynamically to accommodate fluctuating player numbers, launching new instances during peak times and reducing them during off-peak hours, optimizing resource utilization and operational costs.
- Optimal Player Experience: The combined benefits of performance, security, and reliability culminate in a superior player experience. Players can expect stable connections, fair play, and an environment free from the disruptions common in P2P setups. This consistency is crucial for building player loyalty and fostering a thriving online community.
- Streamlined Development and Maintenance: From a developer’s perspective, a dedicated server environment offers a predictable and consistent platform for testing, debugging, and deploying updates. The standardized server setup simplifies bug reproduction and ensures that game logic behaves uniformly across all sessions, regardless of individual player hardware or network conditions.
Unreal Engine 5: Empowering Next-Generation Multiplayer
Unreal Engine 5 provides a sophisticated framework for building multiplayer games, leveraging its cutting-edge features like Nanite virtualized geometry and Lumen global illumination to create stunningly realistic and expansive worlds. These graphical advancements, coupled with UE5’s robust networking capabilities, demand an equally powerful server solution. The engine’s architecture is designed to integrate seamlessly with dedicated server deployments, offering developers the tools to manage complex game states, player interactions, and persistent world data across multiple clients. The ability to customize and compile server-specific builds directly from the engine streamlines the development pipeline for online titles.
The Technical Workflow: Preparing Your Project for Dedicated Hosting
The journey to a functional dedicated server begins with meticulous project preparation within Unreal Engine 5. This involves specific configurations and adaptations to the game’s core logic, ensuring it behaves correctly when running in a server-only context.
Prerequisites for Server Development:
Before diving into server configuration, developers must meet several key prerequisites:
- A Working Multiplayer Unreal Engine 5 Project: The foundational requirement is an existing UE5 project with implemented multiplayer functionality. This typically involves player replication, RPCs (Remote Procedure Calls), and basic game mode/state handling. For those starting, comprehensive guides on multiplayer sessions often serve as an excellent starting point.
- Source Build of Unreal Engine: Crucially, a dedicated server cannot be built from an Unreal Engine version downloaded directly from the Epic Games Launcher. Developers must utilize a version of Unreal Engine compiled from source code. This is because the source build provides access to server-specific compilation targets and allows for deeper customization and optimization necessary for a standalone server executable. Epic Games provides detailed documentation on how to download and build the engine from its GitHub repository.
- AdvancedSessions Plugin (Recommended): For robust and feature-rich session management, including session browsing and joining, the AdvancedSessions plugin is highly recommended. This plugin extends Unreal Engine’s native online subsystem functionalities, providing developers with more granular control over creating, finding, and managing game sessions, which is vital for a dedicated server to correctly advertise itself and allow players to connect.
Adapting Game Logic for Server Environments: Automatic Session Creation
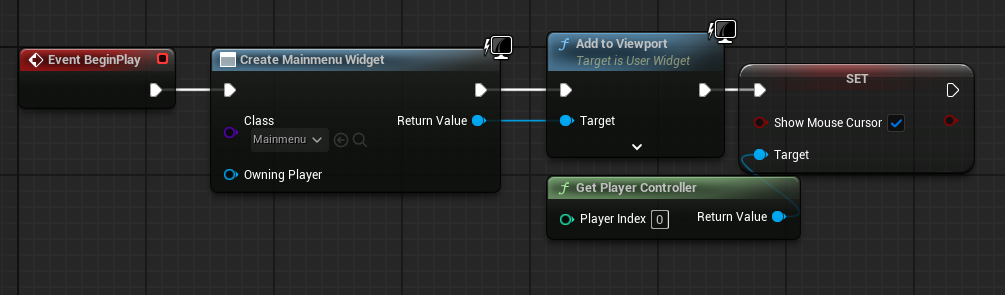
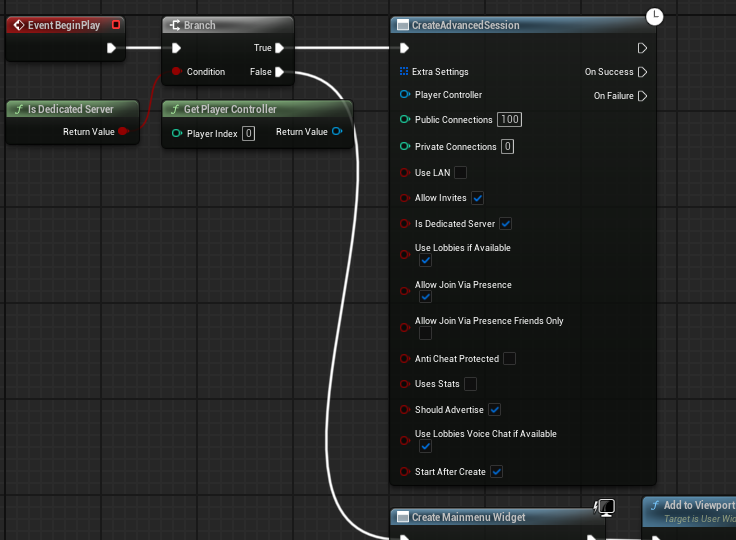
A critical adjustment for a dedicated server is to automate session creation and map loading upon launch, bypassing any client-side menu systems. In a typical client application, a main menu widget would be displayed, allowing the player to initiate actions like joining or hosting a game. For a dedicated server, this visual interface is unnecessary and resource-intensive.
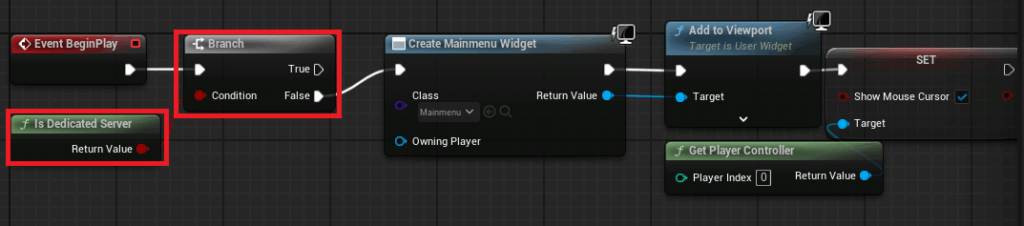
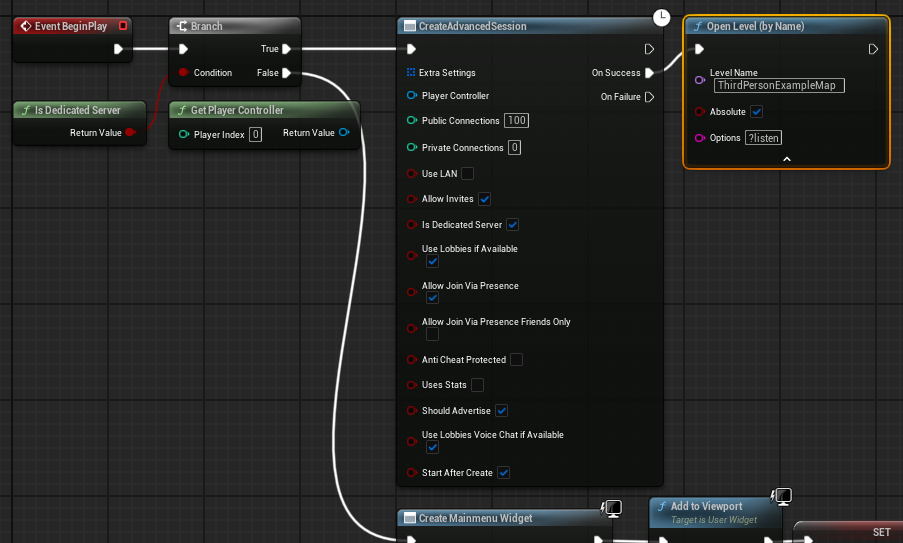
The solution involves introducing a conditional check within the main menu level blueprint or game mode. Utilizing an "Is Dedicated Server" node, the system can determine its operational context. If the application is identified as a dedicated server, the code path that creates the main menu widget is bypassed. Instead, the server proceeds directly to create an "Advanced Session" with predefined parameters (e.g., maximum players, public visibility). Upon successful session creation, the server immediately loads the designated gameplay map, appending the ?listen option to the map name. This command instructs the server to listen for incoming client connections, effectively making it ready for players to join the game world. This logical branch ensures that the dedicated server efficiently initializes its core function without expending resources on client-facing elements.
Establishing the Default Server Map
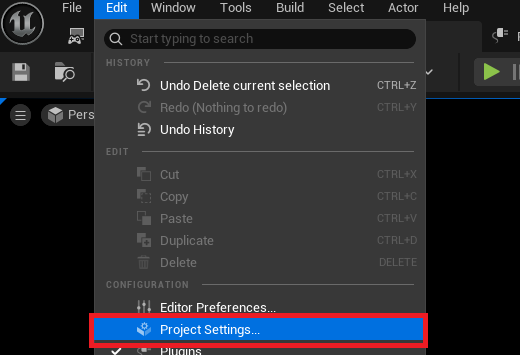
By default, an Unreal Engine server might attempt to load an internal engine map (often named "Entry") upon startup. This behavior needs to be overridden to ensure the dedicated server initializes directly into the intended game level. This configuration is managed within the Project Settings:
- Access Project Settings: Navigate to
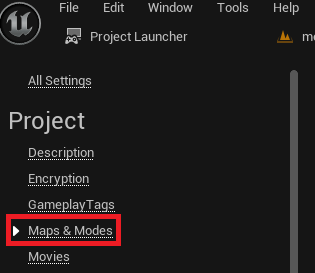
Edit > Project Settings. - Maps & Modes Section: Select the "Maps & Modes" category from the left-hand menu.
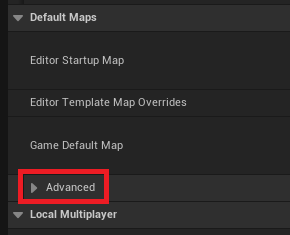
- Advanced Default Maps: Within the "Default Maps" section, expand the "Advanced" dropdown options.
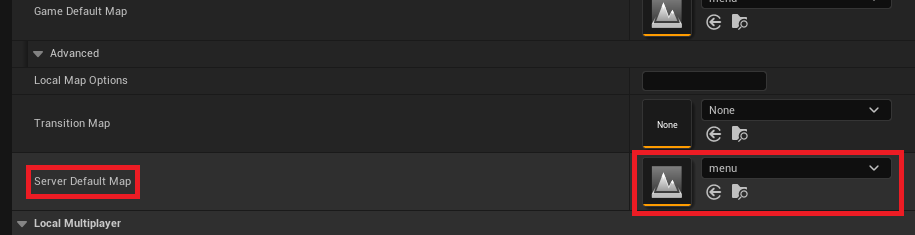
- Set Server Default Map: Locate the "Server Default Map" setting and specify the path to the desired starting map for the dedicated server. This ensures that when the server executable is launched, it automatically loads the correct level, preparing the game world for incoming players.
Optimizing for Server-Side Efficiency: No Default Character
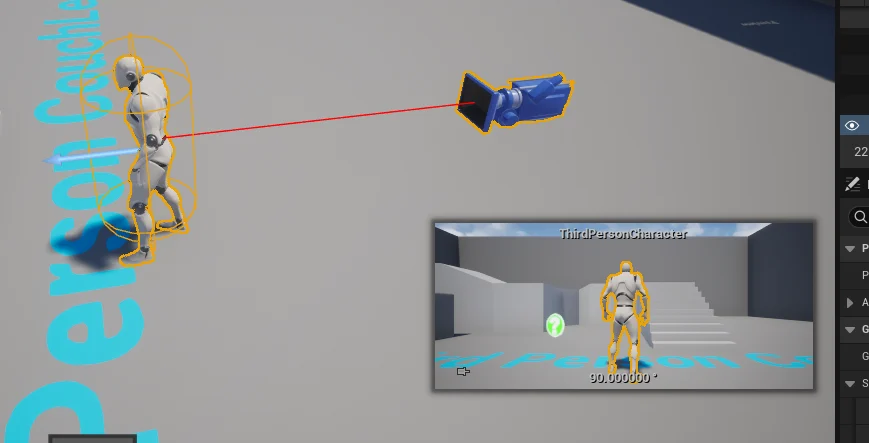
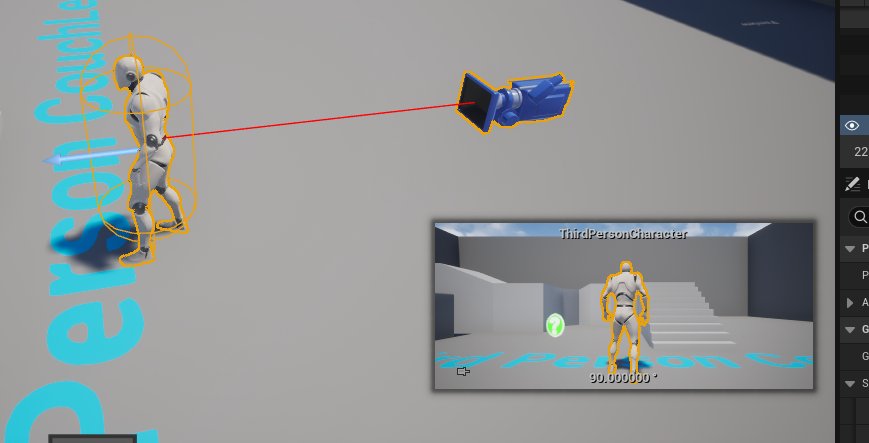
Dedicated servers, by their nature, do not require a visible player character or client-side rendering. Therefore, any default player character blueprints that might be present in the starting level need to be removed or conditionally prevented from spawning on the server. Spawning an unnecessary character on the server consumes resources (memory, processing power) that could be better allocated to game logic and player synchronization. Developers should either ensure that player characters are only spawned for connected clients, or remove any default character actors directly placed in the server’s starting map. This small optimization contributes to a leaner, more efficient server footprint.
The Project Launcher: Streamlining Dedicated Server Builds
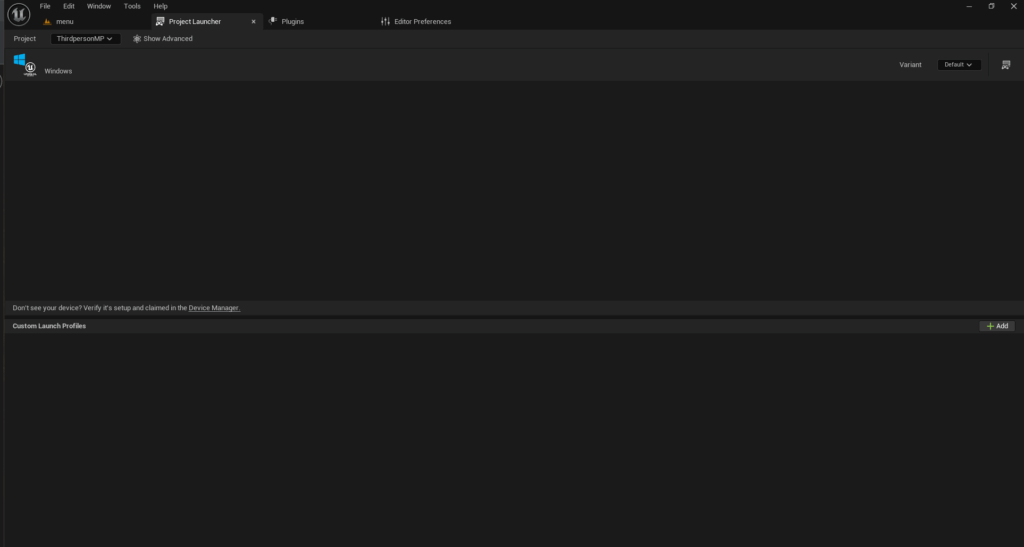
Unreal Engine’s Project Launcher is an invaluable integrated tool designed to streamline the packaging, cooking, and deployment of game builds, including dedicated servers. It provides a user-friendly interface for defining custom build profiles, automating complex compilation tasks.
To access the Project Launcher:
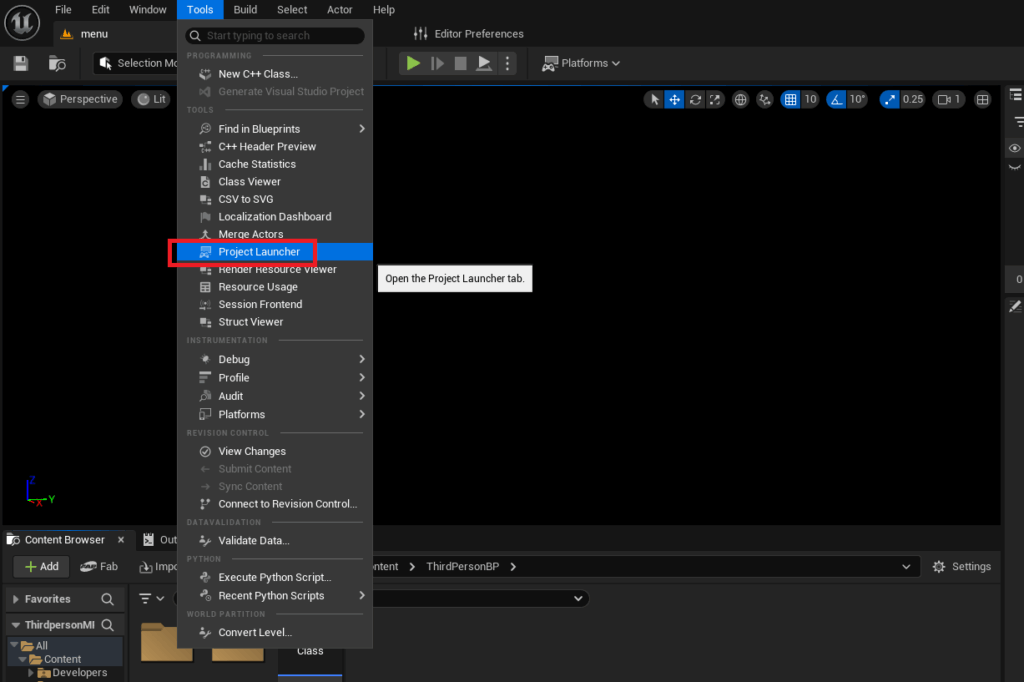
- Navigate to
Tools > Project Launcherwithin the Unreal Editor.
Upon opening, the Project Launcher presents a menu where custom profiles can be created and managed. These profiles encapsulate specific build configurations, allowing developers to define exactly what components are included, for which platforms, and how they are packaged.
Creating a Custom Profile for the Dedicated Server:
The core of building a dedicated server through the Project Launcher lies in configuring a custom profile:
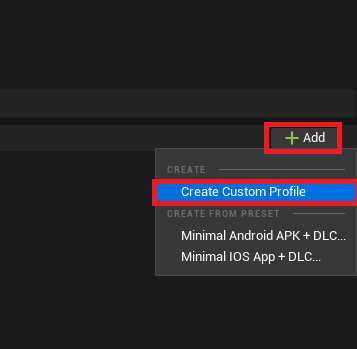
- Add New Profile: Click the "Add" button and select "Create Custom Profile."
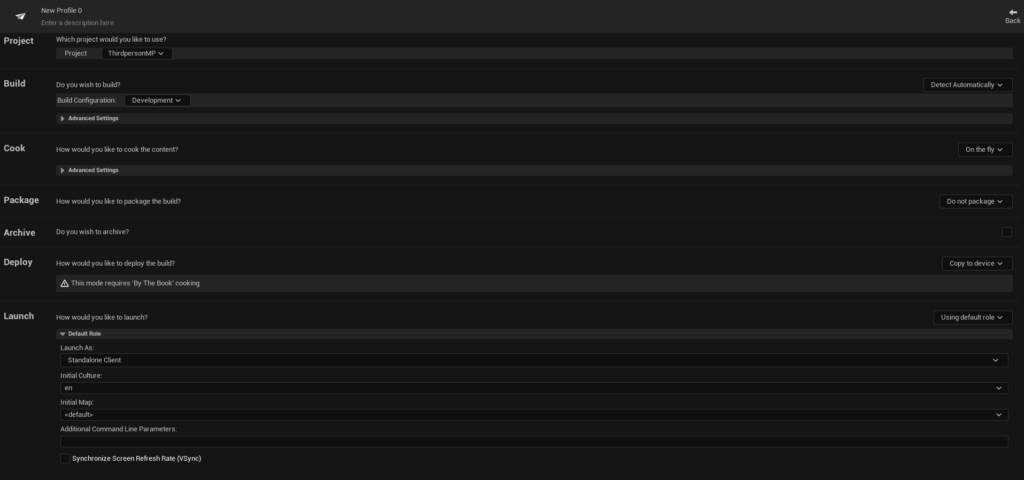
- Cook Settings:
- Change the "Cook" option from "On the fly" to "By the book." This ensures all necessary game assets are pre-processed and included in the build, rather than being cooked during runtime, which is crucial for a standalone server.
- Cooked Platforms:
- Under "Cooked Platforms," select the target server platform. For Windows-based servers, "WindowsServer" is chosen. Options like "LinuxServer" (for x86/64 Linux) or "LinuxArm64" (for ARM-based Linux servers) are available for cross-platform deployments.
- Maps to Cook:
- Specify all maps that the dedicated server will need to access. This typically includes the main gameplay maps and any menu maps that might be used for initial session setup.
- Package Settings:
- Change the "Package" option from "Do not package" to "Package & store locally." This instructs the Project Launcher to compile the server executable and its associated content into a designated local directory. Developers can choose a custom output path or use the default, typically found within the project’s
Saved/StagedBuildsfolder.
- Change the "Package" option from "Do not package" to "Package & store locally." This instructs the Project Launcher to compile the server executable and its associated content into a designated local directory. Developers can choose a custom output path or use the default, typically found within the project’s
- Deploy Settings:
- Set the "Deploy" option to "Do not deploy." Since the server is being built for local testing or manual deployment to a hosting service, automatic deployment to a device is not required.
- Profile Naming: Assign a descriptive name to the custom profile (e.g., "DedicatedServer_Windows") for easy identification.
Executing the Build and Testing the Dedicated Server
With the custom profile configured, the next step is to initiate the build process.
Building the Files:
- Return to the main Project Launcher menu.
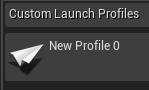
- Locate the newly created custom profile.
- Click the "Launch" button (represented by a controller and display icon) next to the profile.
The Project Launcher will display a console window, detailing the progress of the server build. This process involves cooking content, compiling code, and packaging the final executable. The initial build, especially for larger projects, can take a considerable amount of time. It is imperative to allow the process to complete fully, ensuring all tasks report a "Success" status.
Testing the Dedicated Server:
Once the build is successful, navigate to the specified output directory (e.g., [YourProject]/Saved/StagedBuilds/WindowsServer). Inside, you will find the server executable, typically named [YourProjectName]Server.exe.
For ease of testing and debugging:
- Create a Shortcut: Create a shortcut to the server executable.
- Add
-logArgument: Right-click the shortcut, go to "Properties," and in the "Target" field, append-logto the end of the executable path (e.g.,".../WindowsServer/YourGame/Binaries/Win64/YourGameServer.exe" -log). This argument forces the server to open with a console window, displaying real-time logging messages, which is invaluable for monitoring server initialization, session creation, and debugging potential issues.
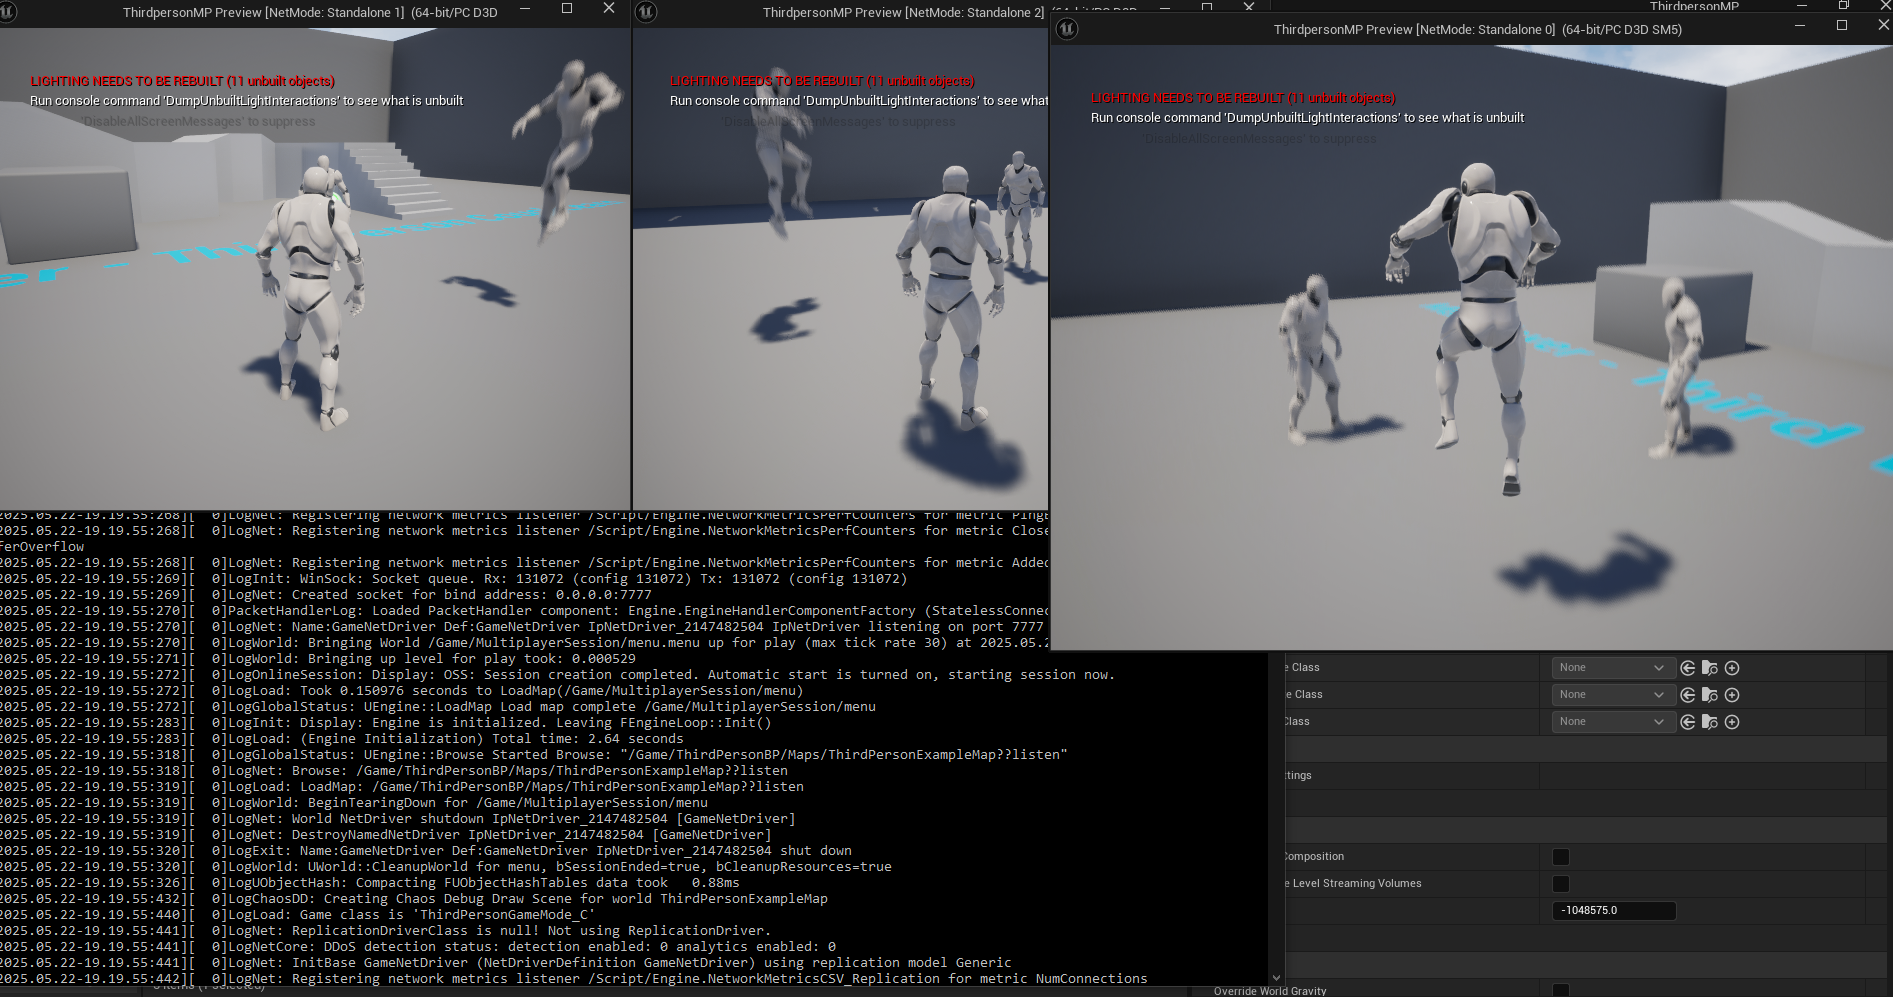
Launching the modified shortcut will open the server in a command-line interface, where a stream of text indicates its initialization process, including session creation and map loading. Once the server is active, client instances (either multiple instances from the Unreal Editor or separate client builds) can then connect to the dedicated server session, typically by searching for available sessions or directly connecting via IP address. The demonstration of multiple clients successfully connecting and interacting within the server-hosted game world validates the entire setup, showcasing a stable, authoritative multiplayer environment.
Beyond Local Testing: Cloud Deployment and Future Considerations
While this guide focuses on building and running a dedicated server locally, the ultimate goal for most developers is deployment to cloud hosting platforms such as Amazon Web Services (AWS), Microsoft Azure, or Google Cloud Platform. These services provide the scalable infrastructure needed to host servers globally, ensuring low latency for players across different regions. The principles of building the server remain consistent, but deployment involves additional steps related to cloud instance management, network configuration (firewalls, port forwarding), and automated scaling solutions.

The commitment to dedicated servers underscores a developer’s dedication to delivering a high-quality, fair, and resilient multiplayer experience. In an increasingly competitive gaming landscape, where online interactions are central to player engagement, the investment in robust server infrastructure is a strategic imperative. This technical capability not only enhances the player’s journey but also future-proofs the game against evolving demands for scale, security, and performance.
You now possess a fully built dedicated server for your Unreal Engine 5 game, capable of hosting multiplayer sessions. This foundational achievement empowers you to deliver a consistent, high-performance online experience, crucial for the long-term success and growth of any multiplayer title. The journey from project conception to a scalable online game is complex, but with a solid dedicated server infrastructure, you are well-positioned to create engaging and memorable multiplayer worlds.
About the Author