The Indispensable Role of Dedicated Servers in Modern Gaming
In an era where multiplayer gaming dominates significant segments of the entertainment industry, the infrastructure supporting these experiences is paramount. The global multiplayer gaming market is projected to continue its substantial growth, driven by esports, persistent online worlds, and social connectivity. For developers leveraging Unreal Engine 5, a sophisticated engine known for its photorealistic graphics and advanced toolsets, the decision to implement a dedicated server is not merely an option but a strategic necessity for any title aspiring to scale beyond intimate player counts.
A dedicated server, in essence, is a specialized computer or virtual instance tasked solely with running the game’s core logic and world simulation. Unlike a "listen server," where one player’s machine hosts the game while simultaneously participating, a dedicated server operates without rendering graphics or hosting a player character. This isolation provides several critical advantages: enhanced performance due to resource dedication, improved security by preventing client manipulation of game state, and greater stability as the server’s uptime is independent of any single player’s connection or hardware. For competitive titles, where even fractional discrepancies can impact fairness, dedicated servers provide the authoritative source of truth for all game events, resolving potential desynchronization and ensuring a level playing field.
Historically, multiplayer games often started with peer-to-peer or listen server models due to their simplicity and lower initial cost. Early console games and smaller PC titles frequently relied on these methods. However, as internet speeds improved and player expectations for seamless, cheat-free experiences grew, dedicated servers became the industry standard for any serious multiplayer offering. This evolution underscores a critical shift in game development philosophy, prioritizing a consistent, high-quality experience for all players over the convenience of a host-driven model. The ability to deploy and manage these servers efficiently is a key differentiator for studios looking to make an impact in the crowded online gaming landscape.
Navigating the Unreal Engine 5 Dedicated Server Deployment
The process of building and configuring a dedicated server for an Unreal Engine 5 project from inception to local operation involves a structured series of technical steps. This comprehensive approach ensures that developers can transition their multiplayer-ready projects to a robust server architecture. The journey begins with crucial preparatory phases, extends through the detailed configuration of project settings, and culminates in the compilation and local execution of the server binaries.
Essential Prerequisites for Server Construction
Before commencing the dedicated server build, several foundational requirements must be met to ensure a smooth and successful compilation. Foremost among these is a fully functional, multiplayer-ready Unreal Engine 5 project. This implies that the game logic for networking, player replication, and session management is already in place, forming the base layer upon which the dedicated server infrastructure will be built. For developers without such a project, resources detailing Unreal Engine 5 Multiplayer Sessions are typically recommended as an initial step, establishing the core networking framework.
A critical, non-negotiable prerequisite is the use of an Unreal Engine version built from source code, rather than the standard installation acquired through the Epic Games Launcher. The source build provides access to the engine’s underlying code, which is essential for compiling the specialized server binaries that are not included in the pre-compiled launcher versions. Epic Games provides extensive documentation on how to download and build the engine from source, a process that, while requiring a deeper understanding of the engine’s architecture and potentially longer compilation times, is indispensable for server deployment. This step ensures that the server application can be tailored precisely to the project’s needs and leverage all necessary engine features.
Furthermore, for seamless session management and discovery, the integration of specific plugins is often required. The AdvancedSessions plugin, for instance, is frequently cited as a necessity for servers to correctly register and appear in session browsers. This third-party plugin extends Unreal Engine’s native session capabilities, offering more granular control over session creation, searching, and joining, which is vital for a user-friendly multiplayer experience. Ensuring this plugin is correctly installed and configured within the project before embarking on the server build is a crucial preparatory measure.
Automating Server Sessions and Map Loading
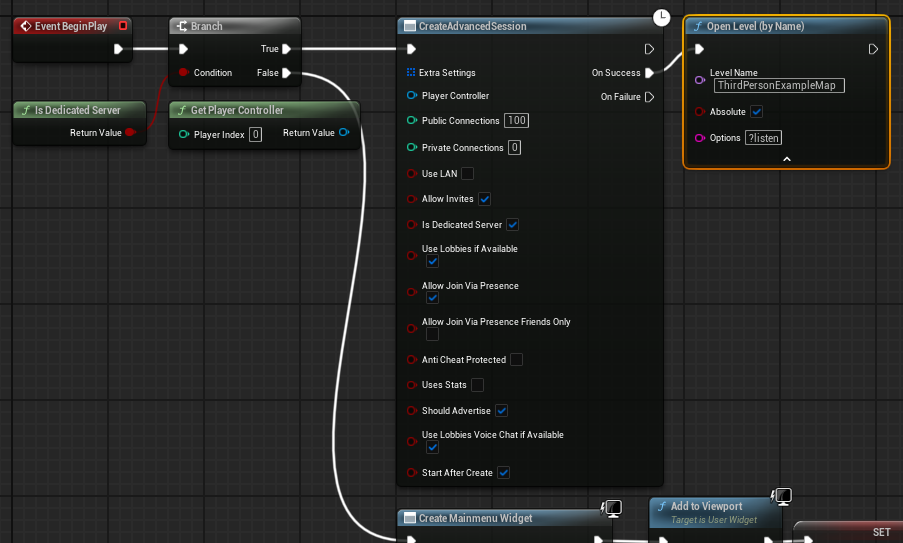
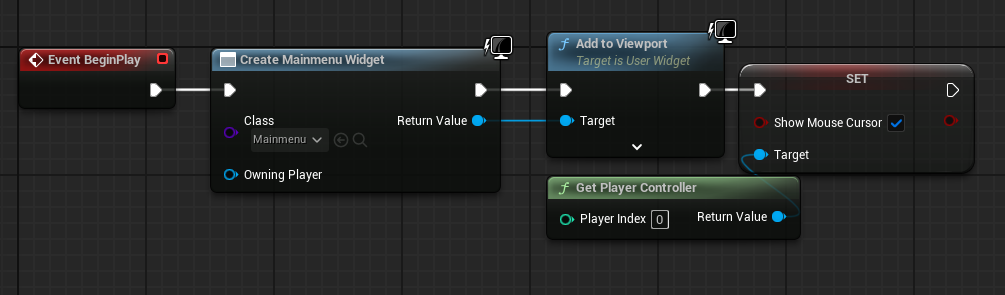
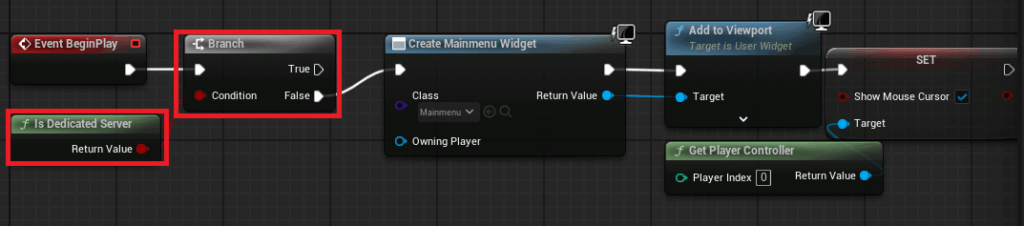
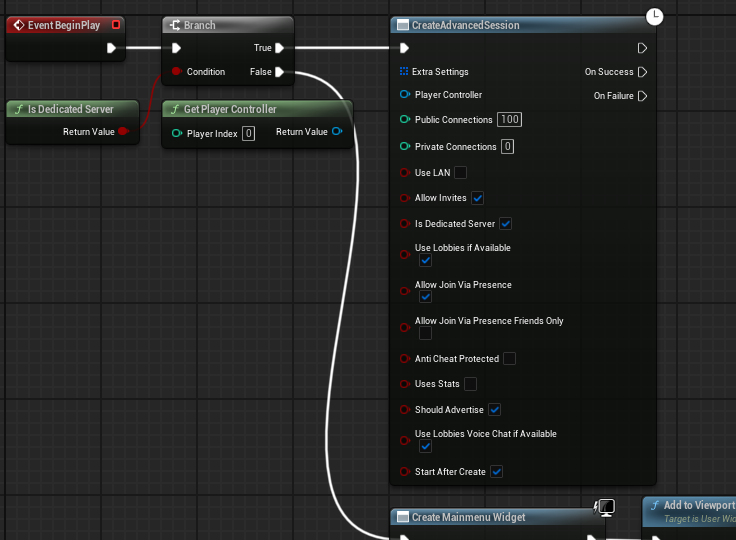
A core functional distinction for a dedicated server lies in its operational autonomy from player input. Unlike a client, which typically loads a main menu widget and awaits user interaction to join or create a session, a dedicated server must automatically establish a session and load the appropriate game map upon launch. This automated process is achieved through specific modifications within the project’s blueprint logic, particularly within the main menu level blueprint.
Developers must implement a conditional check using an "Is Dedicated Server" node. This node evaluates whether the current executable is running as a dedicated server instance. If the condition is false, meaning it’s a client instance, the standard main menu widget creation and display logic proceeds. However, if the condition is true, the system bypasses the client-side user interface entirely. Instead, it directly initiates an "Create Advanced Session" node, configuring the session with predefined parameters such as maximum players, server name, and visibility settings. Upon successful session creation, the server then executes an "Open Level" command, loading the designated game map with the ?listen option appended. This critical option instructs the server to listen for incoming client connections, effectively making the game world available for players. This streamlined, automated startup sequence is fundamental to dedicated server operation, ensuring that the server is ready to host players without manual intervention.
Configuring the Default Server Map
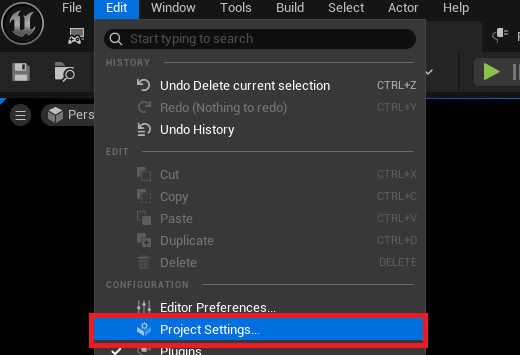
The initial map loaded by a dedicated server is a critical configuration point. By default, Unreal Engine often loads an internal "Entry" map, which is not suitable for hosting game sessions. To ensure players connect to the intended game environment, developers must explicitly define the server’s default map within the project settings.
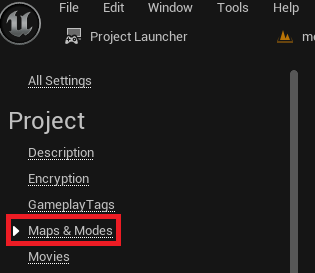
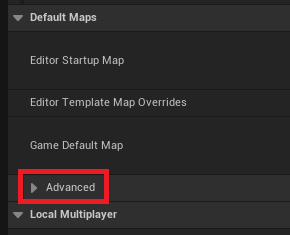
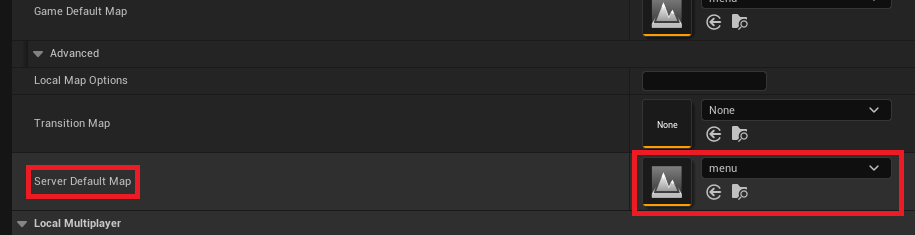
Accessing the Project Settings via the "Edit" menu, developers navigate to the "Maps & Modes" section. Within this area, under the "Default Maps" category, an "Advanced" dropdown menu reveals further options. Here, the "Server Default Map" setting must be adjusted to the desired game level. For instance, if the main game logic resides within a "menu" map that subsequently loads other game levels, this "menu" map would be set as the server default. This ensures that when the dedicated server executable is launched, it immediately initializes the correct game world, ready to accept client connections and manage the game state. This seemingly minor configuration is vital for the server’s operational correctness.
Eliminating Default Character Spawning
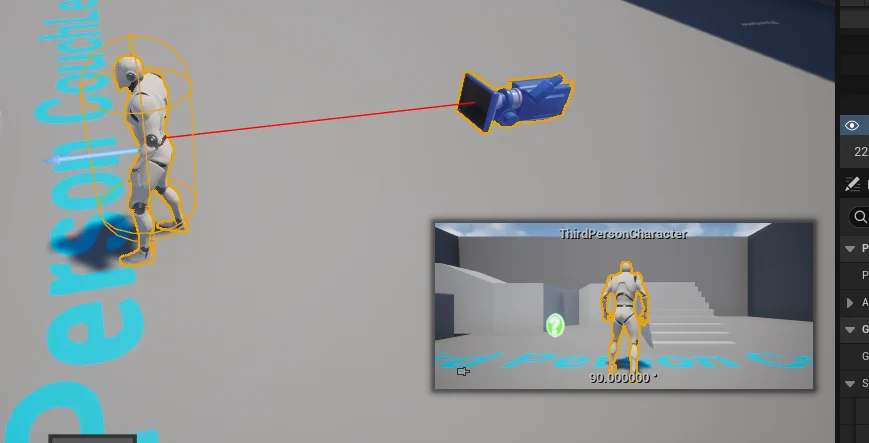
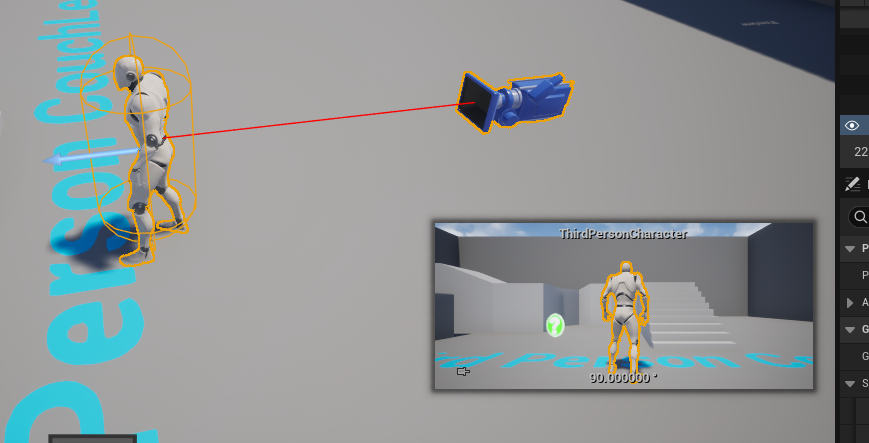
Another key distinction between a client and a dedicated server concerns player character spawning. In a typical multiplayer setup, the host of a listen server also spawns a player character and participates in the game. However, a dedicated server’s role is purely computational; it simulates the game world without active participation. Consequently, any default player character blueprints or spawning logic embedded directly within the level that would typically be controlled by the server host must be removed.
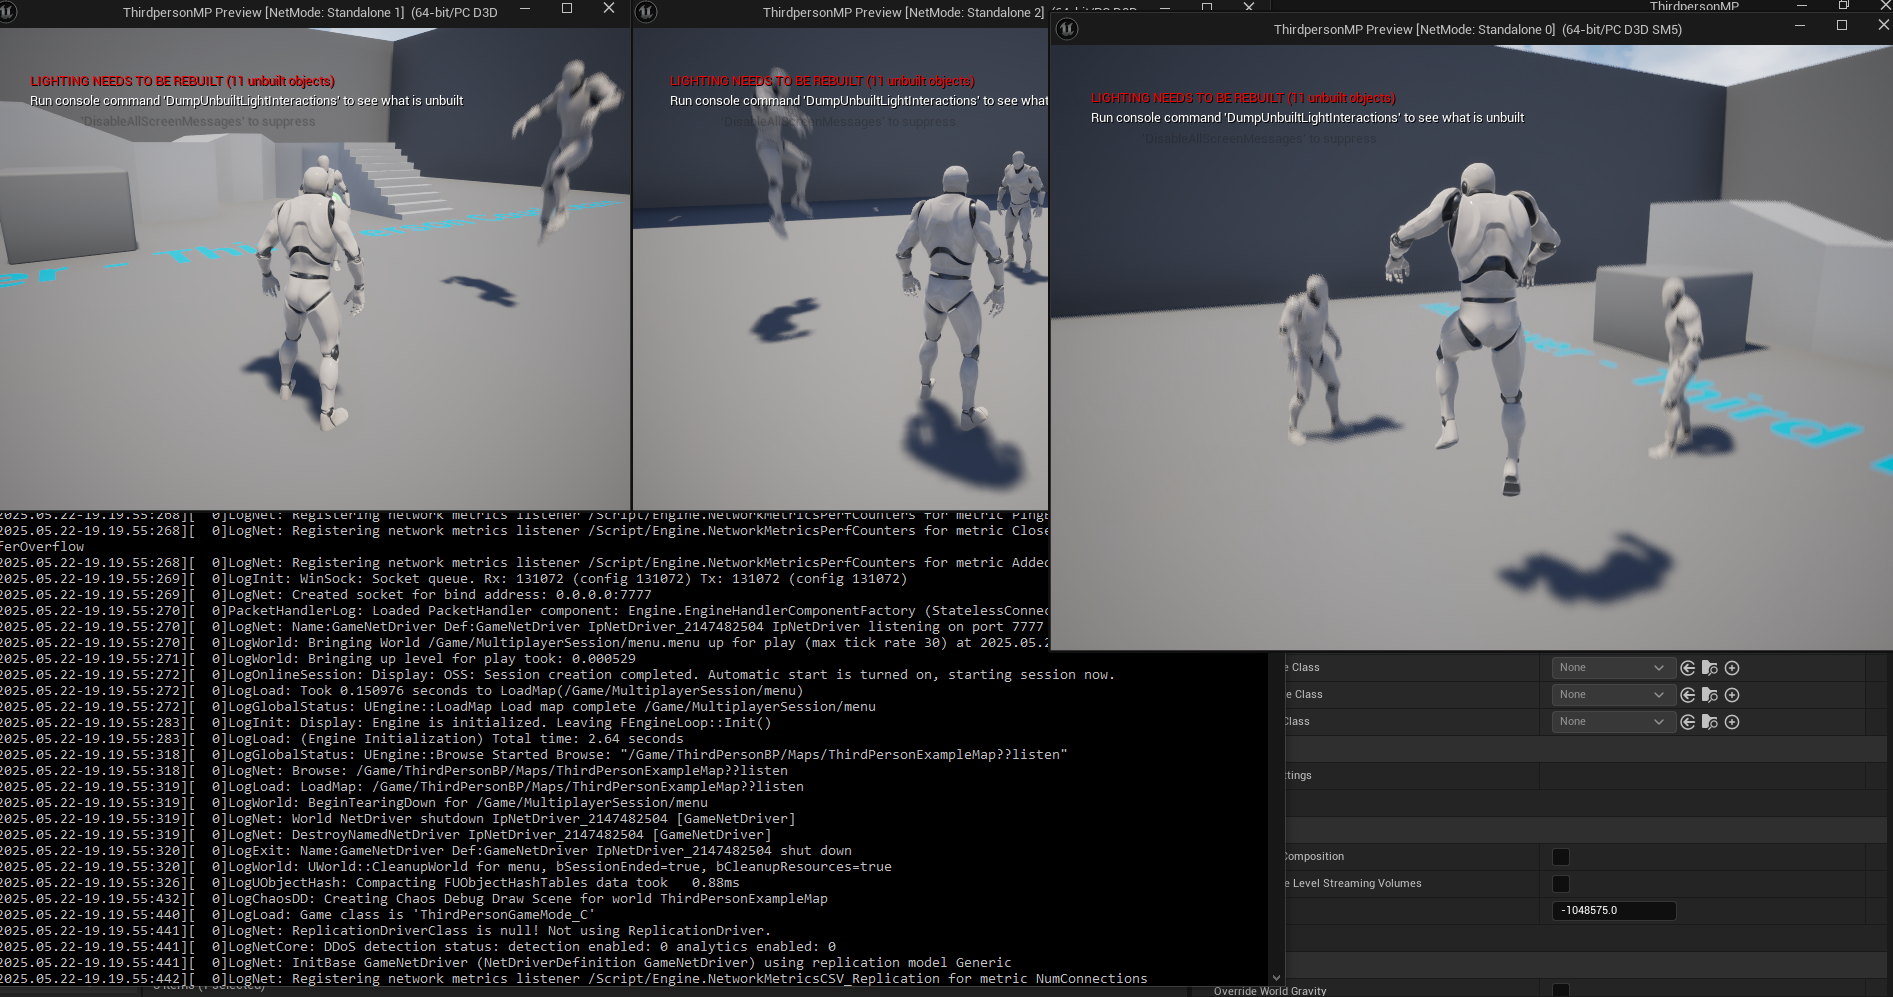
If a level contains a character blueprint that automatically spawns and attempts to be possessed by the first connected player (which would be the server itself in a listen server scenario), this will result in an unnecessary, unpossessed character existing in the game world. This consumes resources and can lead to unintended visual artifacts or game logic issues. Therefore, developers must identify and remove or disable any such default character spawners or associated logic within the server’s default map. This ensures that the dedicated server remains a headless instance, focusing solely on game state management and network synchronization, without extraneous player-controlled entities.
Leveraging the Unreal Engine Project Launcher
The Unreal Engine’s Project Launcher is an integrated, powerful tool designed to streamline the process of building and deploying various versions of a game, including dedicated servers. It operates through the creation of custom profiles, allowing developers to define specific build configurations without resorting to manual command-line arguments for every compilation.
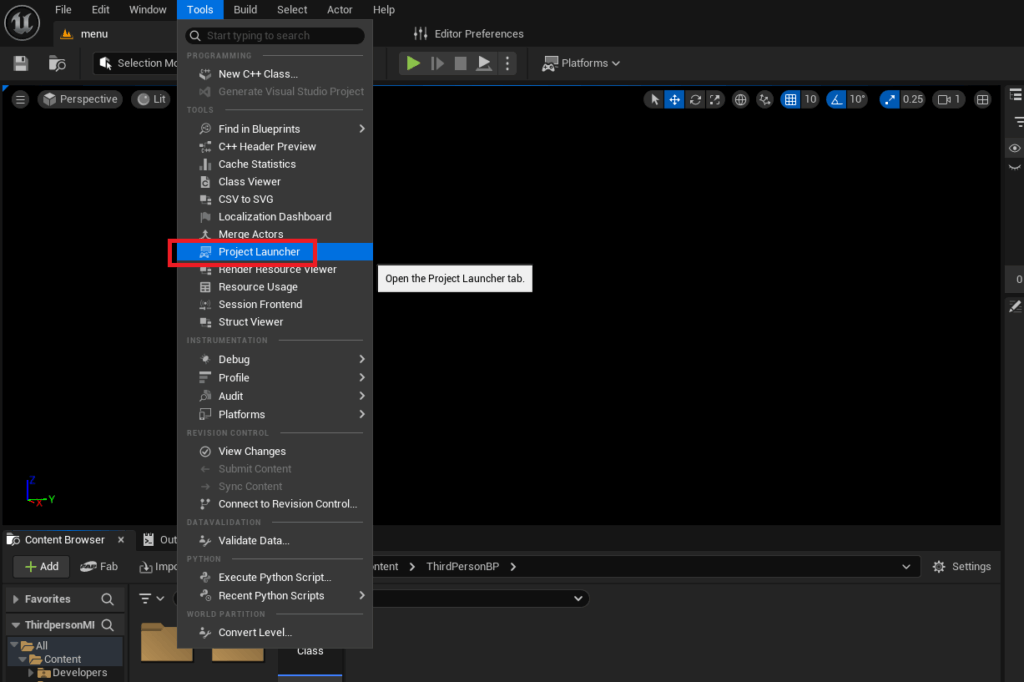
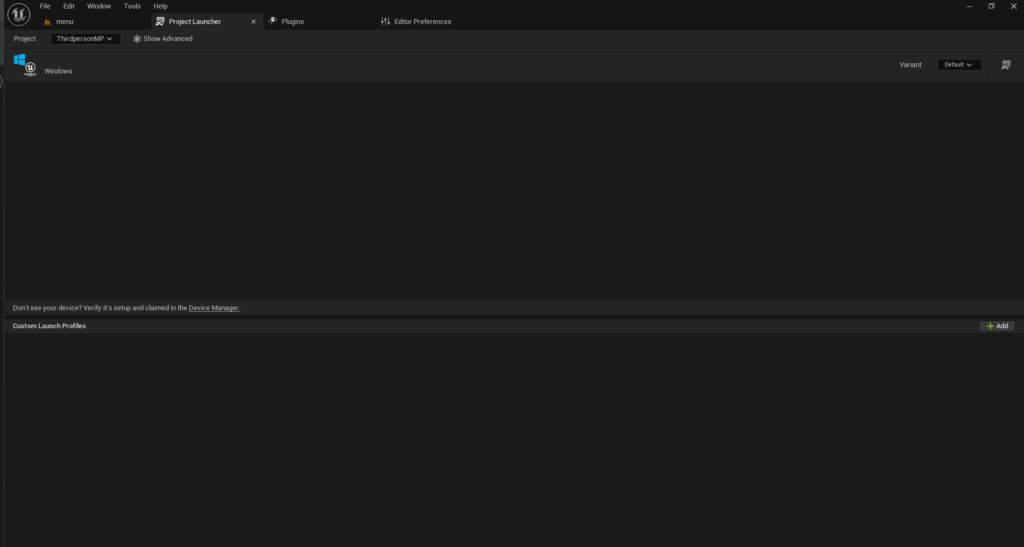
To access the Project Launcher, developers navigate to the "Tools" menu within the Unreal Editor and select "Project Launcher" from the "Tools" section. Upon opening, the launcher typically presents an empty interface, awaiting the creation of custom build profiles.
Crafting a Custom Build Profile for Dedicated Servers
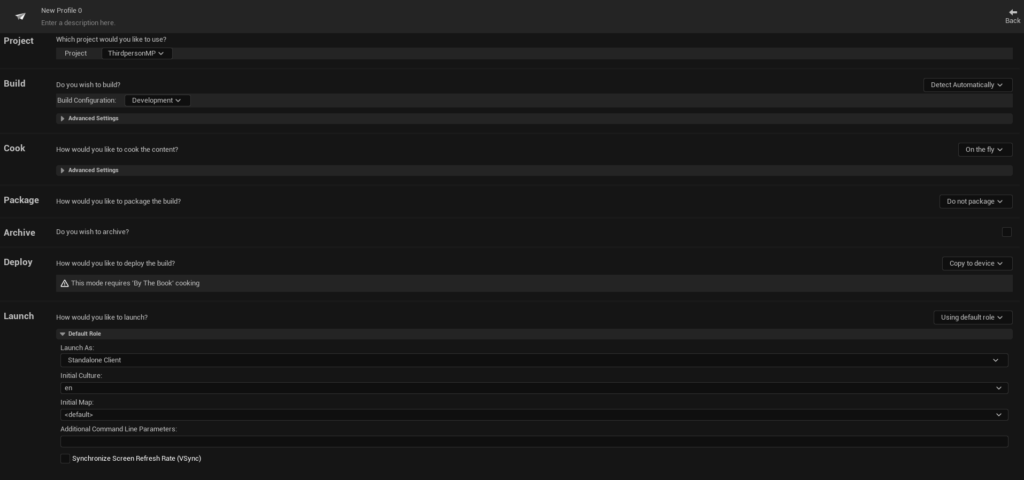
The core of building a dedicated server through the Project Launcher lies in defining a custom profile. This profile encapsulates all the necessary settings for cooking, packaging, and deploying the server binaries.
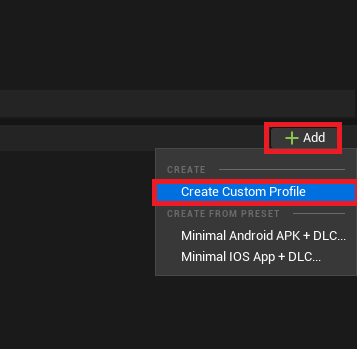
- Profile Creation: The process begins by clicking the "Add" button and selecting "Create Custom Profile." This action opens a comprehensive menu of configuration options.
- Cook Settings: Within the "Cook" section, the default "On the fly" option must be changed to "By the book." This ensures that all necessary content is pre-processed and packaged efficiently for the dedicated server, rather than being compiled dynamically during runtime.
- Platform Selection: Developers then scroll to the "Cooked Platforms" list and select the target server platform. For Windows-based servers, "WindowsServer" is chosen. For Linux deployments, "LinuxServer" (for x86/64 architectures) or "LinuxArm64" (for ARM-based systems) would be selected. This choice dictates the specific binaries and dependencies included in the server build.
- Map Inclusion: All maps intended to be hosted or traversed by the dedicated server must be explicitly added to the cook list. This includes the designated "Server Default Map" and any subsequent game levels that players might load into.
- Packaging Options: In the "Package" section, the option is changed from "Do not package" to "Package & store locally." This command instructs the Project Launcher to compile and package the server binaries and associated game content into a distributable folder structure. A default output path within the project’s
Saved/StagedBuildsdirectory is automatically generated, though developers can customize this location. - Deployment Configuration: For a local build, the "Deploy" section’s default "Copy to device" option is typically changed to "Do not deploy," as the server will be run directly from the packaged output folder.
- Profile Naming: Finally, the custom profile is given a descriptive name, such as "Dedicated Server Build," for easy identification and future use. These meticulous steps in profile creation ensure that the Project Launcher generates a server executable tailored to the project’s specifications.
Executing the Dedicated Server Build
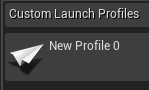
With the custom profile meticulously configured, the actual compilation of the dedicated server can commence. Returning to the main Project Launcher menu, the newly created profile will be visible in the list of custom launch profiles.
To initiate the build process, the developer simply clicks the "Launch" button (often represented by a controller and display icon) associated with the dedicated server profile. This action triggers a sequence of automated tasks: cooking content, packaging binaries, and generating the server executable. The Project Launcher provides real-time progress updates and debug logging, allowing developers to monitor the compilation status. The initial build, particularly for larger projects or the first time a profile is run, can be time-consuming, sometimes extending for several hours depending on project complexity and hardware specifications. It is crucial to allow this process to complete fully, as indicated by a "Success" message for all tasks, before proceeding to testing.
Testing and Validation of the Dedicated Server
Upon successful completion of the build process, the dedicated server executable and its associated files will reside in the designated output folder, typically [YourProjectFolder]/Saved/StagedBuilds/[PlatformName], e.g., WindowsServer.
The primary executable, usually named [YourProjectName]Server.exe, can be launched. However, by default, it may run silently in the background, making monitoring and termination difficult. To facilitate testing and debugging, it is recommended to create a shortcut to the server executable. By right-clicking the shortcut and accessing its properties, the -log launch option can be appended to the end of the "Target" field. This modification forces the server to open in a visible command-line window, displaying all logging messages, including session creation, client connections, and any runtime errors.
Launching the server shortcut with the -log argument will initiate a stream of text in the console window, indicating the server’s initialization, session creation, and readiness to accept connections. Concurrently, client applications can be launched, either directly from the Unreal Editor or as separate packaged builds. These clients should then be able to discover and connect to the newly established dedicated server session, often visible in an in-game server browser. Successful connection and seamless gameplay across multiple clients, where player movements and game state are synchronized without a player-controlled host, serve as the ultimate validation of the dedicated server’s functionality. This setup demonstrates the server’s ability to act as the authoritative game instance, orchestrating the multiplayer experience.
Broader Implications and Future Outlook
The successful deployment of an Unreal Engine 5 dedicated server represents a significant technical achievement for any development team. It directly impacts the quality, scalability, and long-term viability of multiplayer games. By offloading game logic and world simulation to a centralized, high-performance machine, developers can deliver experiences characterized by low latency, high fidelity, and robust anti-cheat measures. This translates directly into enhanced player satisfaction, increased retention, and a more positive community reputation.

The implications extend beyond technical performance to strategic advantages. Smaller and independent studios, by mastering dedicated server deployment, can compete more effectively with larger entities that historically monopolized such infrastructure. This democratizes access to professional-grade multiplayer foundations, fostering innovation across the industry. Furthermore, the knowledge gained from this process is foundational for integrating with advanced server orchestration services and cloud platforms, which are increasingly vital for managing server fleets across different geographical regions and dynamically scaling resources based on player demand. The ability to deploy a stable, secure, and performant dedicated server is not merely a step in game development; it is a critical investment in the future success and integrity of a multiplayer title in the evolving digital landscape.
About the Author