The establishment of a dedicated server for Unreal Engine 5 (UE5) games marks a pivotal advancement for developers aiming to deliver scalable, secure, and high-performance multiplayer experiences. This critical step moves beyond the limitations of peer-to-peer (P2P) hosting, providing a centralized, independent game instance that ensures optimal gameplay stability and fairness for players across diverse genres, from competitive shooters to expansive cooperative survival adventures and dynamic social sandboxes. A recent comprehensive guide by Couchlearn outlines the meticulous process of building and configuring such a server, covering everything from initial project preparations to local compilation and deployment. This initiative is set to empower developers, particularly those leveraging the advanced capabilities of UE5, to meet the escalating demands of the modern multiplayer gaming landscape.
The Evolution and Imperative of Dedicated Servers in Modern Gaming
For decades, multiplayer gaming has evolved dramatically, shifting from local area network (LAN) connections and rudimentary peer-to-peer models to sophisticated server-client architectures. Early multiplayer games often relied on P2P hosting, where one player’s machine acted as the host. While cost-effective for small player counts (typically 2-16 players) and simplifying initial development, this model presented significant drawbacks. Issues such as host advantage (where the host experienced minimal latency), susceptibility to cheating, inconsistent synchronization across clients, and performance degradation on the host machine as player counts increased, frequently marred the player experience. These inherent limitations became particularly pronounced as game complexity and player expectations for seamless, fair gameplay grew.
The advent of large-scale multiplayer online (MMO) games, battle royales, and highly competitive esports titles underscored the critical need for dedicated servers. Unlike P2P, a dedicated server operates as an independent machine, solely focused on processing game logic and managing the game world, without the overhead of rendering graphics or handling player input for a local client. This separation of concerns drastically improves performance, reduces latency, enhances security against malicious actors, and ensures a consistent game state for all connected players, regardless of their individual network conditions or hardware.
Unreal Engine 5, with its cutting-edge rendering capabilities like Nanite and Lumen, and its robust networking features, naturally supports the creation of visually stunning and technically demanding multiplayer titles. However, harnessing this power for a broad audience necessitates a strong server backend. The Couchlearn guide, building upon their previous work on Unreal Engine 5 Multiplayer Sessions, directly addresses this necessity, providing a structured pathway for developers to implement this enterprise-grade solution.
Laying the Foundation: Essential Prerequisites for Server Development
Embarking on the dedicated server development journey within Unreal Engine 5 requires specific foundational elements. Foremost among these is a pre-existing, functional multiplayer UE5 project. This ensures that the core game logic and networking are already established for client-side interaction. Developers without such a project are advised to first consult resources like Couchlearn’s guide on "Multiplayer Sessions in Unreal Engine 5," which provides the necessary groundwork for network-enabled gameplay.
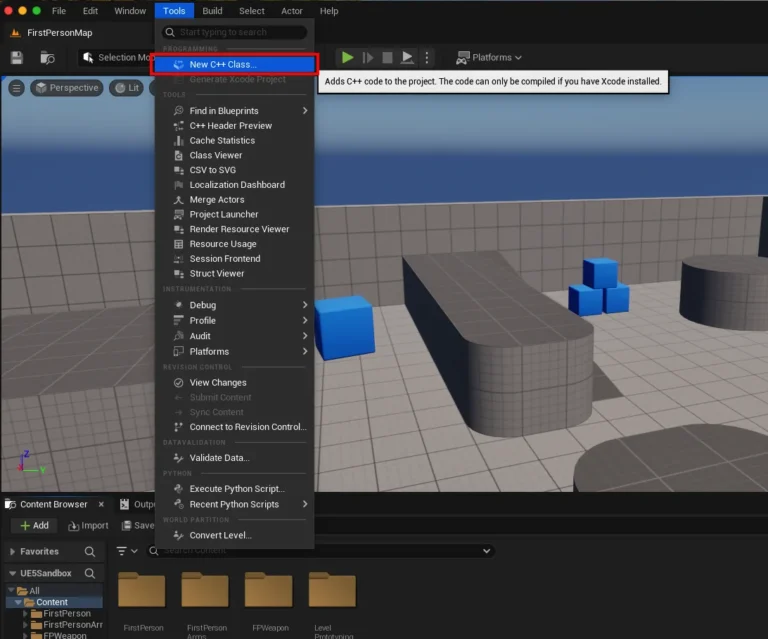
Crucially, the server build process demands a source build of Unreal Engine, rather than a version downloaded directly from the Epic Games Launcher. This is a non-negotiable requirement because the source build grants access to specific server-only build targets and configurations that are not included in the binary versions. These targets are essential for compiling a lean, optimized server executable that lacks client-side components like graphics rendering. Epic Games provides comprehensive documentation on acquiring and building the engine from source, a process that typically involves cloning the engine’s GitHub repository and compiling it using a suitable development environment like Visual Studio. This step, while adding an initial layer of complexity, is fundamental to unlocking the full potential of dedicated server development.
Furthermore, for efficient session management and discovery, the integration of the AdvancedSessions plugin is highlighted as a mandatory component. This plugin extends Unreal Engine’s native session interface, offering enhanced functionalities for creating, finding, and joining multiplayer sessions. Its installation ensures that the dedicated server properly advertises its presence and allows client applications to discover and connect to it seamlessly, a vital aspect for any publicly accessible multiplayer game.
Configuring Server Autonomy: Automating Sessions and Map Loading
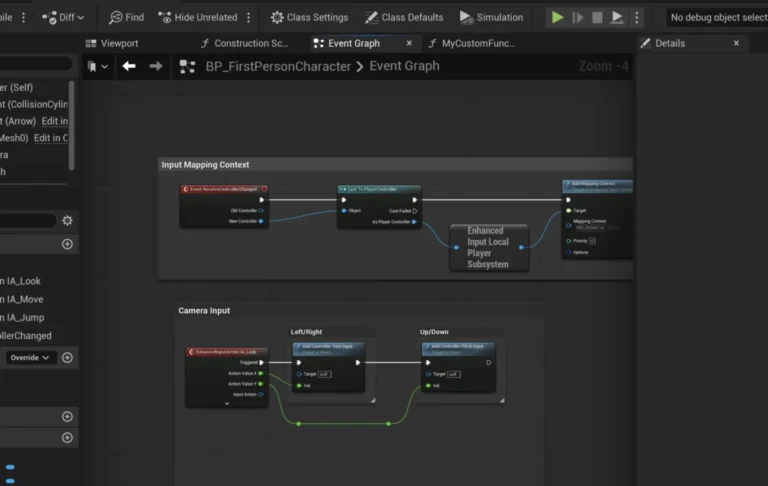
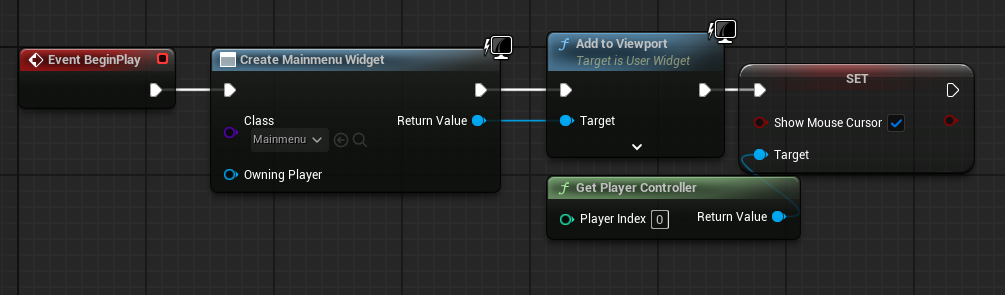
A core principle of a dedicated server is its autonomous operation. Unlike a listen server where a player also acts as the host, a dedicated server operates without a player character or a graphical user interface. This distinction necessitates specific adjustments to the game’s initial startup logic. The Couchlearn guide meticulously details how to modify the game’s blueprint logic to differentiate between a client instance and a dedicated server instance.
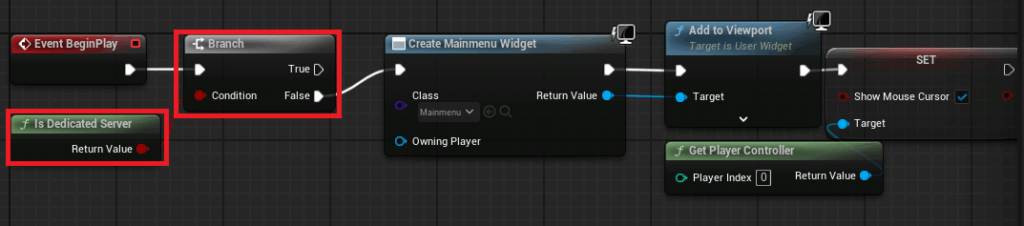
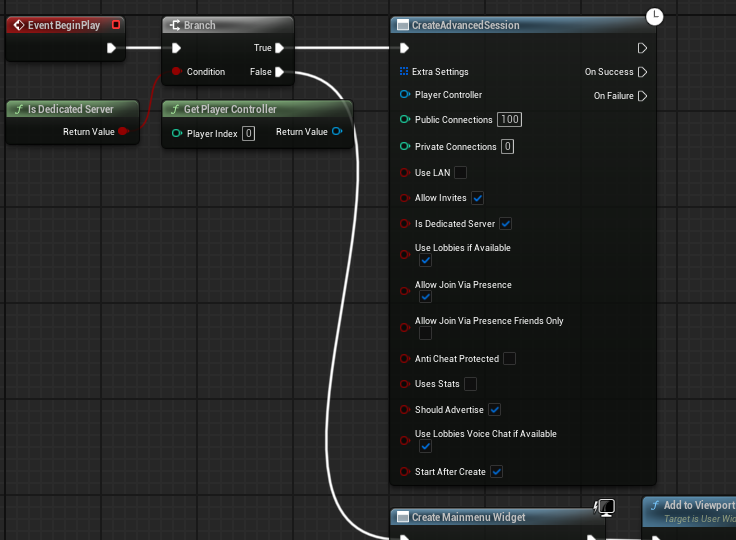
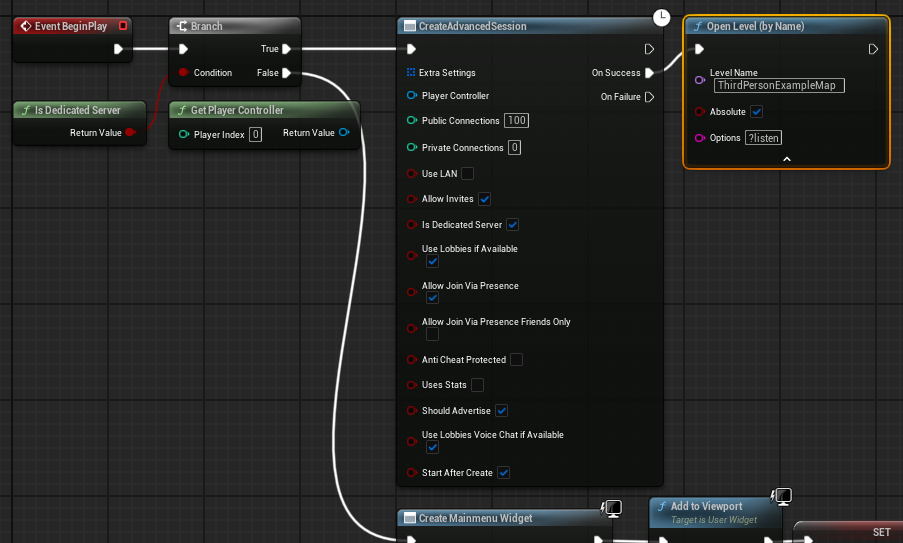
In a typical multiplayer game, the main menu level blueprint might create a user interface widget and present it to the player. For a dedicated server, this behavior is entirely unnecessary and counterproductive. The guide instructs developers to introduce an "Is Dedicated Server" node and a branch condition before any UI creation logic. If the platform is identified as a dedicated server (the "True" pin of the branch), the code bypasses the menu creation entirely. Instead, it proceeds directly to automatically creating an advanced session. This automatic session creation is vital, as it allows the server to immediately become discoverable and joinable by clients upon launch, without any manual intervention.
Following successful session creation, the server is instructed to open the primary game level using the "?listen" option. This command is critical as it tells the engine to open the specified map in a server-listening mode, enabling it to accept incoming client connections. This streamlined startup sequence ensures that the dedicated server is operational and ready to host players from the moment it is launched, eliminating any unnecessary client-side processes. The final step in this configuration phase involves compiling and saving these blueprint changes, integrating them into the project’s executable logic.
Strategic Map Selection: Guiding the Server’s Initial State
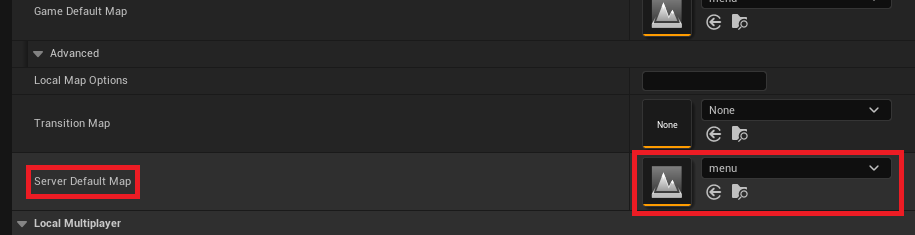
Beyond automating session creation, directing the dedicated server to load the correct default map upon startup is paramount. By default, Unreal Engine dedicated servers often initialize into a generic engine map, such as "Entry." This is unsuitable for a live game environment, as players need to connect to a specific game level. The guide details the process of overriding this default behavior through the Project Settings.
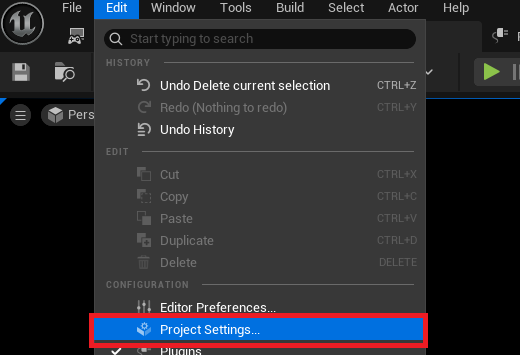
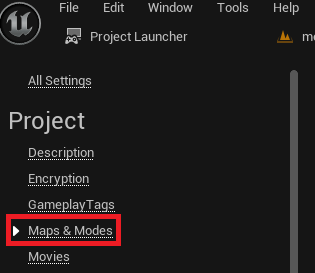
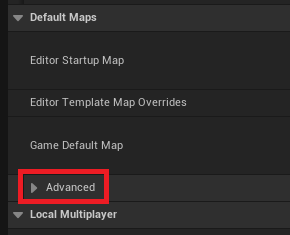
Developers navigate to the "Edit" menu, then "Project Settings," and finally select the "Maps & Modes" section. Within this section, under the "Default Maps" category, an "Advanced" dropdown reveals the crucial "Server Default Map" option. Here, developers can specify the exact game map that the dedicated server should load upon launch. For instance, if a game’s main gameplay occurs on a map named "GameLevel," this map would be set as the server default. In the guide’s example, the "menu" map is chosen, with subsequent blueprint logic handling the transition to the actual gameplay map after session creation. This configuration ensures that the server correctly initializes the game world, physics, and gameplay elements before players connect.

Optimizing Server Performance: Eliminating Unnecessary Elements
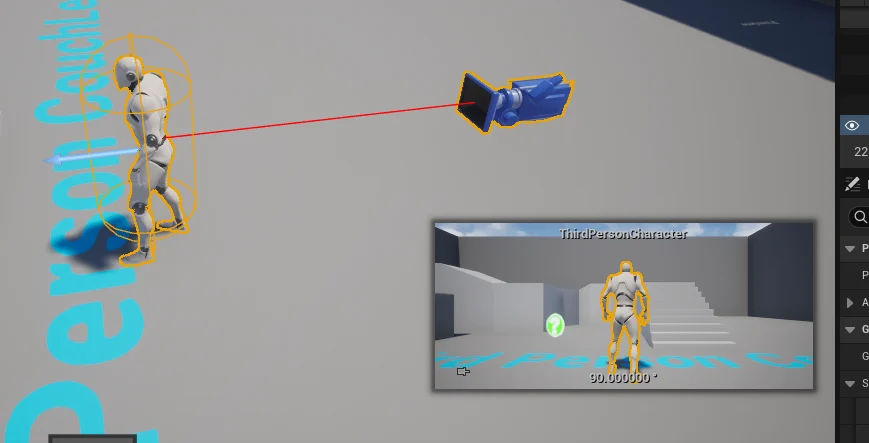
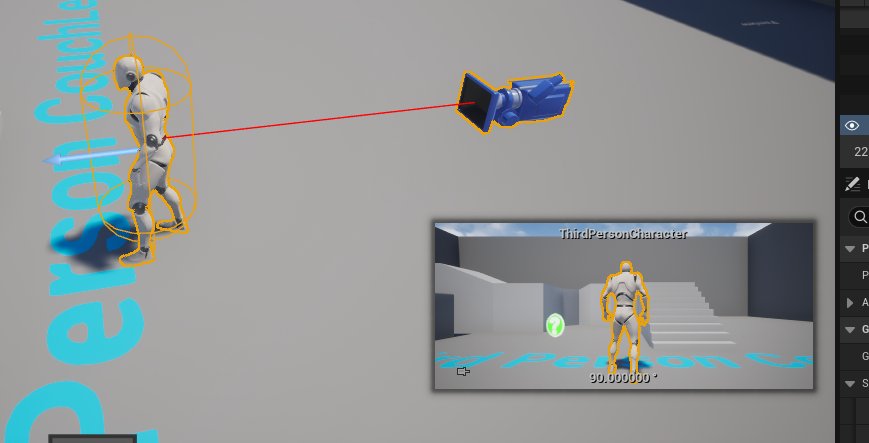
Further optimizing the dedicated server involves removing components that are redundant in a server-only context. One such element is the default character spawn. In a traditional game setup, a character blueprint might be placed directly within a level, intended for control by the first player to connect. However, on a dedicated server, there is no "first player" in the conventional sense, as the server itself does not represent a client.
The guide advises deleting any default character blueprints placed directly in the server’s starting level. Allowing a character to spawn on the server without an associated player not only consumes unnecessary resources but can also lead to unintended gameplay behavior or visual glitches if the server were somehow accessible for rendering. By removing this element, the server remains lean and focused solely on processing game logic, network replication, and managing the game state, contributing to improved performance and stability.
The Project Launcher: Streamlining the Server Build Pipeline
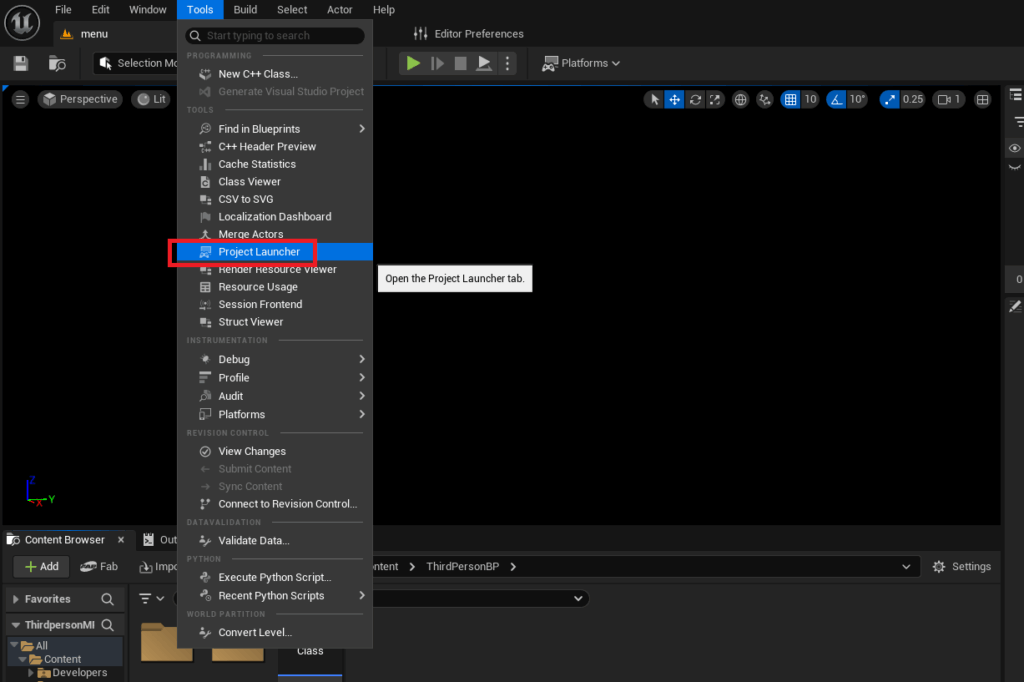
Unreal Engine’s Project Launcher is an indispensable tool that dramatically simplifies the process of building and packaging various versions of a game, including dedicated servers. This integrated utility allows developers to create custom profiles that encapsulate all the necessary settings for different build targets, automating what would otherwise be a complex, manual process. Accessing the Project Launcher is straightforward: from the editor, navigate to the "Tools" menu and select "Project Launcher."
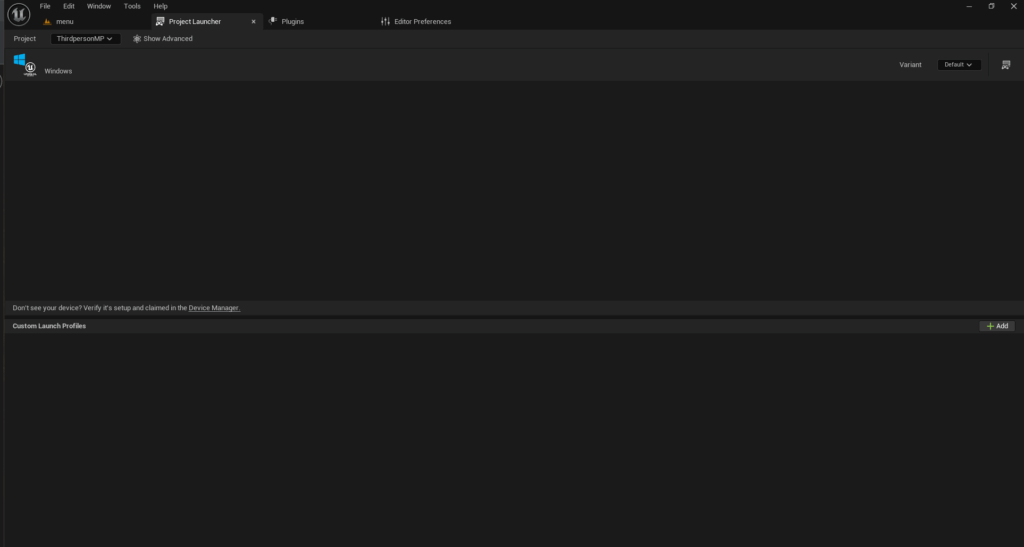
Upon opening, the Project Launcher presents an empty canvas for custom profiles. The guide then walks through the creation of a new custom profile specifically tailored for a dedicated server build. This involves several critical configuration steps:
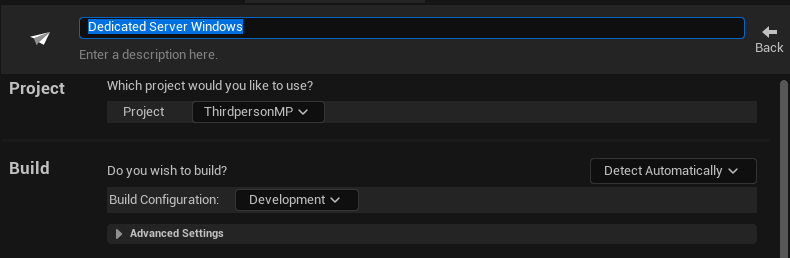
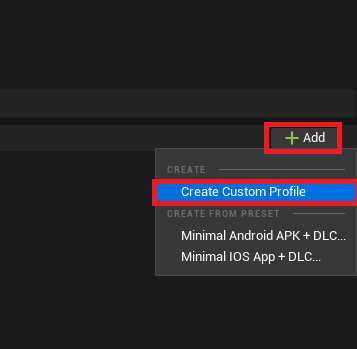
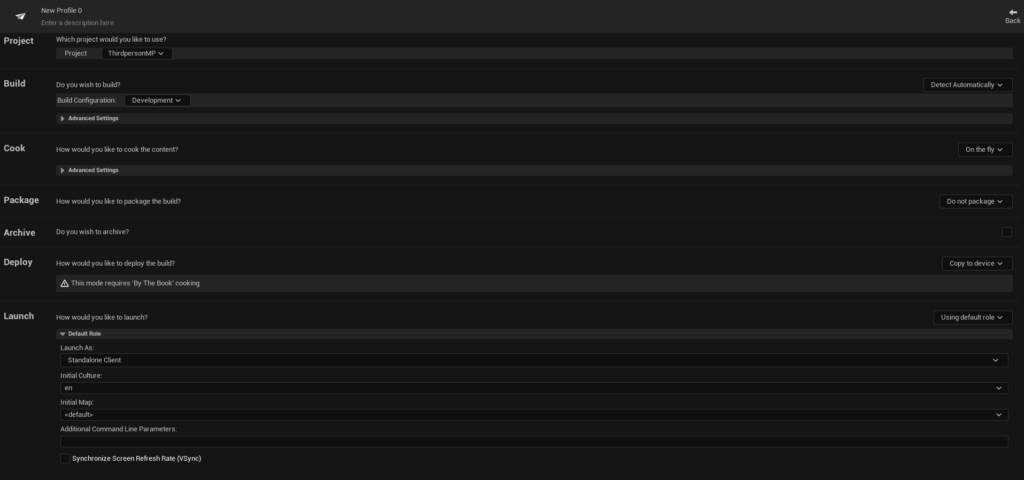
- Creating a Custom Profile: Clicking the "Add" button and selecting "Create Custom Profile" opens a detailed menu of options.
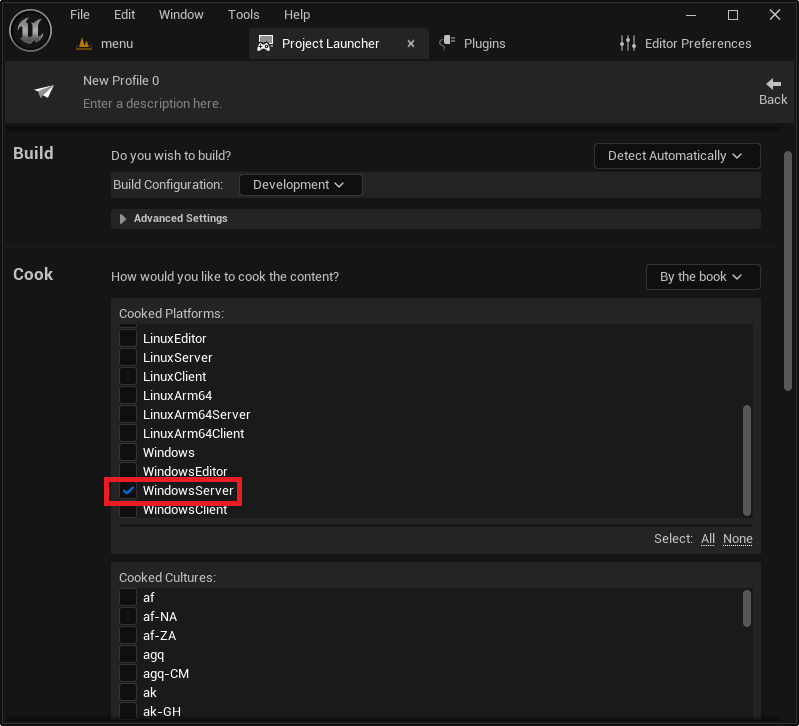
- Cook Settings: The "Cook" section is vital. The default "On the fly" option, suitable for editor testing, must be changed to "By the book." This ensures that all necessary assets are pre-cooked and packaged into the final build, optimizing loading times and performance for the standalone server.
- Platform Selection: Developers must specify the target server platform. For Windows-based hosting, "WindowsServer" is selected. Options for "LinuxServer" (x86/64) and "LinuxArm64" are available for those targeting Linux environments, catering to diverse deployment strategies, from traditional data centers to ARM-based cloud instances. This choice dictates which specific server binaries and dependencies are included in the build.
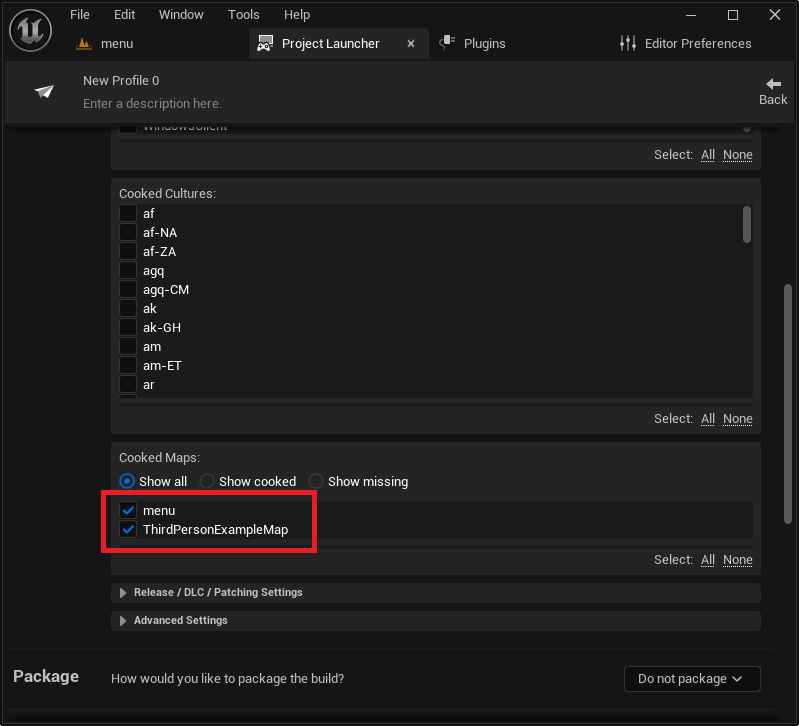
- Map Inclusion: All maps intended for use on the server, whether for main gameplay or specific server-side logic, must be explicitly added to the "Cooked Maps" list. This ensures that the server executable has access to all necessary level data.
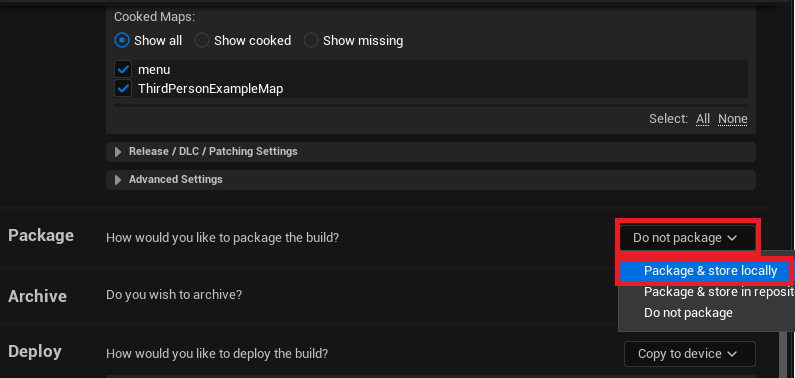
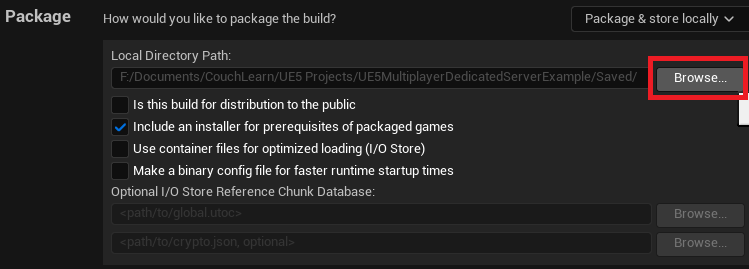
- Packaging Options: The "Package" section dictates how the cooked content is bundled. Changing "Do not package" to "Package & store locally" instructs the launcher to create a self-contained package of the server build files. The output directory for these files can be customized, although a default path within the project’s
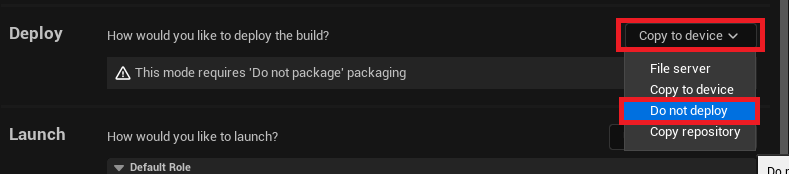
Saved/StagedBuildsfolder is provided. - Deployment Settings: For dedicated servers, the "Deploy" option is typically set to "Do not deploy." This is because dedicated servers are usually deployed manually to specific hosting environments or virtual machines, rather than directly to a local device from the editor.
- Profile Naming: Finally, giving the custom profile a descriptive name (e.g., "Windows Dedicated Server Build") aids in organization and clarity, especially when managing multiple build configurations.
Building, Testing, and Deploying the Dedicated Server
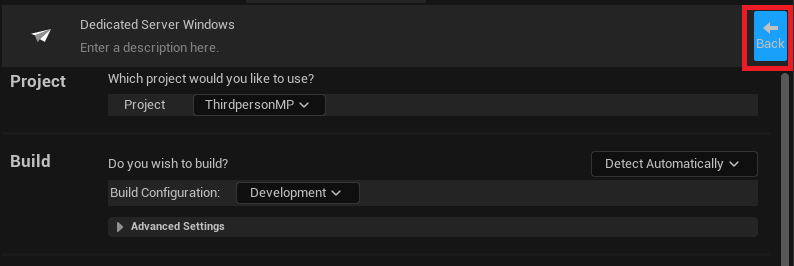
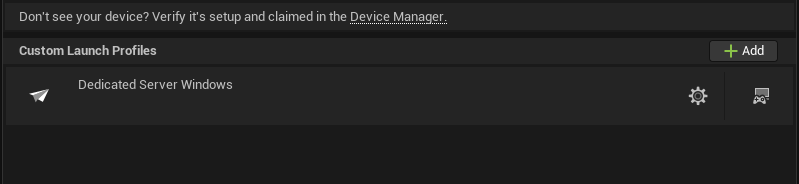
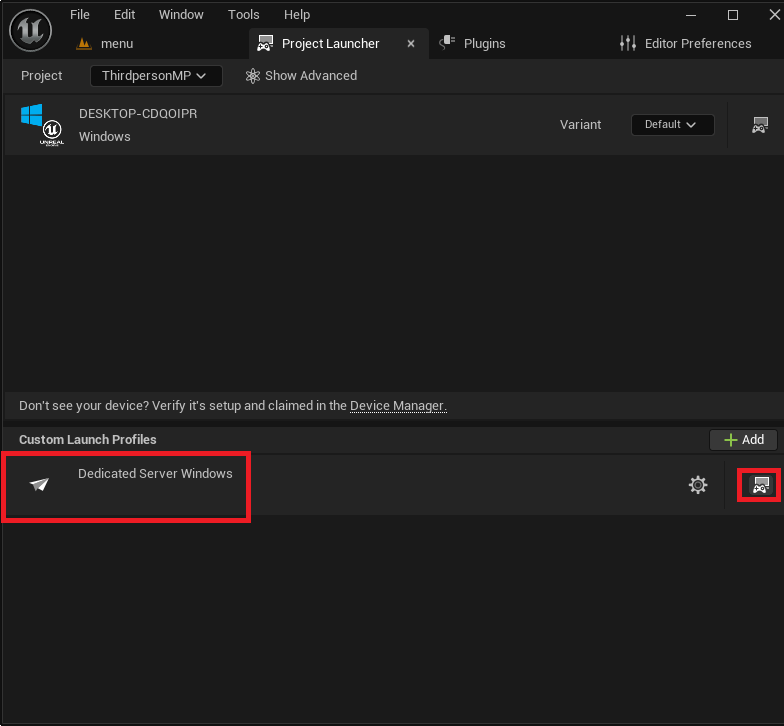
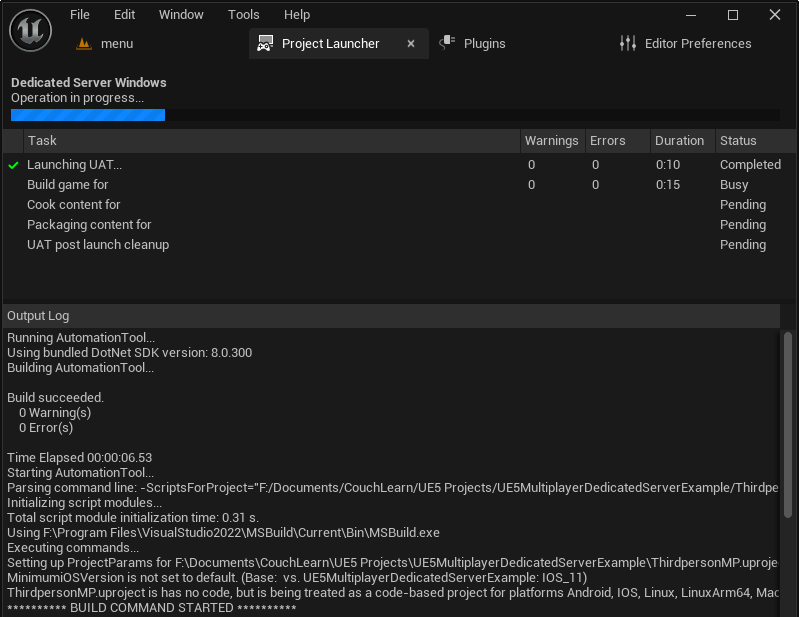
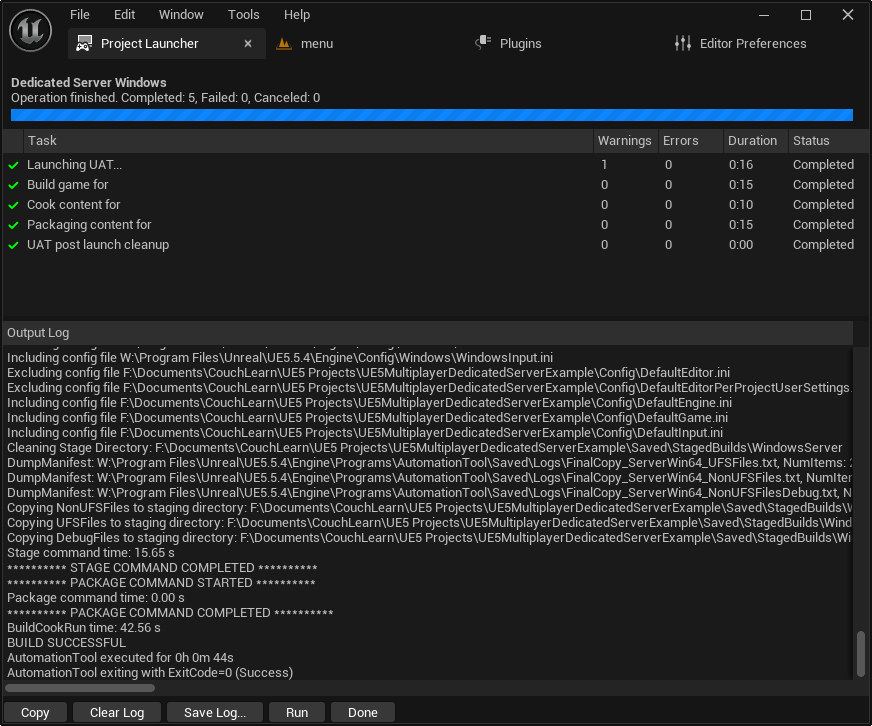
With the custom profile meticulously configured, the actual server build process can commence. Returning to the main Project Launcher menu, the newly created profile is visible. Pressing the "Launch" button (represented by a controller and display icon) initiates the build. The Project Launcher displays a real-time log of the compilation and packaging process, detailing the various tasks being performed, such as cooking assets, compiling code, and packaging the final executable.
The initial build, especially for larger projects or the first time a profile is run, can be time-consuming, potentially taking several hours depending on project size and system specifications. Developers are advised to allow this process to complete fully without interruption. A successful build is indicated by "success" messages for each task in the log.
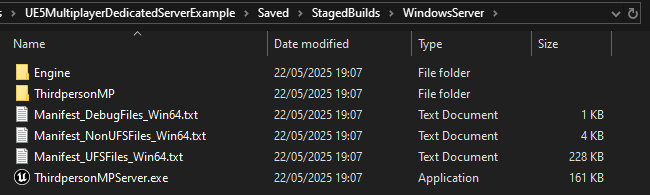
Once the build is complete, the compiled dedicated server files are located in the designated output folder (by default, YourProject/Saved/StagedBuilds/WindowsServer for a Windows server). Within this folder, developers will find the server executable (e.g., YourGameServer.exe).
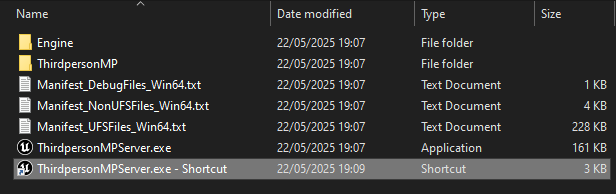
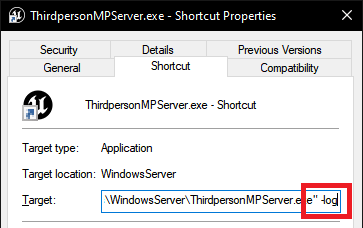
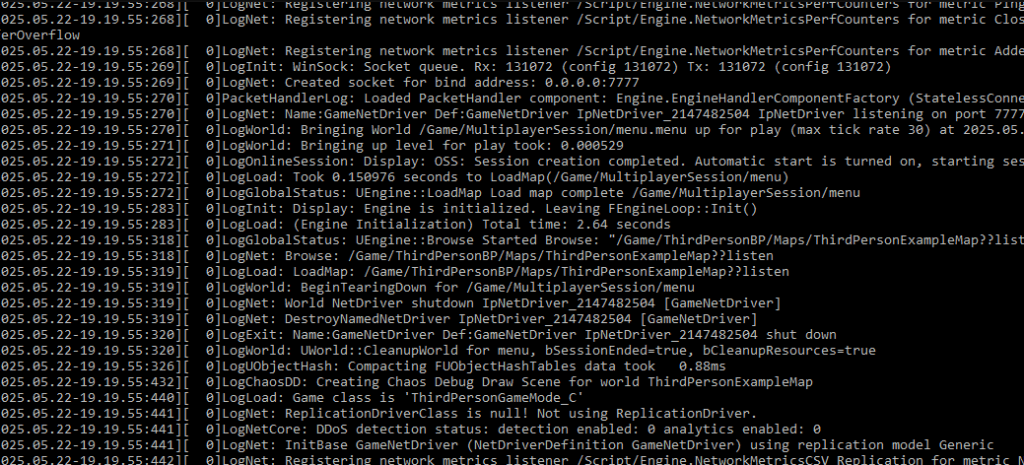
To facilitate testing and debugging, especially in a local development environment, a simple but effective technique is to create a shortcut to the server executable. By right-clicking the shortcut, accessing its properties, and appending the -log launch option to the "Target" field, the server will launch with a console window displaying all logging messages. This provides crucial visibility into the server’s initialization process, session creation, and any potential errors, making it significantly easier to monitor and troubleshoot its operation.
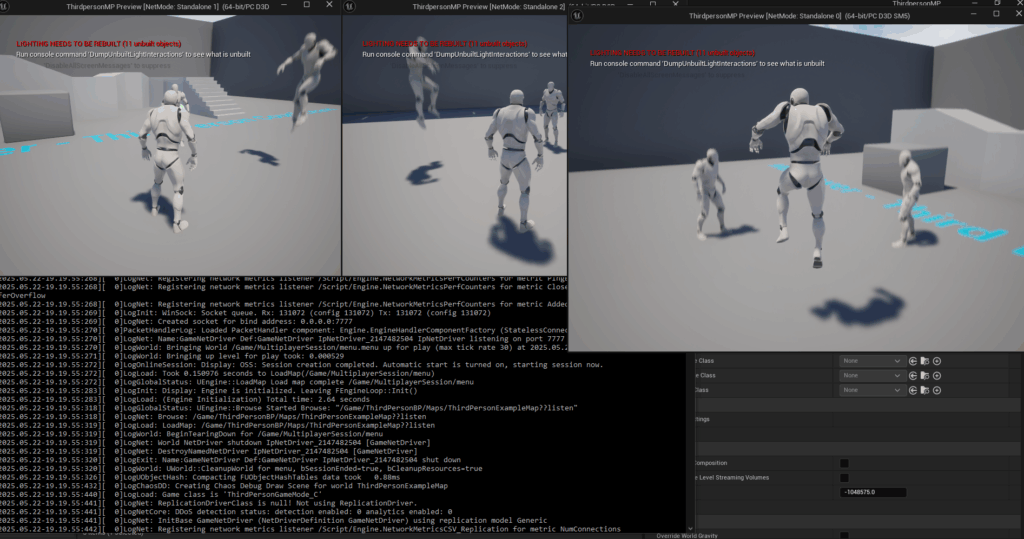
Launching this modified shortcut brings up a text-filled window, indicating the server’s initialization and session setup. Simultaneously, client applications (either launched from the editor or as separate client builds) can then discover and connect to this running dedicated server session. The guide culminates with a demonstration showing multiple clients successfully connecting to the dedicated server, highlighting the seamless multiplayer experience achieved without a client acting as host.
Broader Implications and Future Outlook
The ability to easily build and configure dedicated servers for Unreal Engine 5 projects, as demonstrated by the Couchlearn guide, has profound implications for the gaming industry. It democratizes access to robust multiplayer infrastructure, allowing independent developers and smaller studios to implement solutions previously reserved for larger, well-funded enterprises. This empowerment fosters innovation, enabling creators to focus on ambitious multiplayer concepts without being hampered by network limitations.
From a player perspective, the proliferation of dedicated servers translates directly into higher quality online experiences. Reduced lag, enhanced fairness due to a neutral host, and improved stability contribute to greater player satisfaction and retention. For developers, a dedicated server architecture also lays a scalable foundation for future growth, allowing for easier expansion of player capacities, implementation of anti-cheat measures, and more complex server-side game logic.
The demand for high-quality multiplayer games shows no signs of abating. As Unreal Engine 5 continues to push the boundaries of visual fidelity and interactive experiences, comprehensive guides on backend infrastructure like dedicated servers become increasingly vital. They bridge the gap between powerful engine capabilities and practical deployment, ensuring that the next generation of multiplayer games can deliver on their promises of immersive, stable, and engaging online worlds. This guide, therefore, represents a significant contribution to the Unreal Engine development community, equipping them with the knowledge to build the backbone of tomorrow’s most compelling multiplayer titles.
About the Author