Unreal Engine 5 (UE5), a leading real-time 3D creation tool, empowers developers across diverse industries, from video games and film to architectural visualization and virtual production. While its robust core offers unparalleled capabilities, a significant portion of its advanced features, particularly those optimized for performance and intricate logic, are inherently tied to C++ programming. This often presents a barrier for developers primarily leveraging Unreal Engine’s visual scripting system, Blueprints, which is celebrated for its accessibility and rapid prototyping advantages. The gap between C++ exclusivity and Blueprint usability is effectively bridged by a vibrant ecosystem of plugins, developed both by Epic Games and its expansive global community. These extensions introduce a myriad of new Blueprint nodes, specialized tools, and integrated functionalities, dramatically expanding the engine’s versatility and accelerating development cycles. Understanding the proper procedures for installing and activating these crucial components is paramount for any developer seeking to maximize their UE5 projects. This guide meticulously details the two primary methods for plugin integration: through the official Unreal Marketplace and via advanced manual installation.
The Strategic Importance of Plugins in Unreal Engine 5 Development
Plugins serve as modular additions that extend the core functionality of Unreal Engine 5 without requiring direct modification of the engine’s source code. This architectural design promotes stability, ease of updates, and a highly customizable development environment. For many developers, especially those focused on rapid iteration or working within smaller teams, Blueprints offer a powerful alternative to C++ for implementing game logic and interactive elements. However, certain complex operations, performance-critical tasks, or integrations with external systems are often more efficiently handled at a lower level using C++. Plugins democratize these C++-exclusive capabilities, packaging them into user-friendly Blueprint nodes or accessible editor features.
Consider, for instance, the integration of sophisticated networking functionalities, advanced UI frameworks, or custom input systems. While basic implementations might be achievable with core Blueprints, specialized plugins can offer optimized, pre-built solutions that save hundreds, if not thousands, of development hours. This not only enhances productivity but also allows developers to focus on creative design and gameplay rather than reinventing fundamental technical solutions. The availability of a rich plugin library is a key differentiator for Unreal Engine, fostering an environment where innovation is shared and readily integrated, pushing the boundaries of what independent creators and large studios can achieve.
Method 1: Streamlined Integration via the Unreal Marketplace
The Unreal Marketplace, managed directly by Epic Games, stands as the primary and most recommended source for acquiring plugins and other assets for Unreal Engine. It functions as a curated digital storefront, ensuring a degree of quality control, compatibility verification, and often, ongoing support from the developers. This method is generally preferred for its simplicity, reliability, and automated integration features. As of early 2024, the Marketplace hosts thousands of assets, with hundreds dedicated specifically to code plugins, reflecting a robust and continuously growing ecosystem.
Chronology of Marketplace Plugin Installation:
1. Accessing the Epic Games Launcher and Unreal Marketplace:
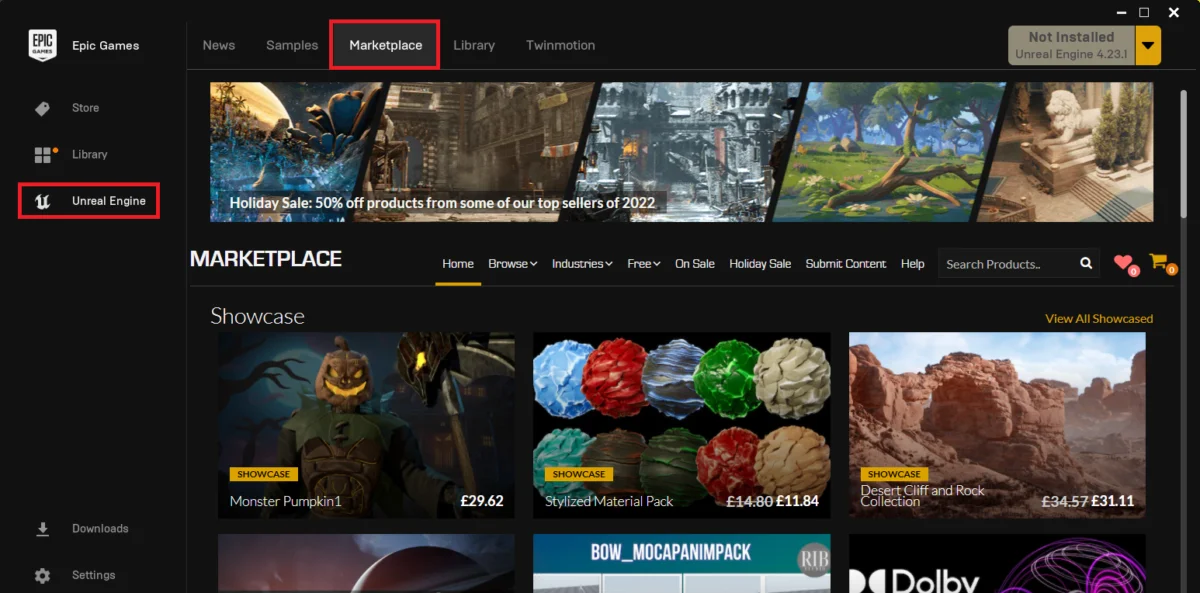
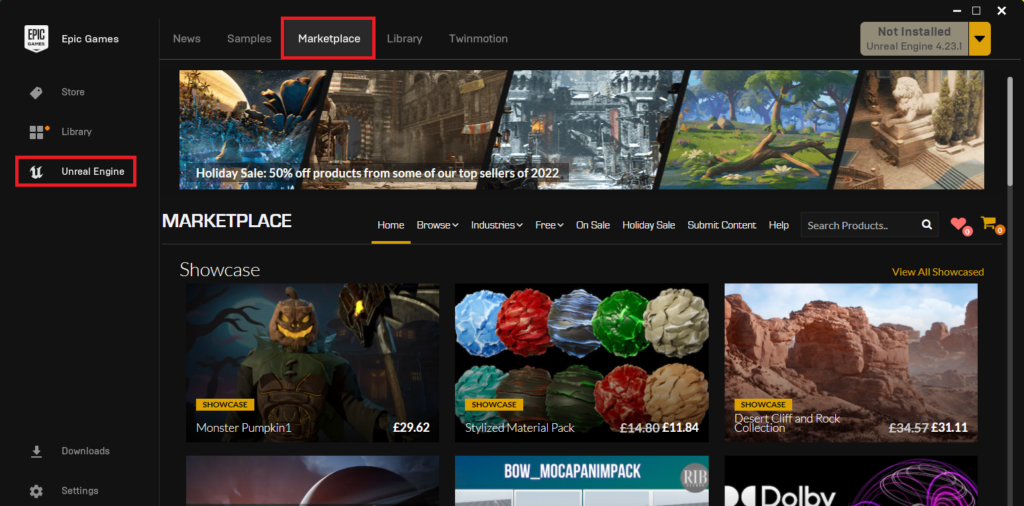
The initial step involves navigating to the central hub for all Epic Games products: the Epic Games Launcher. This application not only manages your installed versions of Unreal Engine but also provides direct access to the Unreal Marketplace. Upon opening the launcher, users will find a prominent "Unreal Engine" tab, which, when selected, reveals various sub-sections including "Library," "Marketplace," and "Learn." Selecting "Marketplace" will transition the user interface to the digital storefront, presenting a vast catalog of assets, tools, and plugins. This curated environment is designed to offer a seamless browsing and acquisition experience, similar to modern app stores.
2. Locating Code Plugins within the Marketplace:
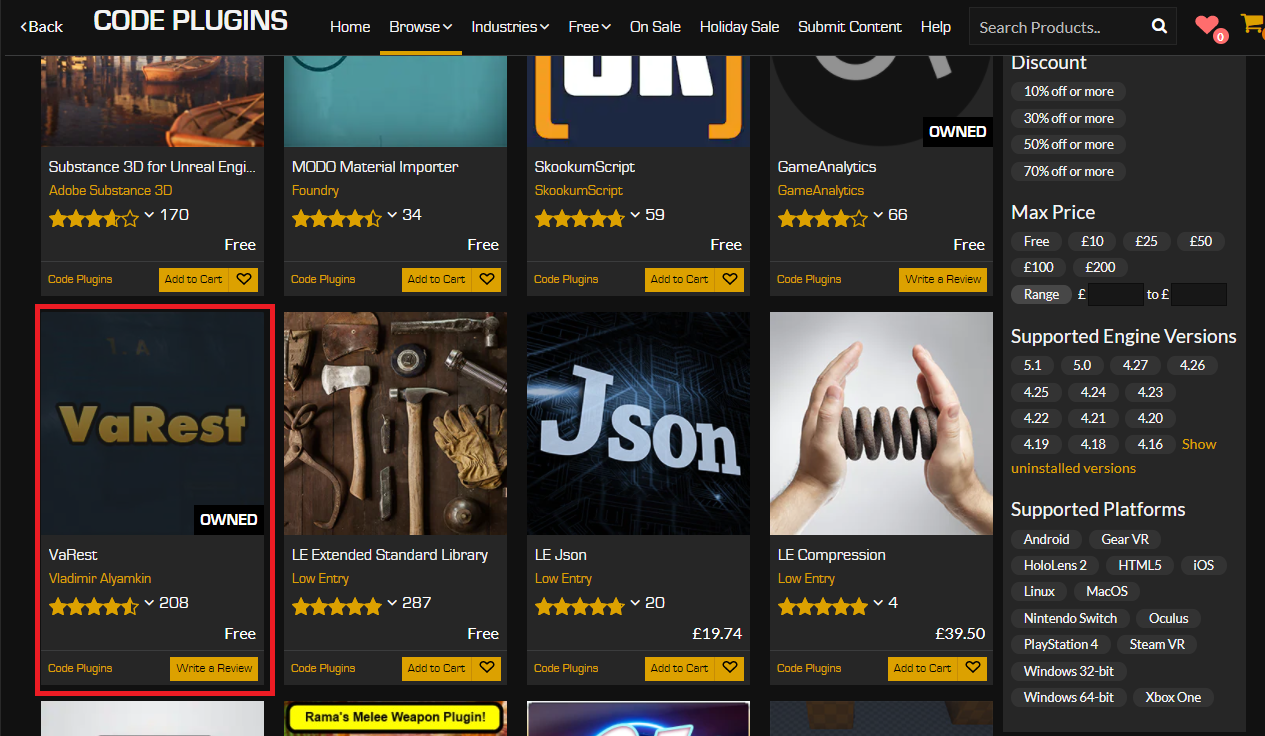
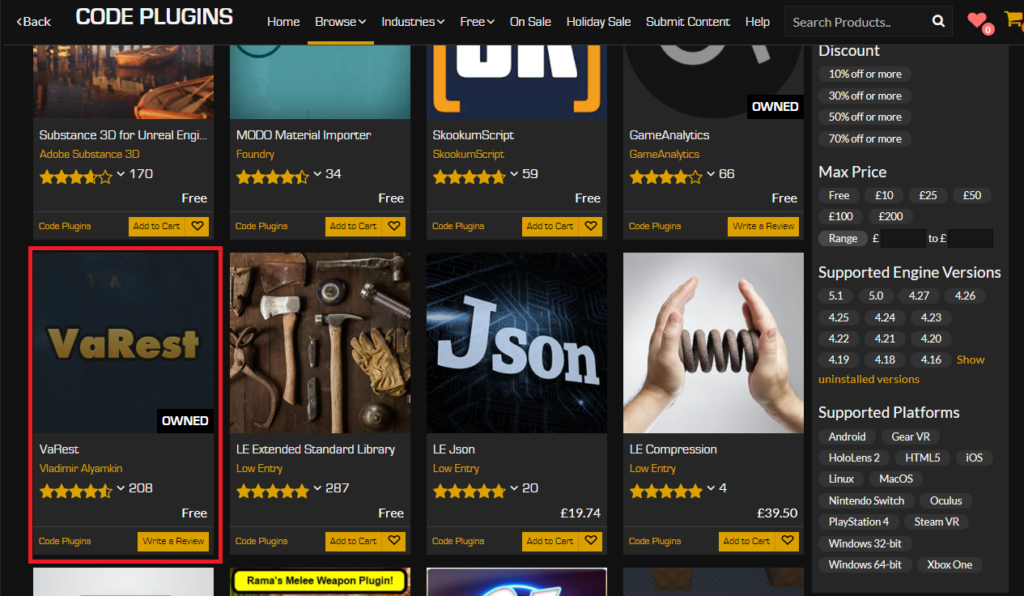
Within the Unreal Marketplace interface, a "Browse" tab or similar navigation option will typically be available. To filter the extensive catalog specifically for executable functionalities rather than visual assets, users must select the "Code Plugins" category. This distinction is crucial as it narrows down the search to extensions that introduce new programming logic, Blueprint nodes, or modify engine behavior, as opposed to 3D models, textures, or animation packs. The marketplace categorizes plugins meticulously, allowing developers to efficiently find tools for specific needs, such as artificial intelligence, networking, UI/UX, or platform-specific integrations.

3. Selection and Acquisition of the Desired Plugin:
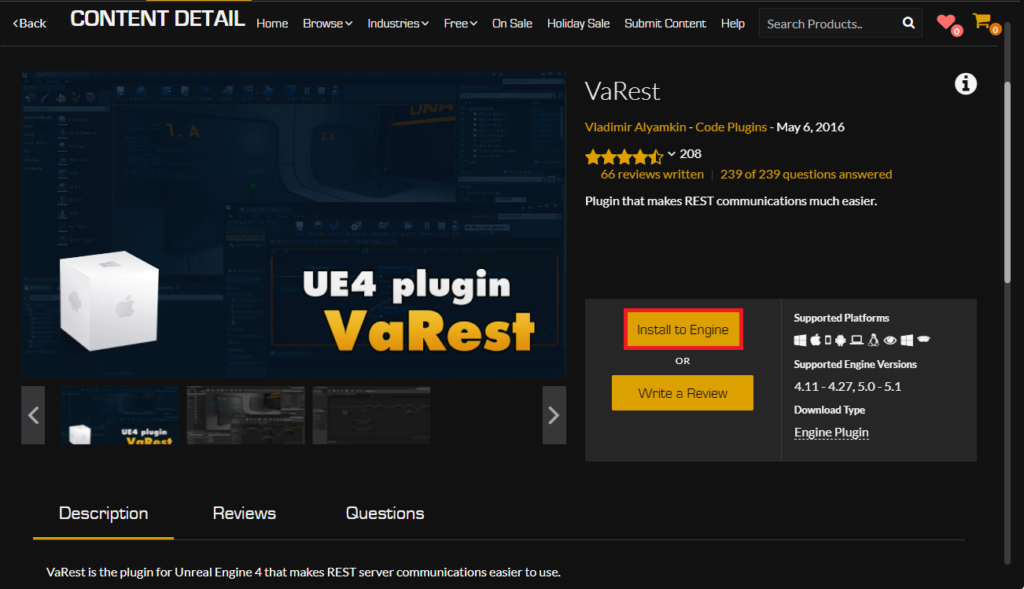
Once in the "Code Plugins" section, developers can browse or search for specific functionalities. For demonstrative purposes, a networking plugin like "VaRest" is a common and highly useful example, enabling easy integration with RESTful APIs directly from Blueprints. When a plugin is selected, its dedicated page provides detailed information, including features, compatibility, documentation links, user reviews, and pricing. It is imperative to review these details carefully to ensure the plugin meets project requirements and is compatible with the target Unreal Engine version. User reviews, in particular, often offer invaluable insights into a plugin’s stability and support quality.
The acquisition process is straightforward:
- Paid Plugins: For commercial plugins, users will proceed through a standard e-commerce checkout, adding the plugin to their cart and completing the purchase.
- Free Plugins: Even if a plugin is offered for free, it still requires an "Add to Cart" and "Purchase" action. This seemingly counter-intuitive step is a licensing formality. Epic Games’ system records ownership, enabling users to download the plugin, receive updates, and track their acquired assets within their account library. No monetary transaction occurs for free items, but the licensing agreement is processed.
4. Installing the Plugin to the Engine:
Unlike content assets that can often be added directly to a project, many code plugins are designed to integrate with the Unreal Engine installation itself. After acquiring the plugin, its marketplace page or your "Library" section will display an "Install to Engine" button. Clicking this button initiates the core installation process. This action tells the Epic Games Launcher to download the plugin files and place them into the appropriate directory within your chosen Unreal Engine installation, typically Engine/Plugins/Marketplace/PluginName. This global installation makes the plugin potentially available to any project created with that engine version, provided it is enabled within the project.
5. Selecting the Target Engine Version:
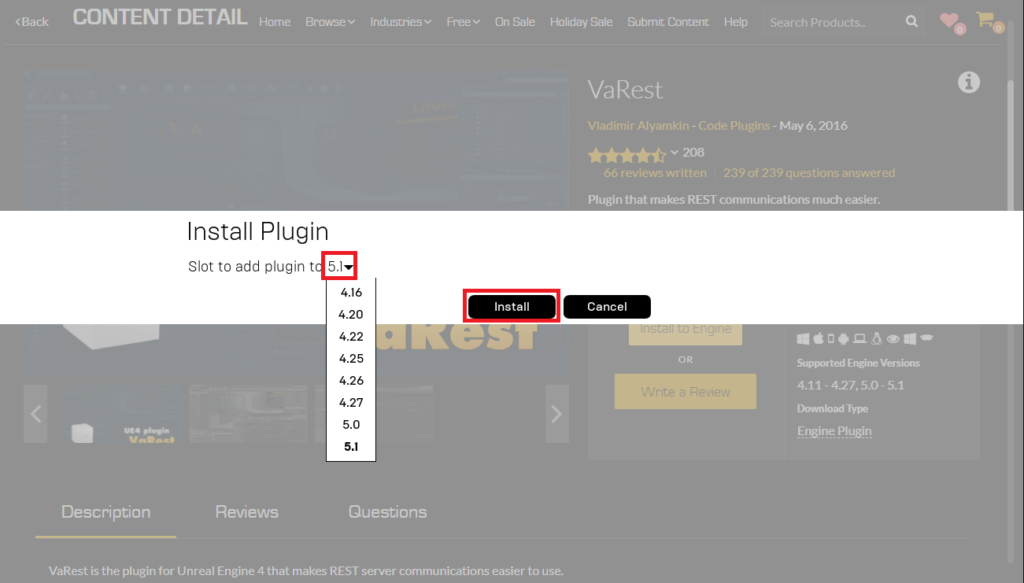
Upon clicking "Install to Engine," a prompt will appear, asking the user to select the specific Unreal Engine version(s) to which the plugin should be installed. This is a critical step. Plugins are often compiled against specific engine versions, and installing an incompatible version can lead to compilation errors, runtime crashes, or unexpected behavior within your projects. Developers should always select the UE5 version that matches their active development environment or the version for which the plugin explicitly states compatibility. The Epic Games Launcher typically lists all installed engine versions, simplifying this selection. For example, installing a plugin compatible with UE5.0 into a UE5.3 project might cause issues if the plugin hasn’t been updated for 5.3’s API changes.
6. Monitoring and Confirmation of Installation:
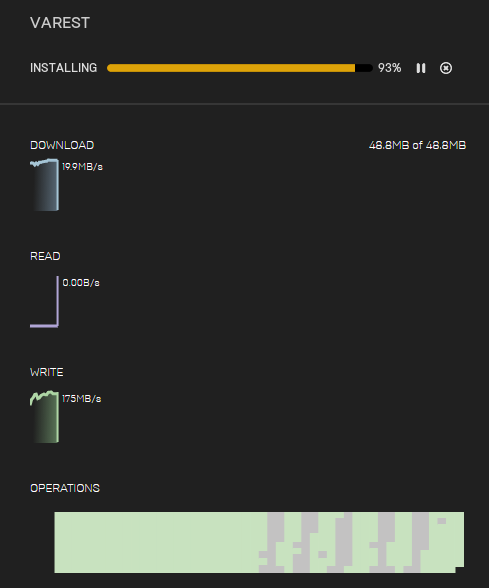
Once the engine version is selected, the plugin download and installation process will commence. The progress can be monitored in the "Downloads" tab within the Epic Games Launcher. Depending on the plugin’s size and the user’s internet connection, this may take a few moments. Upon successful completion, the status will update, indicating that the plugin has been installed to the selected Unreal Engine version. While the files are now present in the engine directory, the plugin is not yet active within any specific Unreal Engine project.
Activating Marketplace Plugins within an Unreal Engine Project
Even after installation to the engine, a newly added plugin is not automatically enabled within individual Unreal Engine projects. This design choice is intentional and serves several important purposes:
- Performance Optimization: Preventing all plugins from loading by default reduces project startup times and overall memory footprint.
- Project Size Management: Only enabling necessary plugins keeps executable sizes lean, which is particularly important for shipping products.
- Dependency Control: Allows developers to manage project dependencies explicitly, avoiding conflicts or unnecessary code compilation.
The final step involves enabling the plugin within the specific UE5 project where its functionality is required.
1. Accessing the Plugin Management Interface:
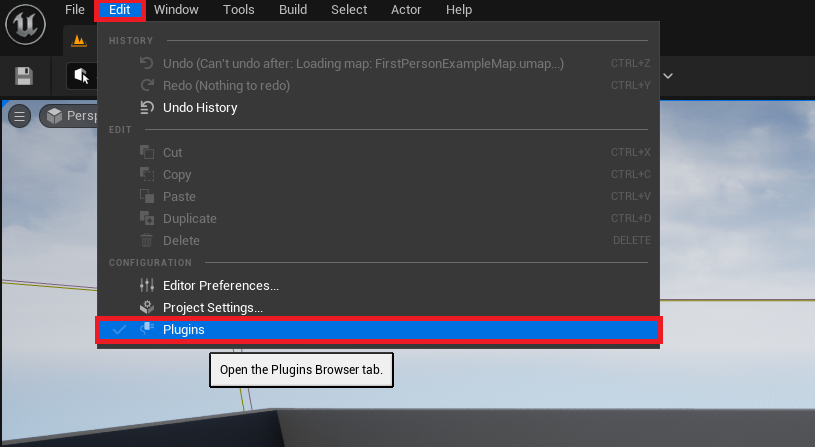
Within the Unreal Engine editor, navigate to the main menu bar. Click on "Edit," then select "Plugins" from the dropdown menu. This action opens the "Plugins" window, which is the central control panel for all plugins installed to your engine version, as well as any project-specific plugins.
2. Locating the Newly Installed Plugin:
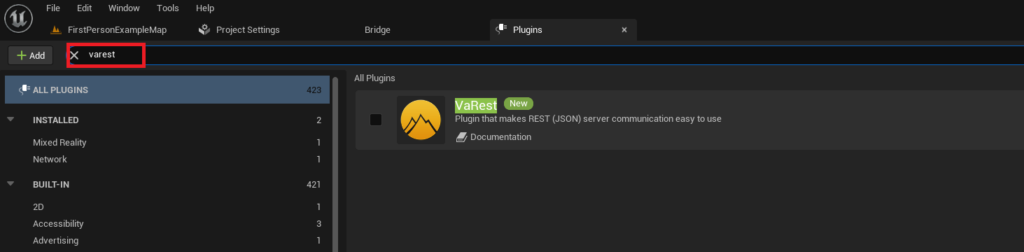
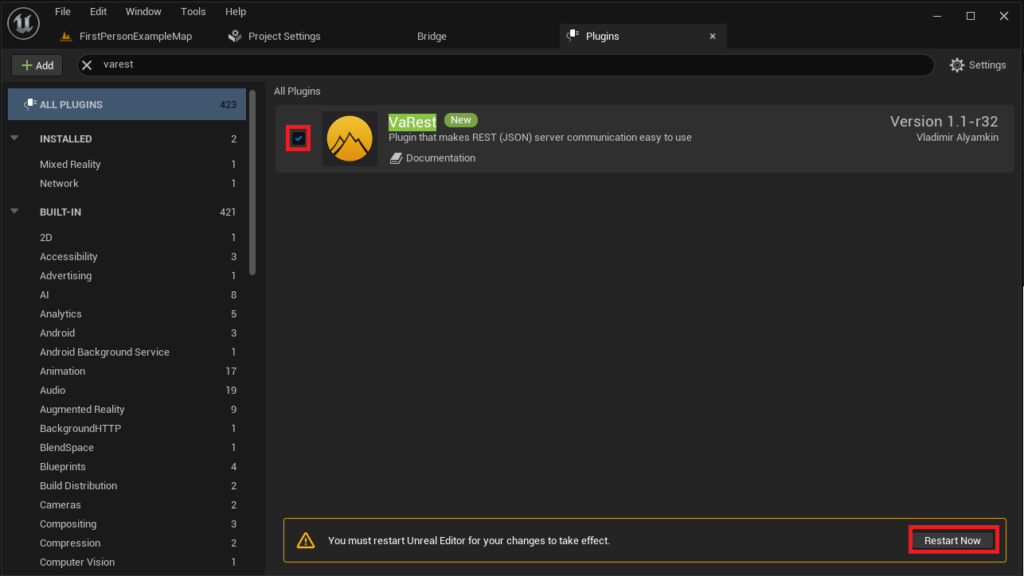
The "Plugins" window features a search bar, which is invaluable for quickly finding specific plugins within the potentially long list. Type the name of the plugin you just installed (e.g., "VaRest") into the search box. The list will filter in real-time, displaying the plugin and its details, including its developer, version, and a brief description.
3. Enabling the Plugin and Restarting the Editor:
Adjacent to the plugin’s name, there will be a checkbox. Click this checkbox to enable the plugin for the current project. Upon activation, the Unreal Engine editor will typically prompt a "Restart Now" button or a similar notification, indicating that a restart is required for the changes to take effect. This restart allows the engine to re-initialize its modules, load the newly enabled plugin’s code, and integrate its features into both the C++ and Blueprint environments. Without this restart, the plugin’s functionalities will not be accessible within the project. After the editor restarts, the plugin’s new Blueprint nodes, C++ classes, and editor extensions will be fully available for use.
Method 2: Advanced Manual Installation of Plugins
While the Unreal Marketplace offers a convenient and secure method, there are legitimate scenarios where manual installation of plugins becomes necessary. This often applies to community-contributed open-source projects, plugins developed in-house, custom experimental features, or older plugins not formally listed on the Marketplace. This method requires a deeper understanding of Unreal Engine’s project structure and demands a higher degree of caution due to the absence of Epic’s vetting process.
Crucial Disclaimer: Exercise Extreme Caution with Untrusted Sources
Manual plugin installation bypasses the inherent security and compatibility checks of the Unreal Marketplace. Therefore, it is absolutely critical to exercise extreme caution:
- Source Verification: Only download plugins from reputable sources, such as official developer websites, well-known community forums (like the Unreal Engine forums with active, established developers), or GitHub repositories with a clear history and active maintenance. Reputable sources often have extensive documentation, active issue trackers, and a transparent development process.
- Security Risks: Untrusted files can harbor malicious code, compromise your development environment, or introduce severe vulnerabilities into your projects. CouchLearn, or any responsible platform, cannot be held liable for damages resulting from downloading and installing unknown or malicious files. It is advised to use antivirus software and, if possible, to review the source code for any suspicious elements.
- Compatibility: Manually downloaded plugins must explicitly state compatibility with your specific Unreal Engine 5 version. Installing an incompatible plugin can lead to project corruption, crashes, and significant debugging challenges. Always verify the plugin’s intended engine version before proceeding. For C++ plugins, this often means checking for
Build.csfiles that specify target engine versions. - Code Review (if applicable): For C++ based plugins, if you have the expertise, reviewing the source code before integration can provide an additional layer of security and understanding of its functionality. This is a critical step for open-source contributions.
Chronology of Manual Plugin Installation:
1. Acquiring and Verifying the Plugin Files:
The first step involves obtaining the plugin’s files, typically as a compressed archive (e.g., .zip, .rar) from a trusted source. After downloading, extract the archive. The extracted content should form a single root folder for the plugin (e.g., "VictoryPlugin"). Within this folder, you would typically expect to find a .uplugin file, which is the plugin’s descriptor, along with "Source," "Binaries," and potentially "Content" folders. Ensure the structure looks logical and complete. The absence of a .uplugin file usually indicates an improperly packaged plugin or one that is not meant for direct manual installation.
2. Preparing the Project Directory: The ‘Plugins’ Folder:
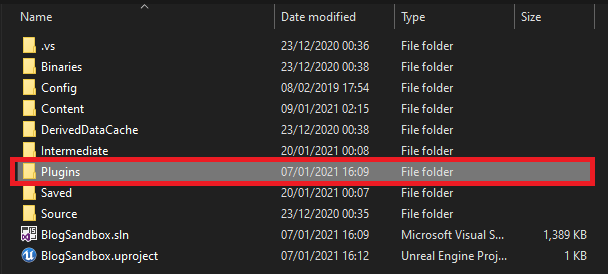
Manual plugins are typically installed directly into your specific Unreal Engine project’s directory, making them project-specific rather than engine-wide. Navigate to your Unreal Engine project’s root folder (e.g., MyProject/). Within this directory, you need a subfolder named Plugins. If this folder does not exist, simply create a new folder and name it Plugins (case-sensitive on some operating systems, e.g., Windows is generally not, but Linux/macOS are). This Plugins folder is where all project-specific manual plugins reside. Installing plugins here ensures they only affect the current project, keeping other projects clean.
3. Copying the Plugin into the Project’s Plugins Folder:
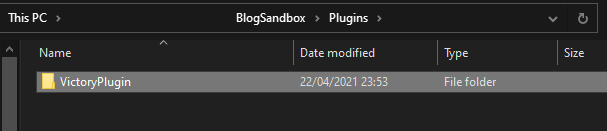
Once the Plugins folder is confirmed or created, copy the entire root folder of the manually acquired plugin into it. For instance, if you downloaded the "VictoryPlugin," you would copy the VictoryPlugin folder (containing its .uplugin file and other subdirectories) into MyProject/Plugins/. After this step, your project structure should look like `
About the Author