The Indispensable Role of Dedicated Servers in Modern Gaming
In an era where multiplayer gaming dominates significant market segments, the architecture underpinning online interactions directly impacts player experience and game longevity. A dedicated server stands as a standalone computational entity, exclusively tasked with hosting and managing the game world, processing game logic, and synchronizing player states. Unlike peer-to-peer (P2P) hosting or "listen servers," where one player’s machine doubles as the host, a dedicated server operates independently of any client device. This architectural choice is paramount for achieving several critical advantages: superior performance, enhanced security, and unwavering reliability, all of which are crucial for maintaining a fair, fluid, and engaging multiplayer environment.
Historically, many smaller multiplayer games or those with limited player counts (typically 2-16 participants) have relied on listen servers. While cost-effective and simpler to implement for rapid prototyping and local testing, this model presents inherent limitations that scale poorly with increased player numbers and competitive stakes. Issues such as host advantage, inconsistent latency across different player connections, and vulnerabilities to cheating (where a malicious host can manipulate game state) often plague P2P setups. For instance, in fast-paced fighting games or precision shooters, even minor sync inconsistencies due to varying host machine performance or network conditions can severely degrade the player experience, leading to frustration and player churn. The host’s machine becoming overburdened by game logic and client connections can lead to slowdowns, impacting everyone connected. Data from industry analysts consistently shows that competitive players prioritize low latency and fair play, directly correlating these factors with game satisfaction and retention rates.
Dedicated servers circumvent these challenges by providing a centralized, authoritative source of truth for the game state. By offloading game world processing to a specialized machine, developers ensure consistent tick rates, minimized latency variations, and a more equitable playing field for all participants. This model has been the backbone of successful massively multiplayer online (MMO) games, competitive esports titles, and large-scale persistent world games for decades, evolving from physically housed server racks to sophisticated cloud-based solutions capable of dynamic scaling. The global cloud gaming market, valued at over $2.5 billion in 2023 and projected to grow substantially, further underscores the industry’s shift towards robust, scalable server infrastructure.
Prerequisites for a Robust Unreal Engine 5 Server Infrastructure
Embarking on the journey to deploy a dedicated server for an Unreal Engine 5 project requires specific foundational elements. Foremost among these is a pre-existing, functional multiplayer UE5 project. This ensures that core networking logic, such as player replication, remote procedure calls (RPCs), and basic game mode functionality, is already in place. For those without such a foundation, comprehensive resources like the Unreal Engine 5 Multiplayer Sessions guide are recommended, providing the necessary groundwork for network-enabled gameplay and ensuring the project is architecturally sound for multiplayer interactions.
Crucially, the server build process mandates a source build of Unreal Engine, rather than a version obtained directly from the Epic Games Launcher. This requirement stems from the need to access specific engine build targets and configurations that are not typically included in the pre-compiled launcher versions. A source build grants developers the flexibility to compile server-specific executables, which are optimized for headless operation (without a graphical interface) and contain only the necessary components for server-side game logic, significantly reducing footprint and resource consumption. This distinction is vital; launcher builds are optimized for client-side development and gameplay, whereas dedicated servers require a stripped-down, performance-focused binary. Epic Games provides comprehensive documentation on downloading and building the engine from source, a process that, while initially more involved, unlocks the full potential of UE5’s server-side capabilities and custom optimizations.
Furthermore, for seamless session management and discovery, the AdvancedSessions plugin is an indispensable component. This plugin extends Unreal Engine’s native session interface, offering more robust and flexible tools for creating, finding, and joining multiplayer sessions. Its integration ensures that a dedicated server, once launched, can correctly advertise itself within the session browser, allowing players to discover and connect without manual IP address input. This feature is a critical component for any public-facing multiplayer title, enhancing user experience and reducing friction in the connection process. Developers must ensure this plugin is properly installed and configured within their project prior to server compilation to guarantee correct session functionality.
Automating Session Management for Dedicated Servers
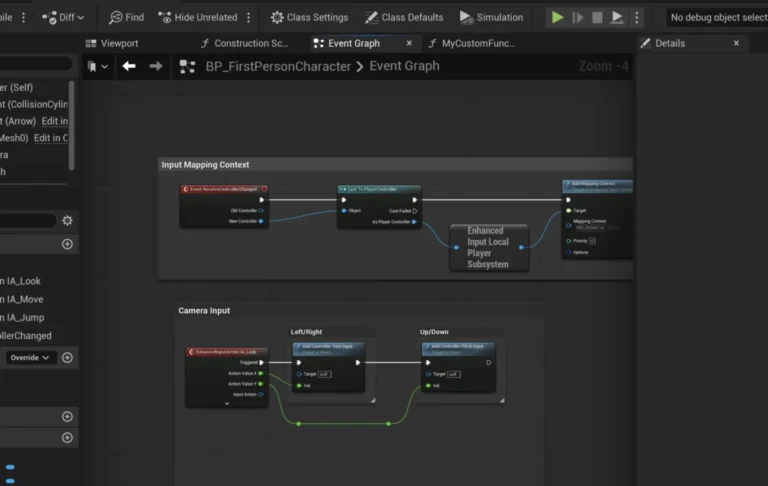
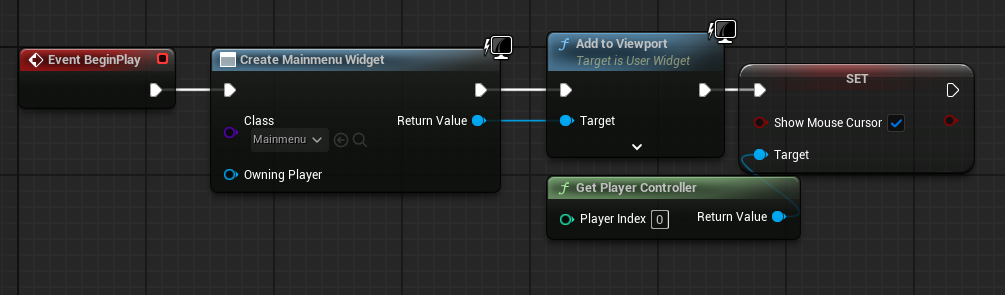
A key distinction of a dedicated server is its autonomous operation. Unlike a client application that might present a main menu and await user input to initiate gameplay, a dedicated server must automatically establish a game session and load the appropriate game map upon launch. This automation is achieved through specific Blueprint scripting within the project’s level blueprints, particularly the main menu level, which acts as the initial entry point for both client and server.
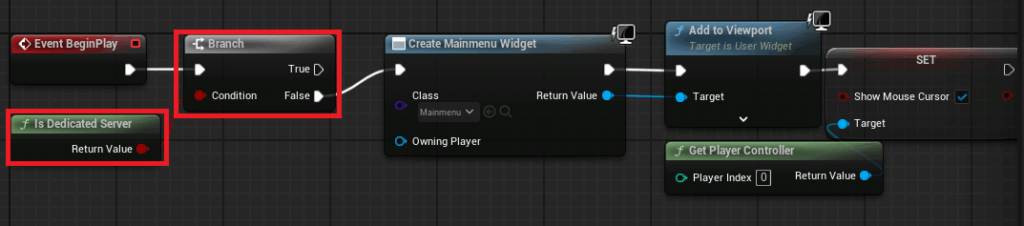
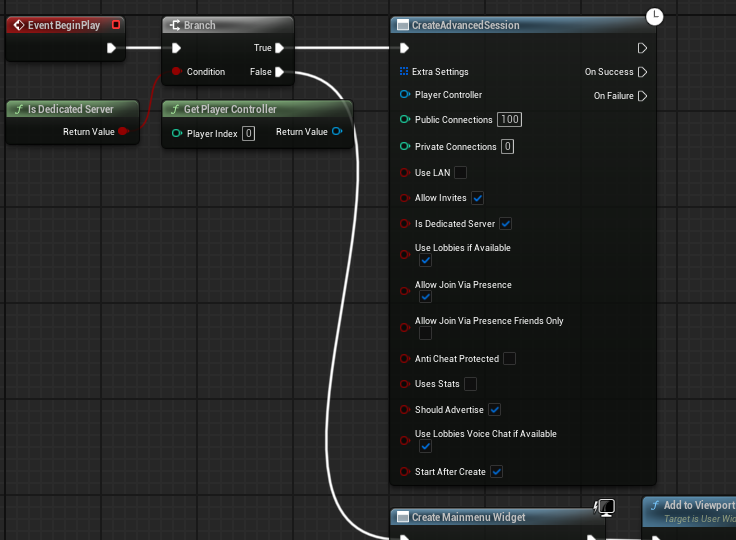
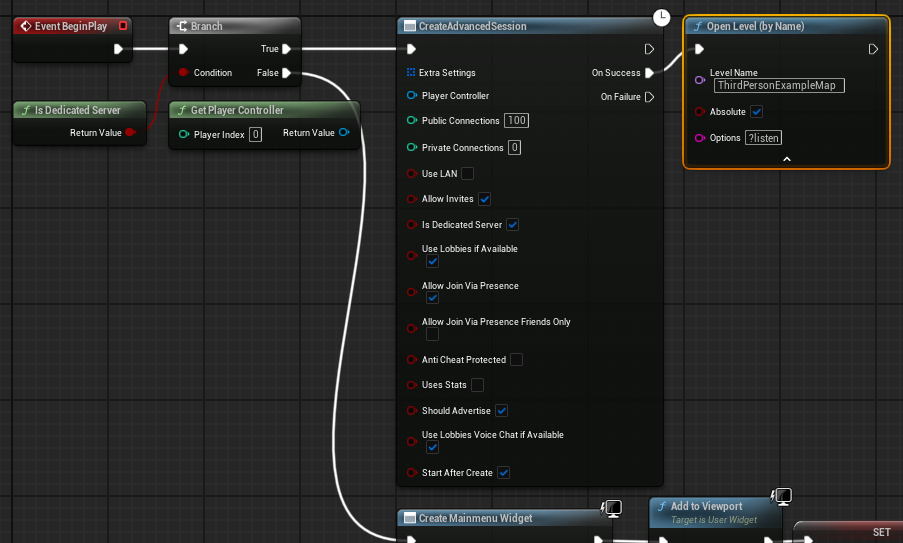
In a standard client-side setup, the main menu level blueprint typically creates and adds a user interface widget to the screen. For a dedicated server, this visual interface is entirely unnecessary and, if loaded, would consume valuable resources without purpose. The solution involves integrating a conditional check: an "Is Dedicated Server" node. This node returns true if the current executable is running as a dedicated server and false otherwise. By branching the execution flow, developers can ensure that the main menu widget is only created when the application is running as a client (on the "False" pin), preserving server resources.
On the "True" pin, signifying a dedicated server launch, the system proceeds to create an advanced session directly. This involves utilizing a "Create Advanced Session" node, configured with desired parameters such as maximum players, session name, and other relevant metadata crucial for discoverability and game logic. Upon successful session creation, the server then initiates the game by opening the designated level with the ?listen option appended. The ?listen command is crucial as it instructs the server to listen for incoming client connections, transforming the loaded map into an active multiplayer instance ready for players. This entire sequence is then compiled and saved, ensuring the dedicated server behaves as expected from the moment it is launched, eliminating any need for manual interaction.
Configuring the Default Server Map for Game Initiation
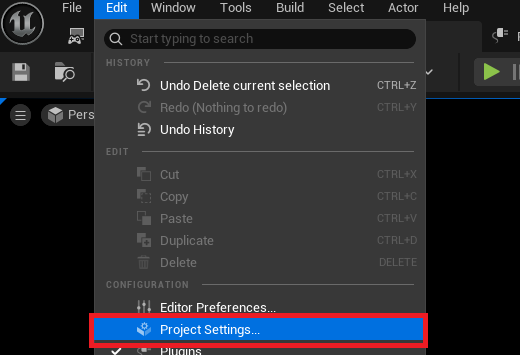
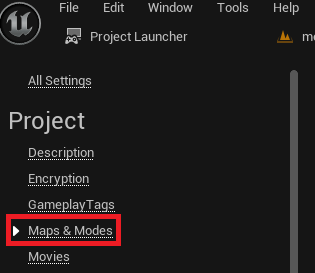
An often-overlooked but vital configuration step is specifying the default map that the dedicated server should load upon startup. By default, Unreal Engine servers may attempt to load an internal engine map, such as "Entry," which is not designed for active gameplay and would render the server unusable for players. To rectify this, developers must navigate to the Project Settings within the Unreal Engine editor.
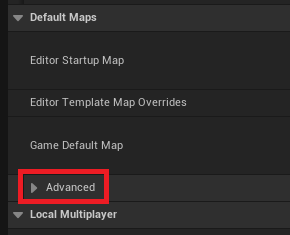
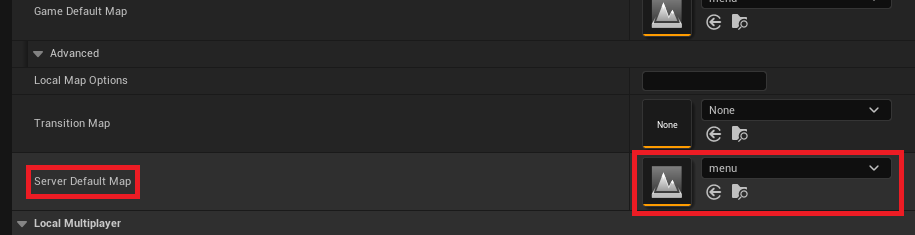
Under the "Maps & Modes" section, an advanced dropdown option reveals the "Server Default Map" setting. This allows developers to explicitly select the specific game map that the dedicated server should load first. For instance, if the main multiplayer gameplay occurs on a map named "GameLevel," this map should be designated as the Server Default Map. In many projects, a "menu" or "lobby" map might be chosen as the initial server map, with the server logic then automatically transitioning players to subsequent gameplay maps as sessions are formed and filled. This setting, combined with the automatic session creation logic, guarantees that the server initializes into a meaningful state, ready to host players without manual intervention, streamlining the server’s operational readiness.
Optimizing Server Resources: Eliminating Unnecessary Character Spawning

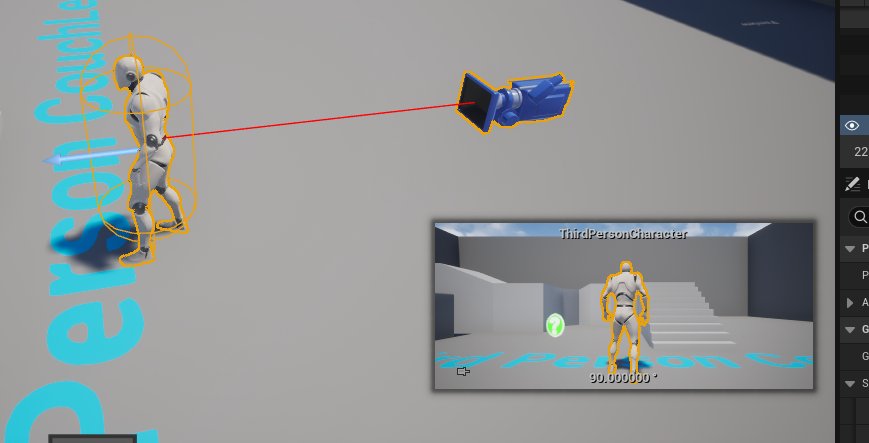
A dedicated server’s primary function is to manage the game world and synchronize clients, not to render graphics or control a player character itself. Therefore, any default character spawning behavior present in a game level for client-side testing becomes redundant and resource-intensive when running on a dedicated server. Many Unreal Engine projects, especially during initial development, include a default player character blueprint directly within the level or via a default Pawn class in the Game Mode.
When a dedicated server loads such a level, it might attempt to spawn this character, leading to an invisible, uncontrollable entity consuming server resources without contributing to the gameplay experience. To prevent this, developers must identify and remove any explicit character blueprints placed directly in the server’s default map. Additionally, if the Game Mode is configured to automatically spawn a default Pawn, this behavior should be conditionally disabled or adjusted for dedicated server builds. This optimization ensures that the server operates with maximum efficiency, dedicating its processing power solely to game logic, network synchronization, and player management, rather than rendering or simulating an unneeded player character. This practice aligns with best practices for server resource management, where every byte of memory and CPU cycle is optimized for core game functionality.
Streamlining Deployment with the Unreal Engine Project Launcher
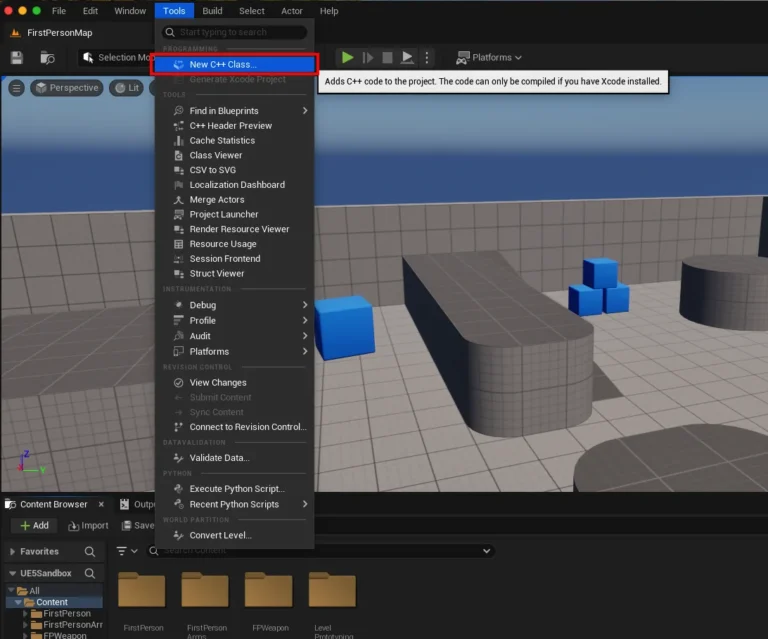
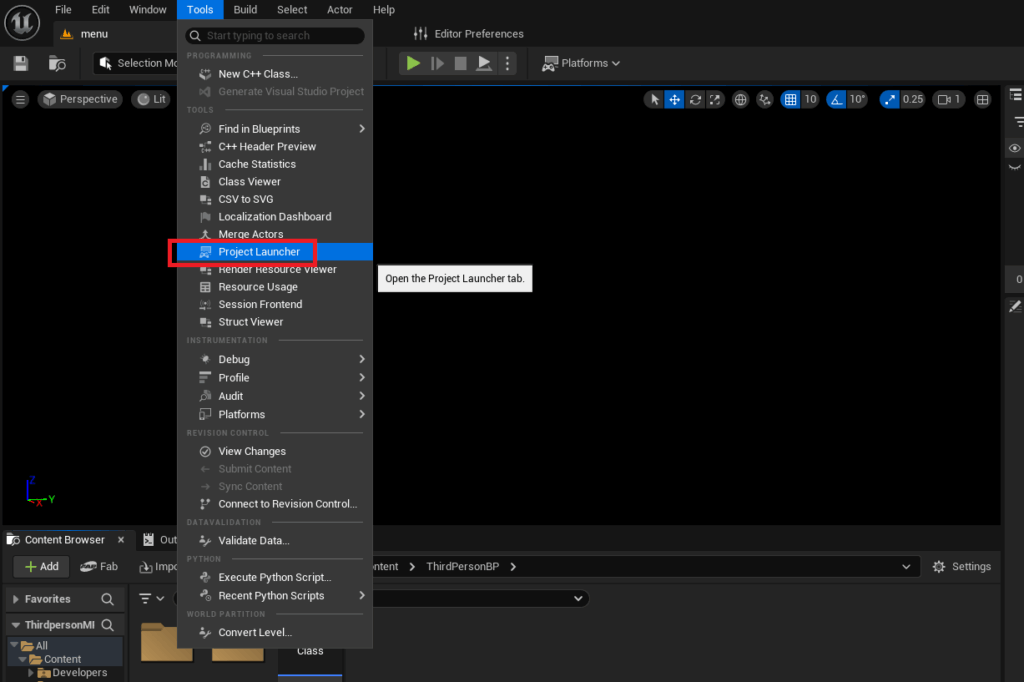
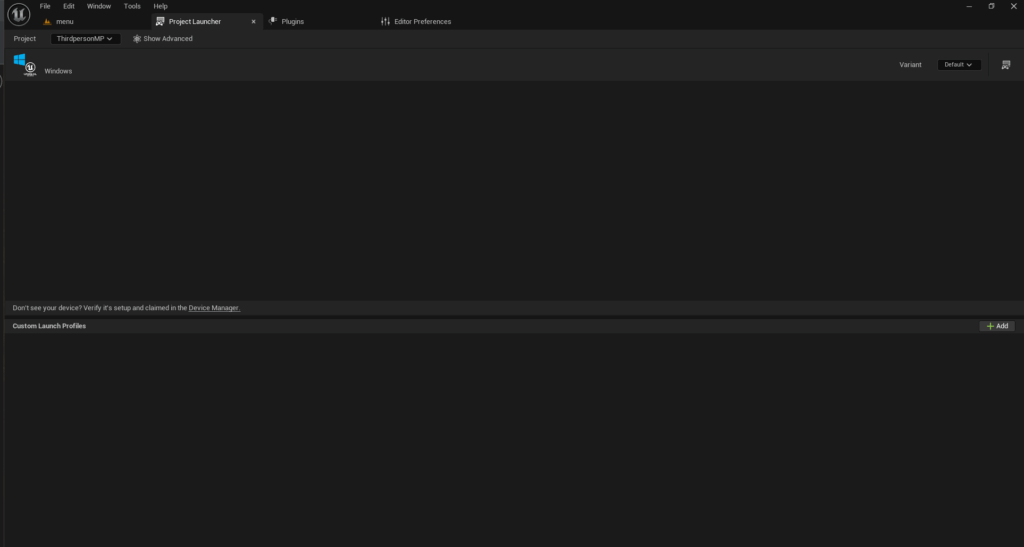
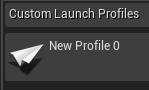
The Unreal Engine Project Launcher is an integral tool designed to simplify the complex process of packaging and deploying various builds of a game, including dedicated servers. Accessible via the "Tools" menu in the editor, the Project Launcher offers a centralized interface for defining custom build profiles, each tailored for specific platforms, configurations, and deployment scenarios. Upon opening, developers are presented with an empty canvas, signifying the need to create a new, custom profile specifically for the dedicated server. This tool acts as a powerful orchestrator for the Unreal build system, abstracting away much of the command-line complexity traditionally associated with game builds.
Crafting a Custom Build Profile for Dedicated Servers
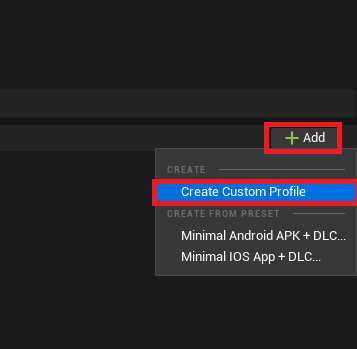
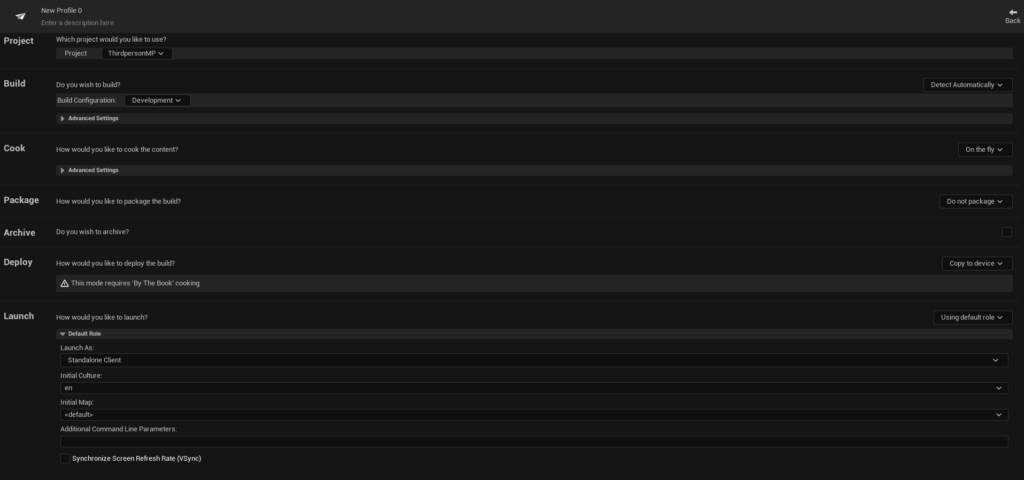
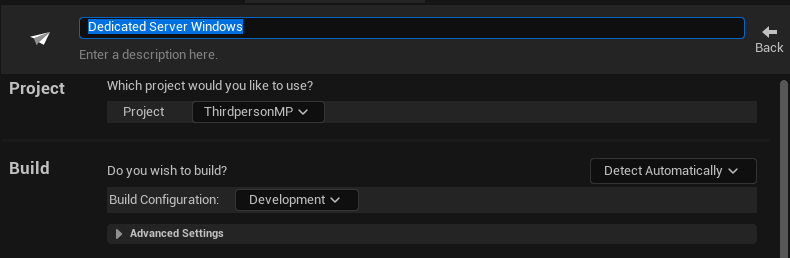
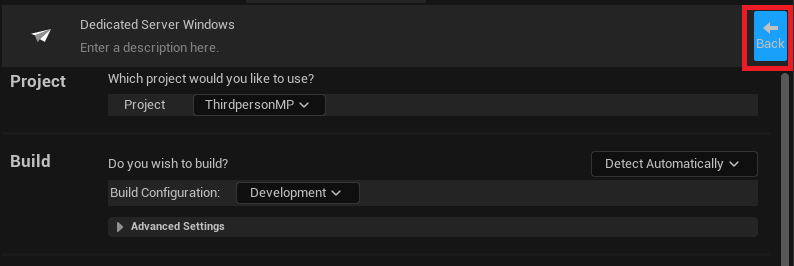
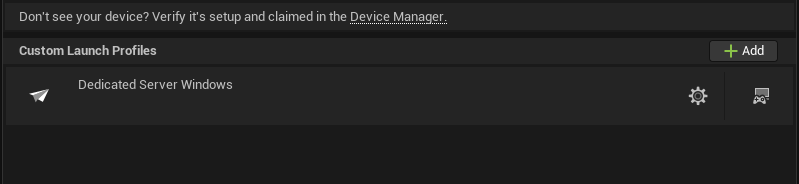
Creating a custom profile begins by selecting the "Add" button and choosing "Create Custom Profile." This action unveils a comprehensive menu of options, allowing for granular control over the build process, which is crucial for tailoring a server-specific executable.
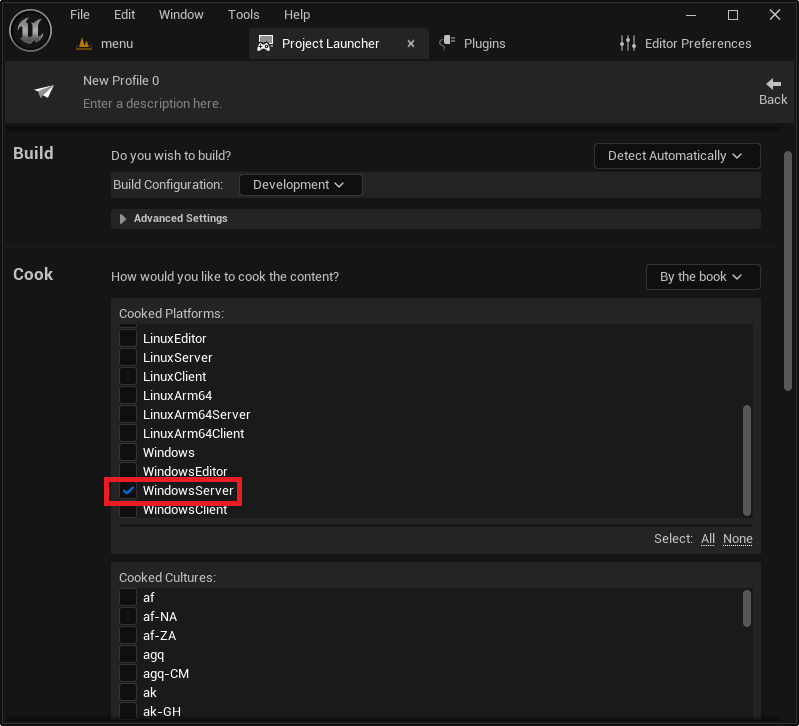
Within the "Cook" section, a critical adjustment involves changing the cooking method from "On the fly" to "By the book." "On the fly" cooking is typically used during iterative development within the editor, compiling assets as needed. For a release-ready dedicated server, "By the book" ensures that all necessary assets are pre-cooked and packaged systematically, guaranteeing a complete and stable build that includes only the optimized, server-ready assets.
Next, developers must specify the target server platform. For Windows-based deployment, "WindowsServer" is the appropriate selection. However, Unreal Engine also supports "LinuxServer" for x86/64 Linux environments and "LinuxArm64" for ARM-based Linux servers, catering to diverse hosting infrastructure needs, including newer cloud platforms and embedded systems. The choice of platform dictates the architecture and operating system compatibility of the resulting server executable, offering flexibility for global deployment.
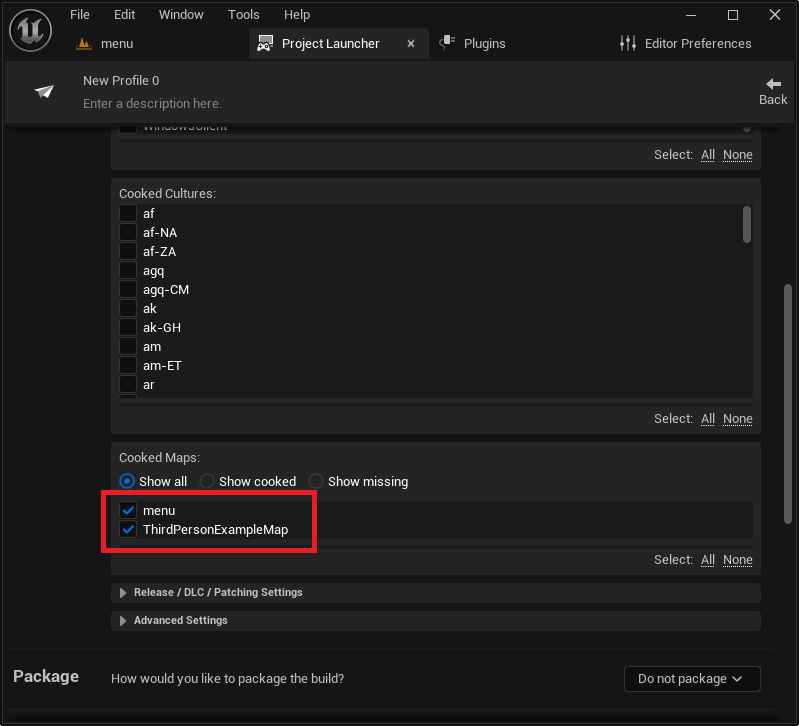
Further down the configuration list, developers must explicitly select all maps intended for inclusion in the server build. Unlike client builds that might only package maps accessible through game flow, a dedicated server requires all potential gameplay maps to be present to facilitate level transitions and session management. Failing to include a map will prevent the server from loading it, leading to runtime errors and an inability to host certain game modes.
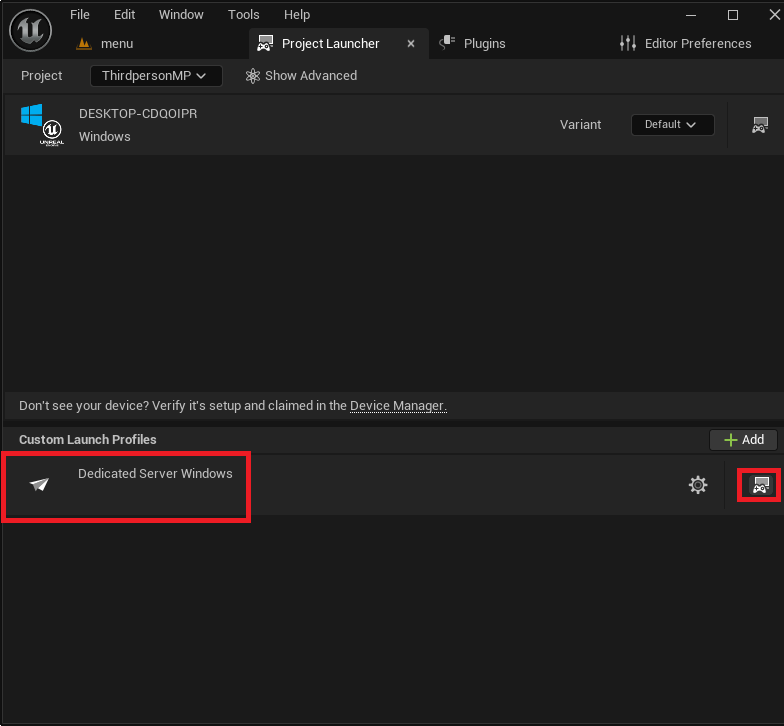
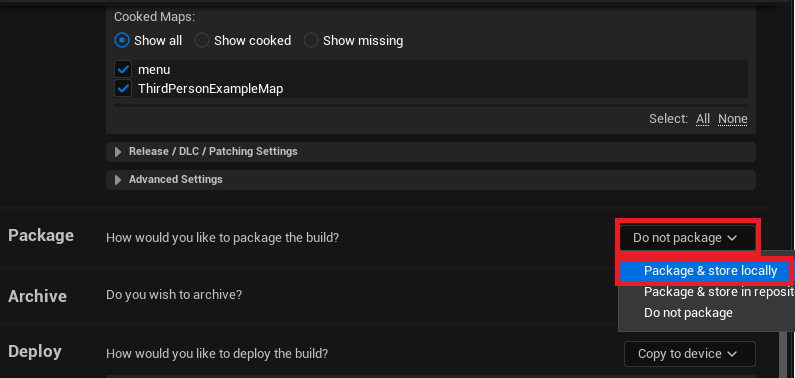
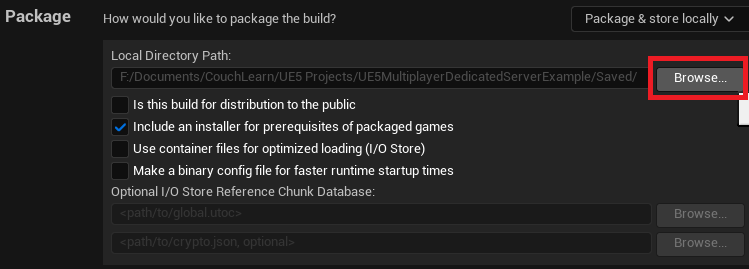
In the "Package" section, the default "Do not package" option must be changed to "Package & store locally." This setting instructs the Project Launcher to compile all cooked content and engine binaries into a self-contained, deployable package. The output directory is typically a Saved/StagedBuilds folder within the project, followed by the chosen platform name (e.g., WindowsServer). Developers retain the flexibility to customize this output path, allowing for organized storage of server builds and integration into existing development pipelines.
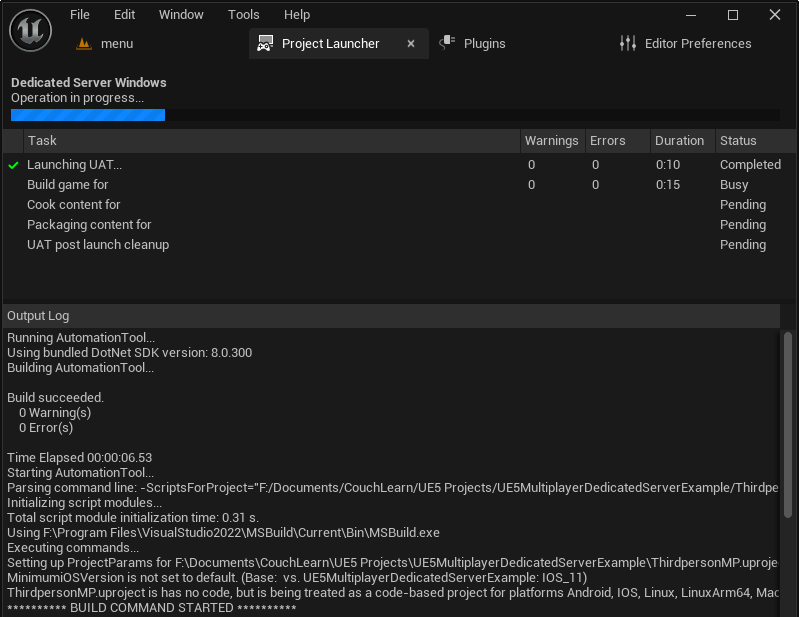
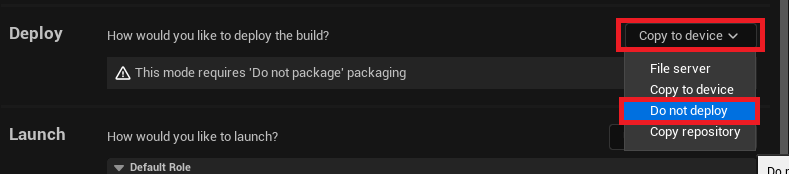
Finally, in the "Deploy" section, the option "Copy to device" should be changed to "Do not deploy
About the Author