The advent of sophisticated multiplayer experiences in modern gaming has rendered dedicated server infrastructure an indispensable component for developers aiming to deliver scalable, secure, and high-performance online gameplay. In an era dominated by competitive shooters, sprawling cooperative survival adventures, and dynamic social sandboxes, the foundational choice between peer-to-peer (P2P) and dedicated server hosting significantly impacts player experience and game longevity. This article details the process of constructing and configuring a dedicated server for Unreal Engine 5 (UE5) projects, moving from initial project setup to local deployment and testing, thereby ensuring a robust backend capable of supporting expansive player bases.
The shift towards dedicated server models addresses numerous limitations inherent in peer-to-peer (P2P) networking, which, while cost-effective for small-scale multiplayer experiences (typically 2-16 players), often introduces vulnerabilities. P2P systems are prone to host advantage, where the player hosting the game experiences minimal latency, and client-side cheating, as the game logic is often distributed and less authoritative. Furthermore, P2P connections can suffer from inconsistent performance due to varying host internet connections and hardware capabilities, leading to "lag spikes" and desynchronization that can be game-breaking, especially in fast-paced or precision-dependent genres like fighting games. Dedicated servers, by contrast, centralize the game instance on a server-grade machine, running independently of any individual player’s device. This centralized control provides a single, authoritative source of truth for the game state, drastically improving security against cheating, ensuring consistent performance, and offering greater reliability and scalability for larger player counts and persistent game worlds.
Foundational Requirements for Dedicated Server Development
Embarking on the journey of dedicated server development for Unreal Engine 5 necessitates specific foundational prerequisites. Developers must possess a fully functional multiplayer Unreal Engine 5 project. This baseline ensures that core gameplay mechanics and networking logic are already established and tested in a multiplayer context. Furthermore, a critical requirement is a source build of Unreal Engine, rather than a version downloaded directly from the Epic Games Launcher. The rationale behind this lies in the need for specific build targets and compilation options that are only accessible through a source-compiled engine. A source build grants developers the flexibility to compile server-specific executables, optimize engine modules for server performance, and integrate custom server-side logic at a deeper level than a pre-compiled binary allows. This is a common practice in professional game development, allowing for fine-grained control over the final product.
Complementing these engine-level requirements, the AdvancedSessions plugin is highlighted as a crucial component. This plugin streamlines the often-complex process of managing multiplayer sessions within Unreal Engine, including session creation, discovery, and joining. For a dedicated server to correctly advertise its presence and allow clients to connect seamlessly, a robust session management system is paramount. The AdvancedSessions plugin simplifies this by providing a comprehensive suite of Blueprint nodes and C++ classes that abstract away much of the underlying complexity of online subsystem integration, ensuring server visibility and client connectivity. These prerequisites collectively form the technical bedrock upon which a stable and scalable dedicated server environment can be built.
Differentiating Server Architectures: Listen vs. Dedicated
Understanding the core differences between various server architectures is fundamental to choosing the right solution for a multiplayer game. The initial foray into multiplayer networking for many developers often involves a listen server. In this model, one of the players’ machines acts as both a client and the host server. This approach is highly suitable for games with smaller player counts, typically ranging from 2 to 16 participants, such as cooperative survival games or small-scale competitive skirmishes. Listen servers offer distinct advantages, including reduced development costs, as they eliminate the need for external server infrastructure, and faster testing cycles, enabling developers to quickly iterate on multiplayer features between two clients. However, the inherent limitations of listen servers become apparent as game complexity and player expectations increase. Issues such as client-side cheating, where a malicious player hosting the game can manipulate game state, and synchronization inconsistencies, particularly in high-latency scenarios or games requiring precise timing, can severely degrade the player experience. Moreover, a host machine’s performance limitations can impact all connected players, leading to slowdowns and unfair advantages.
Dedicated servers emerged as the primary solution to these challenges. A dedicated server is a specialized computer system running a standalone software instance that exclusively manages the game world and server-side logic. Crucially, it does not spawn a player character and does not count as a connected player. This "headless" operation means the server is purely computational, devoid of rendering or input processing overhead, allowing it to efficiently manage complex game states and a large number of concurrent players. By running game files on a dedicated machine with correctly configured network ports, these servers can operate 24/7, providing a persistent, authoritative, and fair game environment. This distinction is paramount for genres like Massive Multiplayer Online (MMO) games, Battle Royales, and professional esports titles, where fairness, low latency, and high availability are non-negotiable requirements. The operational cost associated with maintaining dedicated server infrastructure is a trade-off for the superior performance, security, and scalability they offer.
Automating Session Creation and Map Loading
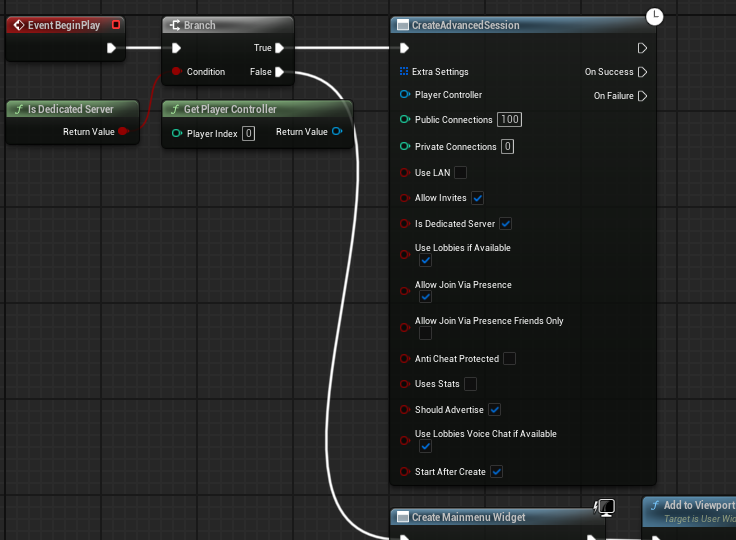
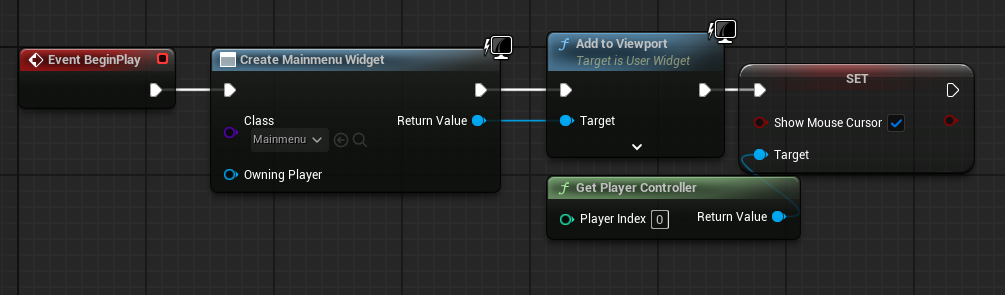
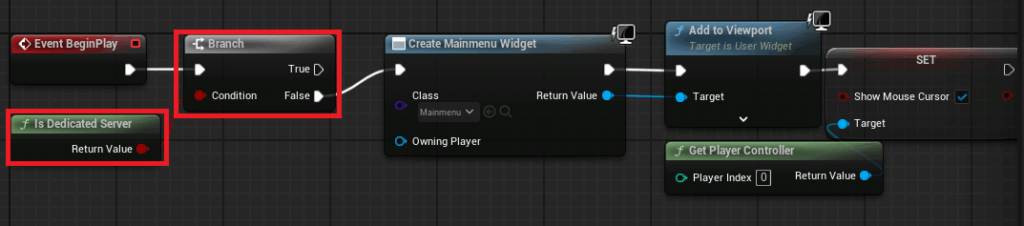
A critical step in preparing a dedicated server for deployment involves automating its initial startup sequence. Unlike a player-controlled client that navigates menus, a dedicated server must automatically create a game session and load the appropriate game map upon launch. This automation is typically achieved by modifying the game’s initial loading logic, often within the main menu level blueprint. In standard client builds, the main menu widget is displayed, allowing players to interact with UI elements. For a dedicated server, this UI is entirely superfluous and would consume valuable resources.
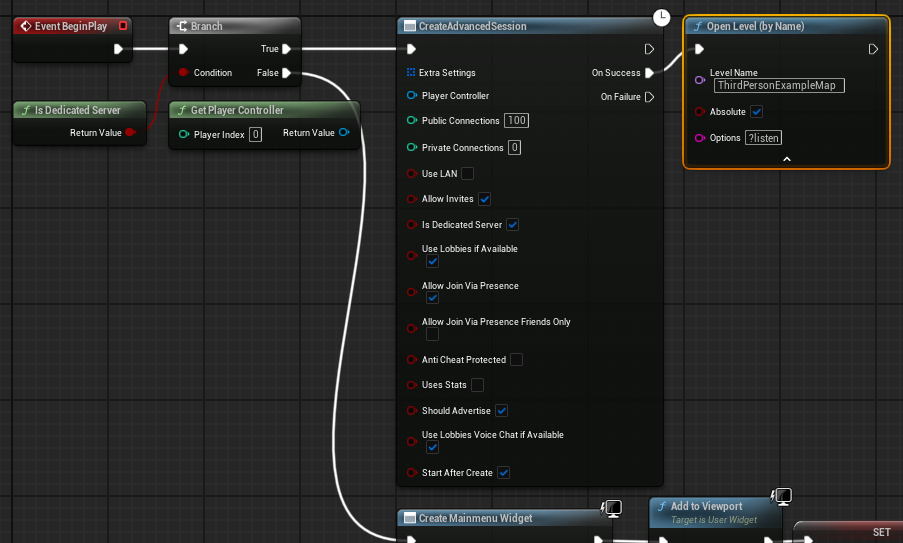
To address this, developers implement a conditional logic check using an "Is Dedicated Server" node. This node evaluates whether the current executable is running as a dedicated server instance. If the condition is false (i.e., it’s a client build), the game proceeds to create and display the main menu widget as usual. However, if the "Is Dedicated Server" check returns true, the menu creation logic is bypassed. Instead, the server directly executes a "Create Advanced Session" node, configuring it with the desired session settings (e.g., maximum players, public visibility). Upon successful session creation, the server then initiates the loading of the primary gameplay level using the "Open Level" node, critically appending the ?listen option to the map name. The ?listen argument instructs the server to listen for incoming client connections, effectively transforming the loaded map into an active multiplayer game instance. This streamlined, automated process ensures that the dedicated server is operational and discoverable by clients immediately upon execution, maximizing efficiency for large-scale deployments.
Configuring the Default Server Map
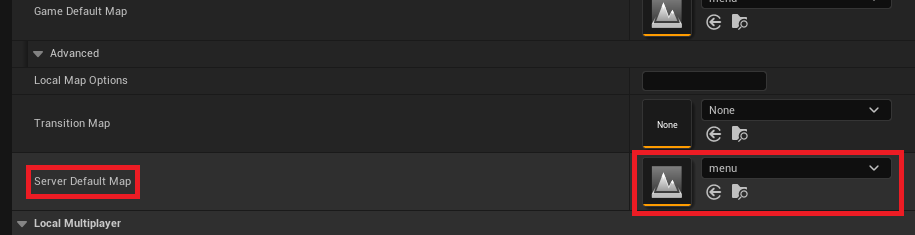
Ensuring that a dedicated server initializes into the correct game environment is a fundamental configuration step. By default, Unreal Engine servers often load an internal engine map, typically named "Entry," which is usually an empty or minimal scene not intended for actual gameplay. To prevent this and direct the server to a functional game world or lobby, developers must explicitly define the Server Default Map within the project settings.
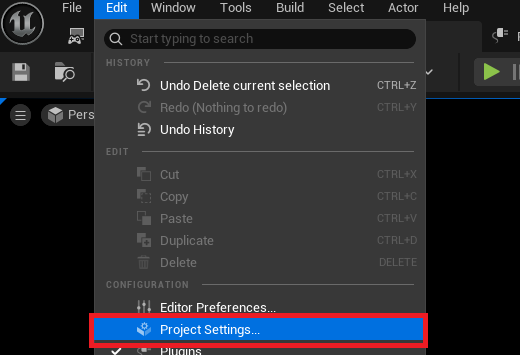
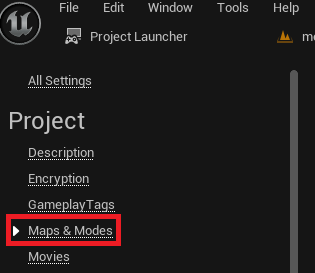
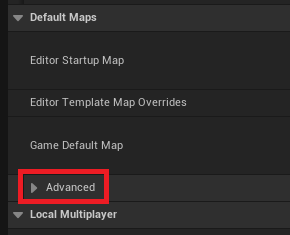
This configuration is accessed via the Unreal Editor’s main menu, under "Edit" -> "Project Settings." Within the Project Settings window, navigating to the "Maps & Modes" section reveals various map-related configurations. Under the "Default Maps" subsection, an "Advanced" dropdown option exposes granular settings, including the "Server Default Map." Here, developers can specify the exact path to the desired map, such as a main lobby or a specific gameplay level. For instance, if the game’s primary lobby is named "Menu," this map would be selected as the server default. This ensures that when the dedicated server executable is launched, it immediately loads the designated map, allowing players to connect to a meaningful game environment rather than an unplayable placeholder. This seemingly minor adjustment is crucial for a seamless player experience and efficient server operation.
Optimizing for a Headless Environment: Character Removal
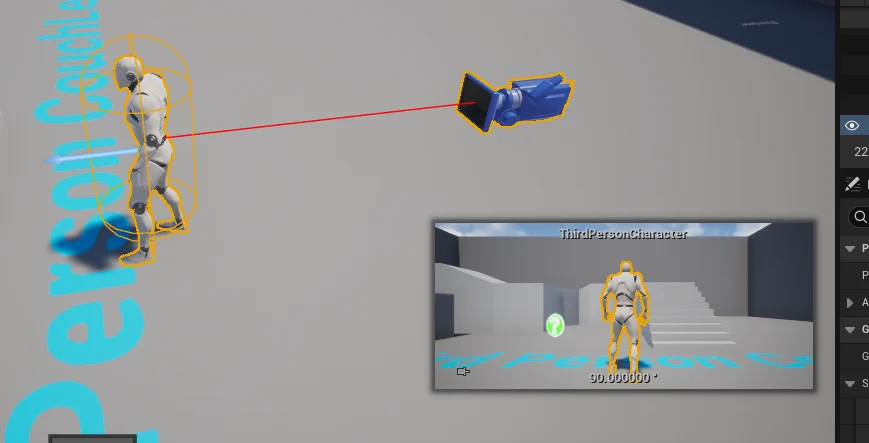
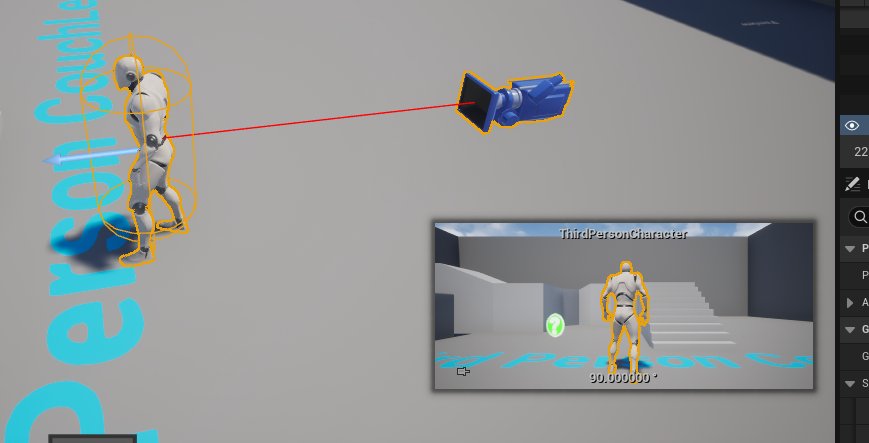
A dedicated server operates as a "headless" instance, meaning it lacks a graphical interface and does not require a player character to be physically present in the game world. This fundamental distinction necessitates an optimization step: the removal of any default character blueprints from the server’s initial loading level. In many Unreal Engine projects, a default character or pawn might be placed directly into a level to facilitate quick testing or serve as a starting point for player instantiation. While appropriate for client builds, allowing such a character to spawn on a dedicated server is inefficient and functionally redundant.
When a dedicated server launches, its primary role is to compute and manage the game state authoritatively, not to simulate player input or render visuals. Spawning an unplayed character consumes CPU cycles, memory, and potentially network bandwidth without contributing to the game experience. This can lead to unnecessary resource expenditure, particularly critical in cloud-hosted environments where server resource utilization directly translates to operational costs. Therefore, developers must identify and remove or disable any character blueprints that would automatically spawn in the default server map. This ensures that the dedicated server runs as leanly as possible, dedicating all its resources to processing game logic, physics, and networking, thereby maximizing its performance and capacity to host multiple players efficiently. This practice underscores the principle of designing server-side components purely for computational authority, separate from client-side presentation.
Leveraging the Unreal Engine Project Launcher for Server Builds
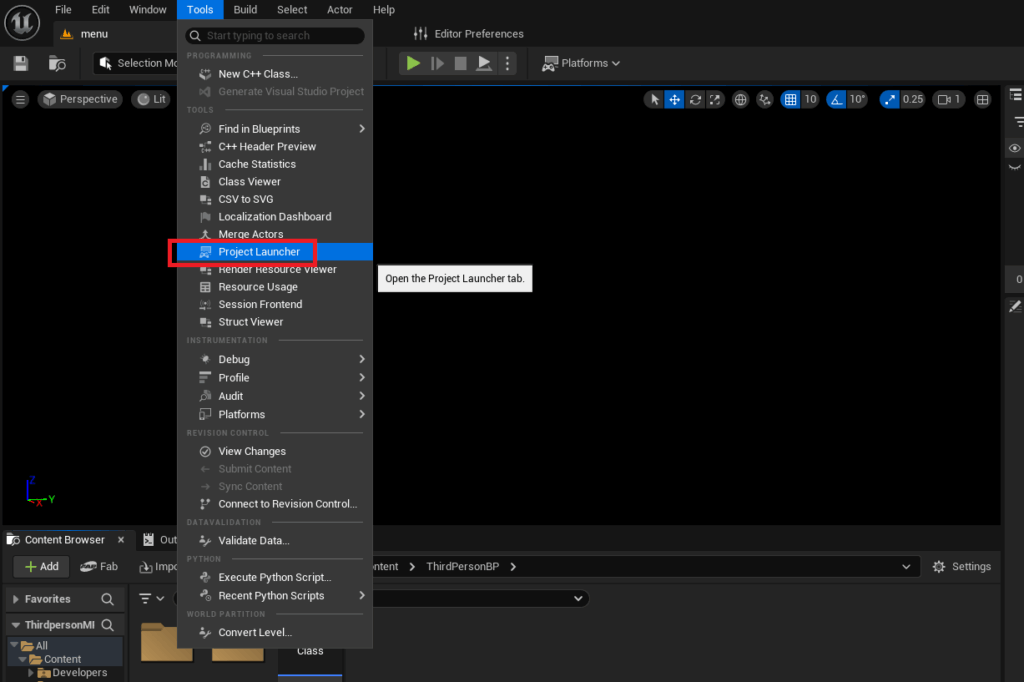
The Unreal Engine provides a powerful, built-in tool called the Project Launcher, designed to streamline the complex process of packaging and deploying game builds. This tool is indispensable for creating dedicated server executables, offering a centralized interface to manage various build profiles and configurations. Accessing the Project Launcher is straightforward: from the Unreal Editor, navigate to "Tools" in the top menu bar, then select "Project Launcher" from the "Tools" section.
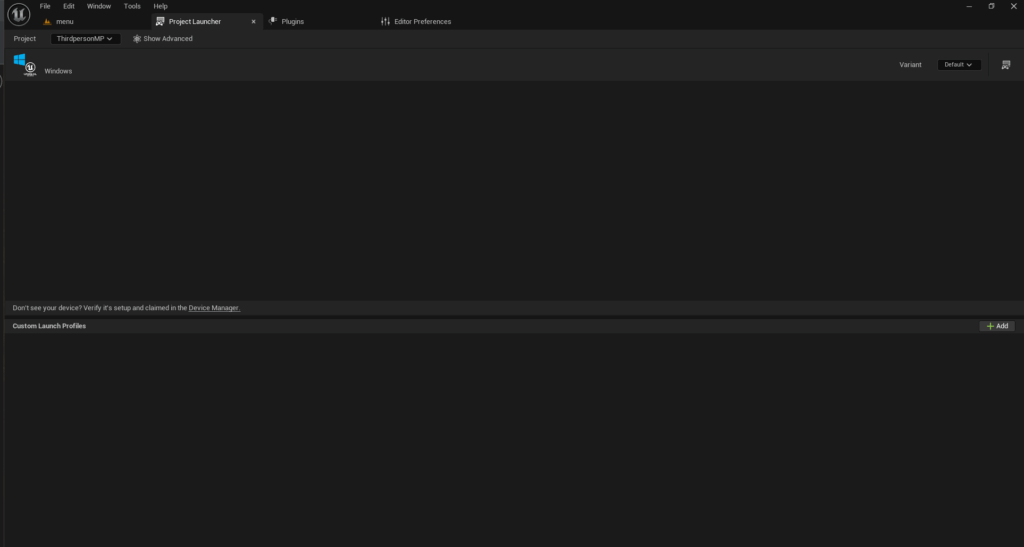
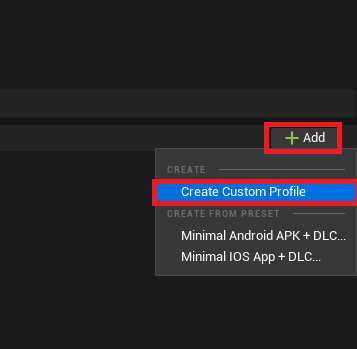
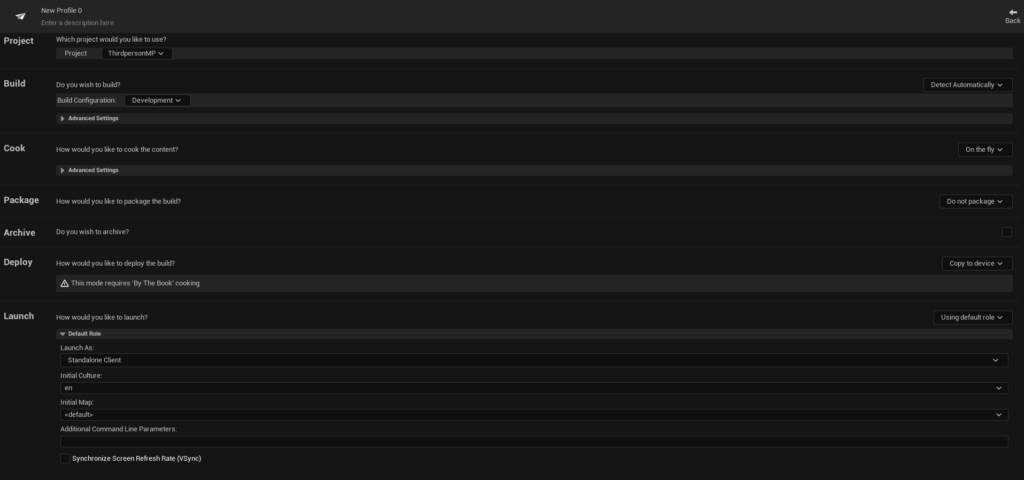
Upon opening, the Project Launcher typically presents an empty interface, awaiting the creation of custom build profiles. The first step in building a dedicated server involves creating such a custom profile. This process begins by clicking the "Add" button, followed by selecting "Create Custom Profile." This action reveals a comprehensive menu of options, allowing granular control over the build process.
Within the custom profile settings, several key configurations must be made:
- Cooking Method: The "Cook" section requires changing the default "On the fly" option to "By the book." "On the fly" cooking typically occurs during development or when launching the game directly from the editor, compiling assets as needed. "By the book" cooking, however, pre-packages all necessary assets into a deployable format, optimizing them for distribution and ensuring consistent performance on the server. This pre-packaging is essential for a production-ready server build.
- Platform Selection: Developers must specify the target server platform. For Windows-based deployments, "WindowsServer" is selected. For Linux environments, options include "LinuxServer" for x86/64 architectures or "LinuxArm64" for ARM-based systems, catering to diverse hosting solutions. This choice is critical for generating an executable compatible with the chosen operating system of the dedicated server machine.
- Map Inclusion: All maps intended to be part of the server’s operational cycle must be explicitly included in the cook list. This ensures that the server executable contains all the necessary level data to transition between gameplay areas or host various game modes.
- Packaging Options: The "Package" section requires changing "Do not package" to "Package & store locally." This instructs the Project Launcher to compile and package the server executable along with all its cooked content into a specified local directory. While a default path within the project’s
Saved/StagedBuildsfolder is automatically generated (e.g.,ProjectName/Saved/StagedBuilds/WindowsServer), developers have the flexibility to choose any desired output location using the "Browse" button. - Deployment Options: In the "Deploy" section, "Copy to device" should be changed to "Do not deploy." This setting is crucial as dedicated server builds are typically deployed manually to hosting providers or cloud instances, rather than directly to a local device through the launcher.
- Profile Naming: Finally, assigning a descriptive name to the custom profile (e.g., "MyGame Dedicated Server") enhances organization and clarity, particularly when managing multiple build configurations.
This meticulous configuration within the Project Launcher provides developers with a robust and repeatable process for generating optimized dedicated server builds, tailored to their specific deployment needs.
Executing the Dedicated Server Build Process
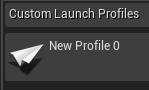
Once the custom profile within the Project Launcher has been meticulously configured, the actual process of building the dedicated server can commence. Returning to the main Project Launcher menu, the newly created profile will be visible in the list of custom launch profiles. To initiate the build, the developer simply clicks the "Launch" button, often represented by a controller and display icon, associated with their dedicated server profile.
Upon activation, the Project Launcher begins an automated compilation and packaging sequence. This process involves several stages: compiling any C++ code specific to the server, cooking (optimizing and converting) all selected game assets (textures, meshes, blueprints, maps) into a format suitable for the target platform, and finally, packaging these components into a standalone executable. During this phase, a log window will display the progress, providing real-time feedback on each task being performed. The initial build, especially for larger projects, can be a time-intensive operation, often taking a significant duration depending on the project’s size, complexity, and the developer’s hardware specifications. It is crucial to allow this process to complete entirely, ensuring that all assets are correctly cooked and packaged, and all necessary files are generated without errors. A successful completion is typically indicated by a "Success" message for all listed tasks in the log, culminating in the creation of the server executable and its associated data files in the specified output directory.
Local Testing and Verification of the Dedicated Server
With the dedicated server successfully built, the next critical phase involves local testing to verify its functionality before contemplating live deployment. The compiled server executable and its supporting files are located in the output folder specified during the packaging process. By default, this is typically found within the project directory under Saved/StagedBuilds/[PlatformName] (e.g., YourProject/Saved/StagedBuilds/WindowsServer). Inside this directory, developers will find the server executable, usually named after the project (e.g., YourProjectServer.exe).
Directly launching the server executable often runs it as a background process, making it challenging to monitor its status or gracefully terminate it. To facilitate debugging and observation, a common practice is to create a shortcut to the server executable. By right-clicking the shortcut and accessing its properties, developers can append the -log launch option to the "Target" field. This argument instructs the server to open with a console window, which will display all logging messages generated by the engine during startup and runtime. This provides invaluable insight into the server’s initialization, session creation, network activity, and any potential errors, allowing developers to confirm that the server is correctly setting up game sessions and listening for connections.
Upon launching the shortcut with the -log argument, a command prompt window will appear, rapidly filling with text. This output details the server’s internal processes, including the loading of assets, initialization of the networking subsystem, and the successful creation of the multiplayer session. Once the log indicates that a session has been created and the server is listening for connections, client machines can then attempt to connect. Clients running the game (either from the editor or a client build) should be able to discover and join the session advertised by the dedicated server. This step validates that the server is properly broadcasting its presence and that the client-server communication channels are correctly established.
Demonstrating Multi-Client Connectivity
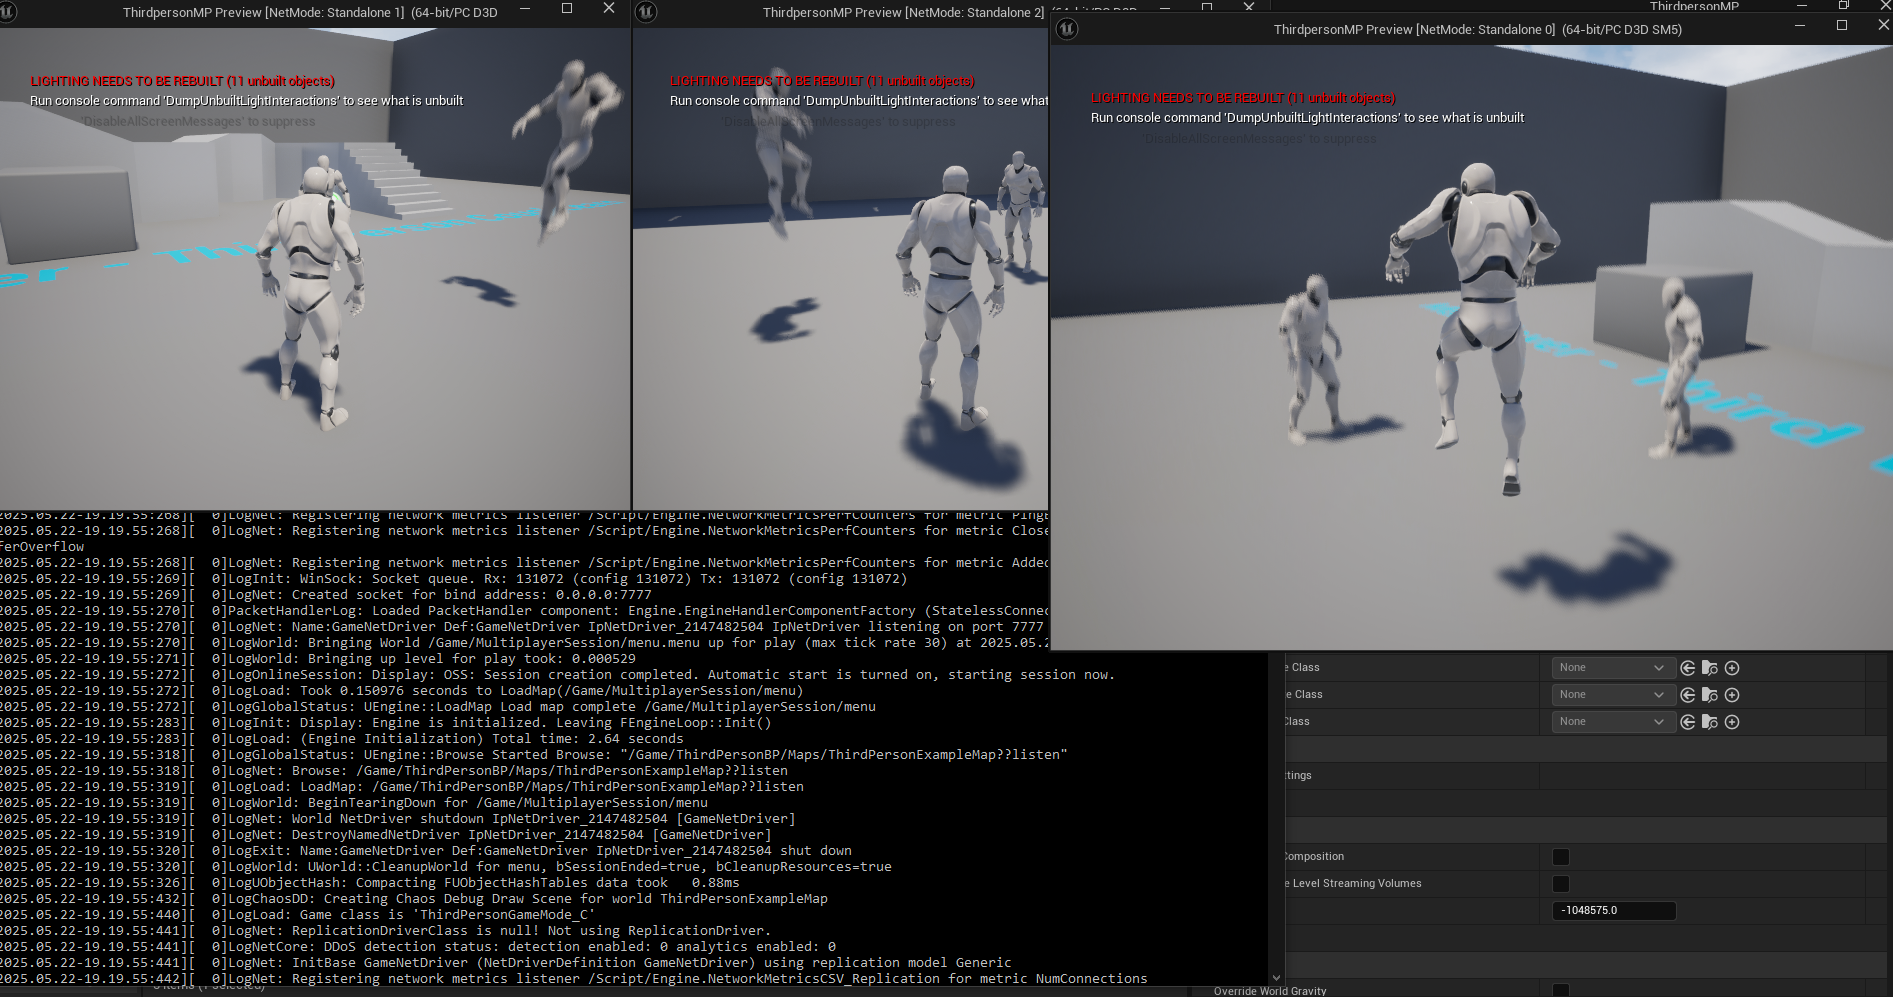
The ultimate validation of a successfully configured dedicated server lies in demonstrating its ability to host multiple clients concurrently, facilitating synchronized gameplay without a player-hosted instance. In a typical testing scenario, a developer would launch the dedicated server executable (with the -log argument for monitoring), and then open several client instances of the game. These clients can be launched directly from the Unreal Editor (using the "Play" button with "Number of Players" set to multiple, and "Net Mode" set to "Client") or as separate packaged client builds.
As each client connects to the dedicated server, the server’s log window will register their presence. On the clients’ screens, the session browser should clearly list the dedicated server, allowing players to join. Once connected, all clients will experience a unified and synchronized game world, with each player’s movements and actions replicated across all instances via the authoritative server. This setup visually confirms the core benefits of a dedicated server: players experience smooth, low-latency interactions, the game state remains consistent across all clients, and no single player’s machine bears the burden of hosting, eliminating issues like host advantage or performance bottlenecks. This demonstration is the culmination of the entire configuration process, proving that the game is ready to deliver a robust and fair multiplayer experience at scale.
Broader Implications and Future Outlook

The successful implementation of a dedicated server for an Unreal Engine 5 game represents a significant stride towards creating a professional-grade multiplayer title. This foundational architecture is critical for any game aspiring to competitive play, large persistent worlds, or a vibrant online community. The benefits extend beyond mere technical stability; they foster a fairer play environment, build player trust, and ultimately contribute to a game’s long-term viability and success in a competitive market.
The knowledge gained from building and configuring a dedicated server empowers developers to tackle complex networking challenges, optimize server performance, and design games with ambitious multiplayer features. As the gaming landscape continues to evolve, with increasing demands for cross-platform play, cloud gaming, and serverless architectures, a solid understanding of dedicated server deployment remains an invaluable skill. Unreal Engine 5, with its powerful tools like the Project Launcher and robust networking framework, positions developers to not only meet current industry standards but also innovate in the creation of future online interactive experiences. This comprehensive guide serves as a testament to the meticulous planning and technical execution required to unlock the full potential of multiplayer gaming in Unreal Engine 5.
About the Author