The pursuit of robust, scalable multiplayer experiences in modern video games has never been more critical, with player expectations for seamless, fair, and secure online interactions continually rising. For developers leveraging Unreal Engine 5 (UE5), a powerful and versatile platform, the strategic deployment of dedicated servers stands as a cornerstone for achieving these ambitious goals. This detailed instructional resource, released by Couchlearn, meticulously outlines the end-to-end process of building and configuring a dedicated server for UE5 projects, marking a significant contribution to the engine’s vibrant development community.
The Imperative for Dedicated Servers in Modern Gaming
In an era dominated by competitive esports, expansive cooperative worlds, and persistent online social spaces, the choice of networking architecture profoundly impacts a game’s success and longevity. While peer-to-peer (P2P) hosting or "listen servers" (where one player’s machine acts as the host) offer simplicity and cost-efficiency for smaller-scale games, they inherently carry significant drawbacks. Issues such as host advantage, inconsistent latency, vulnerability to cheating, and the inability to scale to large player counts or maintain persistent world states often plague P2P models.
Dedicated servers emerge as the professional standard, providing a centralized, independent game instance that operates autonomously from any individual player’s device. This separation ensures enhanced performance by offloading computational burden from player machines, bolsters security against malicious actors, and delivers superior reliability through consistent uptime and stable network conditions. Whether developing a fast-paced competitive shooter demanding millisecond precision, a sprawling survival game requiring persistent environmental states, or a social sandbox fostering large community interactions, a dedicated server architecture is not merely an option but a foundational requirement for a high-quality multiplayer experience.
Key Prerequisites for Implementation
Before embarking on the server setup journey, developers must ensure their Unreal Engine 5 project meets specific technical requirements. According to the guide, a foundational element is a pre-existing, functional multiplayer UE5 project. For those new to multiplayer development within the engine, Couchlearn cross-references its own "Multiplayer Sessions" guide, emphasizing a logical progression of learning.
Crucially, the server build process necessitates a source build of Unreal Engine, rather than a version downloaded directly from the Epic Games Launcher. This requirement stems from the need to access and compile server-specific code, which is typically omitted from the client-focused Launcher builds. Developers are directed to Epic Games’ official documentation for instructions on building the engine from source, a process that grants greater control and customization capabilities vital for server operations. Furthermore, the guide highlights the indispensable role of the AdvancedSessions plugin. This third-party plugin is essential for ensuring the dedicated server correctly registers and displays within session browsers, facilitating player discovery and connection. The inclusion of this specific plugin underscores the practical considerations and community-driven solutions often employed in professional game development workflows.
Understanding Server Architectures: Dedicated vs. Listen
To fully appreciate the benefits of a dedicated server, it’s vital to differentiate it from its counterpart, the listen server. A dedicated server is defined as a computer running a standalone piece of software solely responsible for managing the game world and server-side logic. Importantly, it does not instantiate a player character and does not count as a connected player, acting purely as an impartial arbiter of game state. This ‘headless’ operation minimizes resource consumption compared to a full game client, allowing for greater efficiency and stability.
Conversely, a listen server is where one of the players hosts the game instance on their own machine. This model is well-suited for games with smaller player counts, typically ranging from 2 to 16, and offers advantages in terms of reduced development costs and simplified testing due to the integrated client/server environment. However, the inherent limitations of listen servers become apparent in larger or more competitive titles. The host’s machine performance directly impacts all connected players, leading to potential slowdowns, and the host’s direct control over the game state can be exploited for cheating. Network inconsistencies, such as latency spikes or desynchronization, are also more prevalent, particularly in games demanding high precision like fighting games. Dedicated servers systematically remedy these issues by providing a neutral, robust, and consistently performing environment that processes the game world independently, keeping the server operational 24/7 if desired, and safeguarding against client-side manipulation.
Streamlining Server Initialization: Automatic Session Creation and Map Configuration
A critical aspect of setting up a dedicated server is ensuring it automatically initializes and becomes available for players upon launch. The Couchlearn guide outlines a clear chronological sequence for configuring this behavior within the Unreal Engine project.
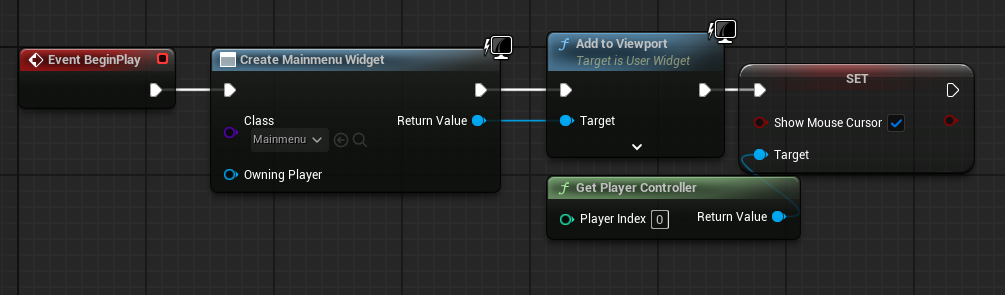
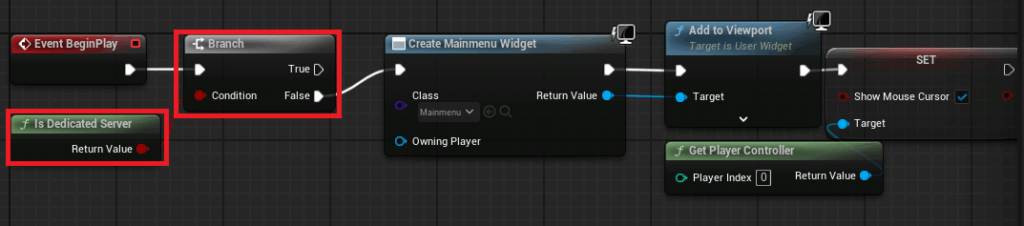
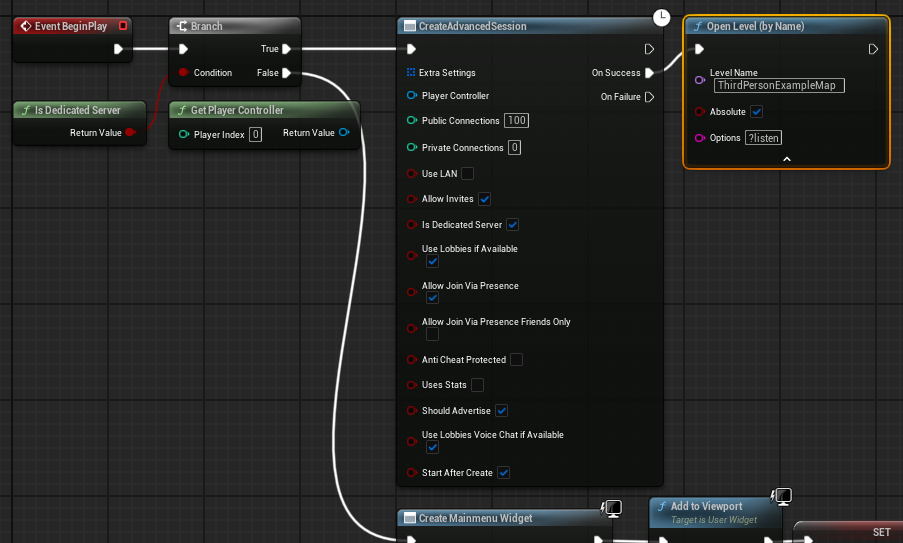
- Bypassing Menus for Dedicated Servers: In a standard multiplayer project, the game typically loads into a main menu where players can initiate or join sessions. For a dedicated server, this user interface is redundant. The guide instructs developers to modify the main menu level blueprint by introducing an "Is Dedicated Server" node. This node, when evaluated, directs the execution flow: if the platform is identified as a dedicated server, the menu widget creation is bypassed entirely. This optimization prevents unnecessary rendering and resource allocation on a headless server.
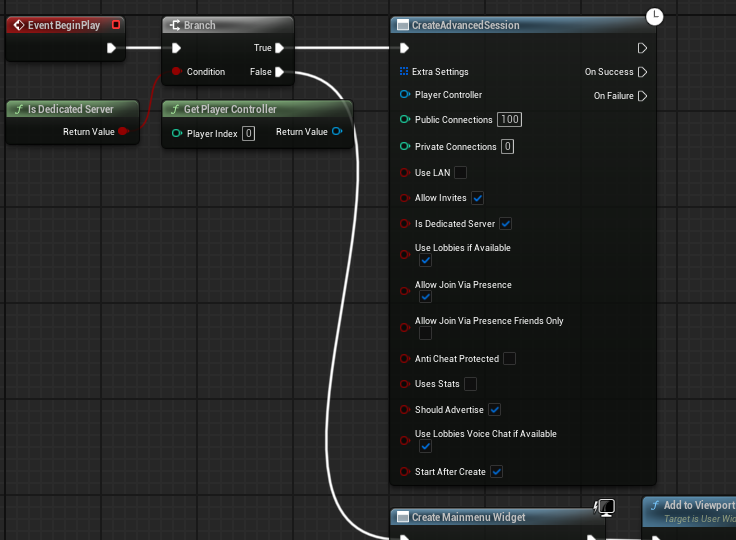
- Automated Session Establishment: Following the "True" branch of the "Is Dedicated Server" check, a "Create Advanced Session" node is invoked. This crucial step automatically establishes a game session with predefined settings, making the server discoverable to clients. The guide emphasizes configuring desired session parameters, which would typically include maximum players, session name, and other relevant metadata for client browsing.
- Loading the Game Level: Upon successful session creation, the server is instructed to open the main game level using the
?listenoption. This command ensures the server begins listening for incoming client connections on the specified map, transitioning from a lobby state directly into active gameplay.
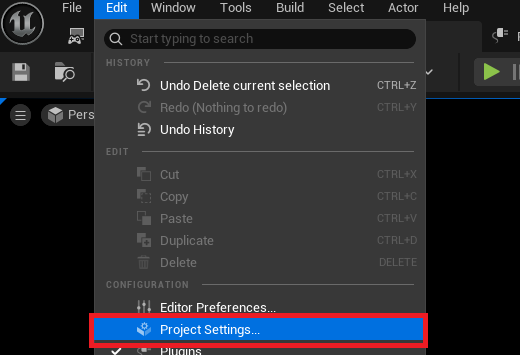
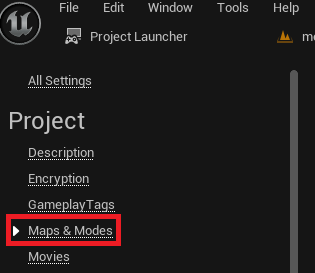
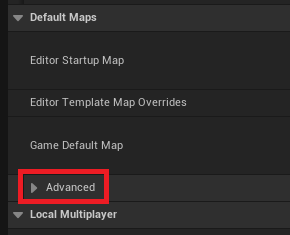
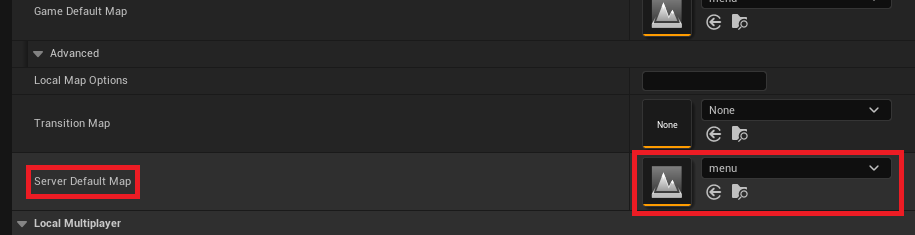
Beyond session management, correctly setting the default server map is paramount. By default, Unreal Engine’s dedicated servers often load an internal "Entry" map, which is unsuitable for gameplay. The guide directs users to the Project Settings, under the "Maps & Modes" section. Within the "Default Maps" subsection, expanding the "Advanced" options reveals the "Server Default Map" setting. Here, developers must specify their desired game map (e.g., "menu" map in the example), ensuring the server loads into the correct environment from the outset.
Optimizing Server Performance: Eliminating Unnecessary Elements
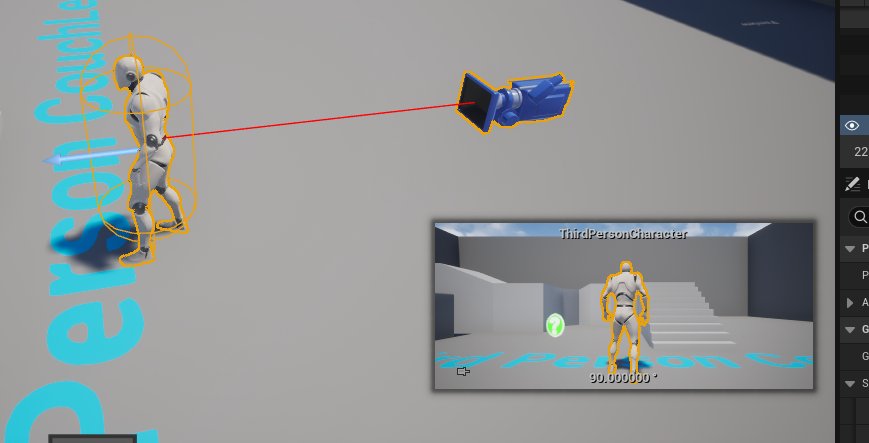
Dedicated servers are designed for efficiency, focusing solely on game logic and network communication. Consequently, any elements intended for a player-controlled client are superfluous and can consume valuable resources. The guide advises a simple yet effective optimization: removing the default character blueprint from the server’s starting level. In a listen server setup, a character might spawn for the host, but on a dedicated server, this character would stand idle, consuming processing power and memory without purpose. Deleting this default character ensures the server operates in its most streamlined, headless form.
The Project Launcher: Streamlining Server Builds

Unreal Engine’s Project Launcher is an invaluable built-in tool designed to simplify the complex process of building and packaging game versions, including dedicated servers. This utility allows developers to create custom profiles that encapsulate specific build configurations, ensuring repeatable and consistent deployments.
Chronology of Profile Creation:
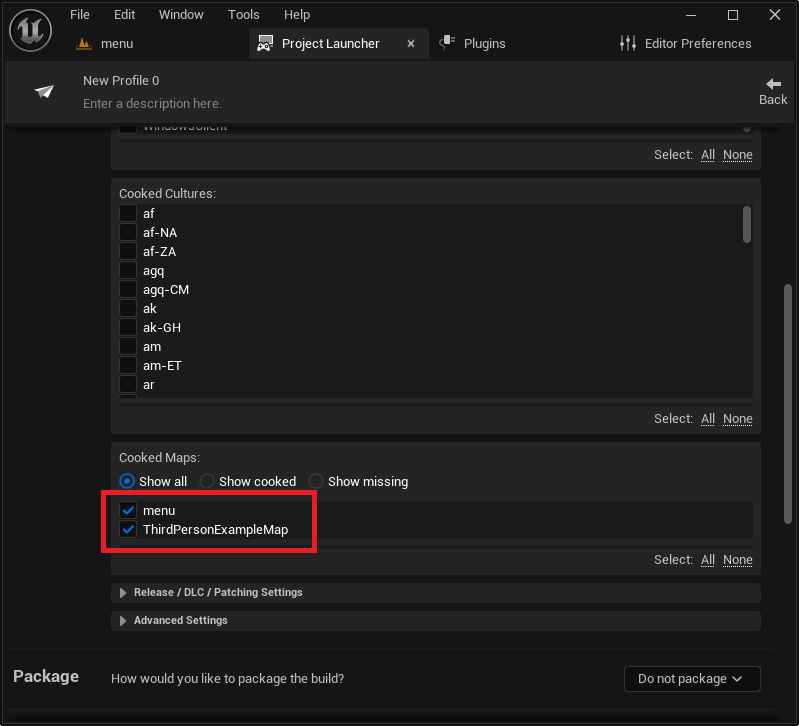
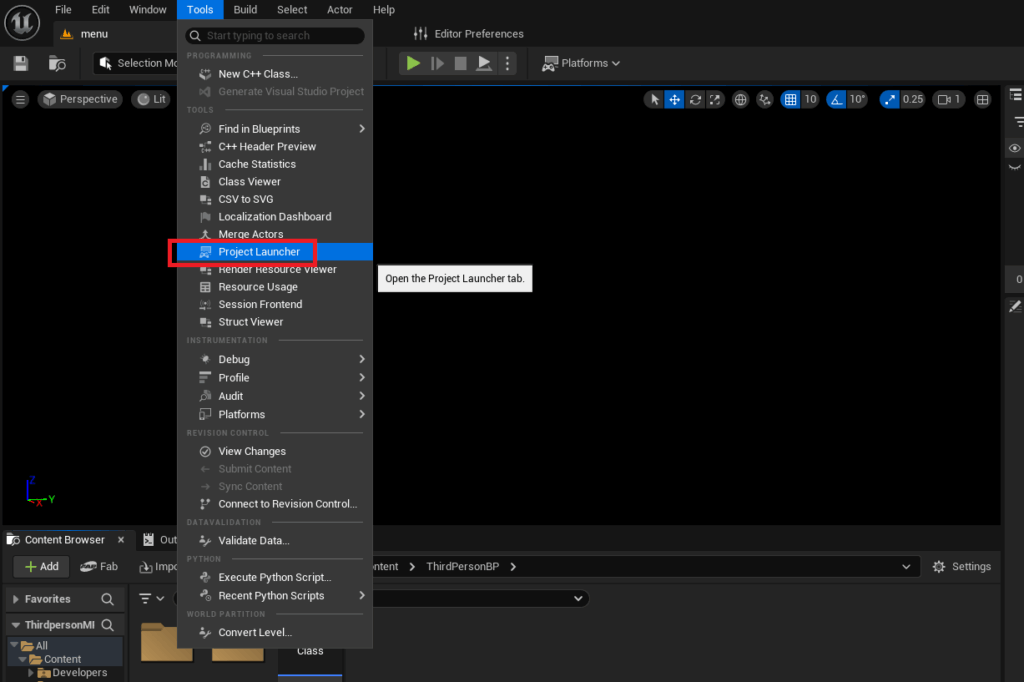
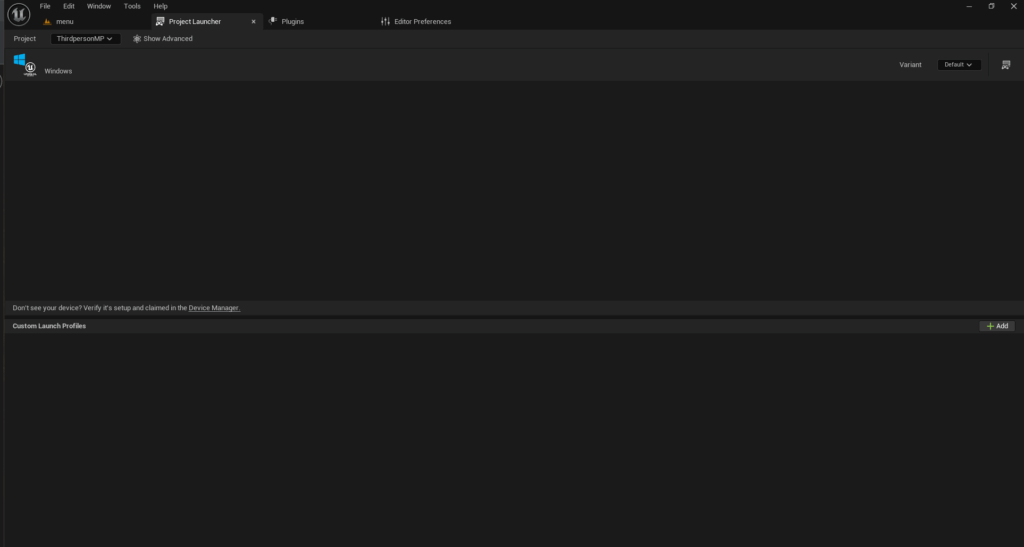
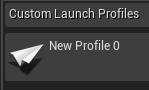
- Accessing the Project Launcher: The process begins by navigating to the "Tools" menu within the Unreal Engine editor and selecting "Project Launcher." This opens a dedicated interface, initially empty, awaiting custom configurations.
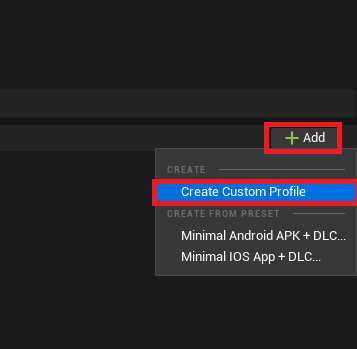
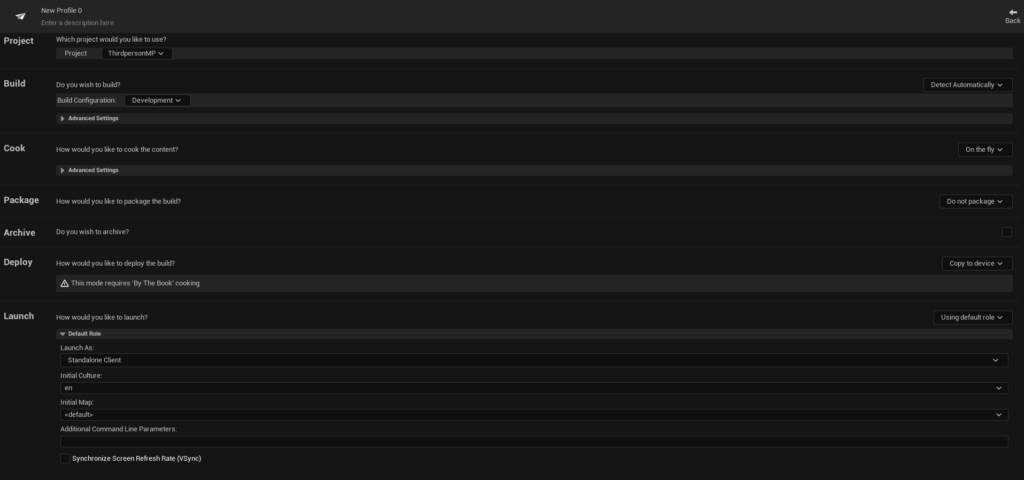
- Initiating Custom Profile Creation: Developers click the "Add" button, followed by "Create Custom Profile," which unveils a comprehensive menu of build options.
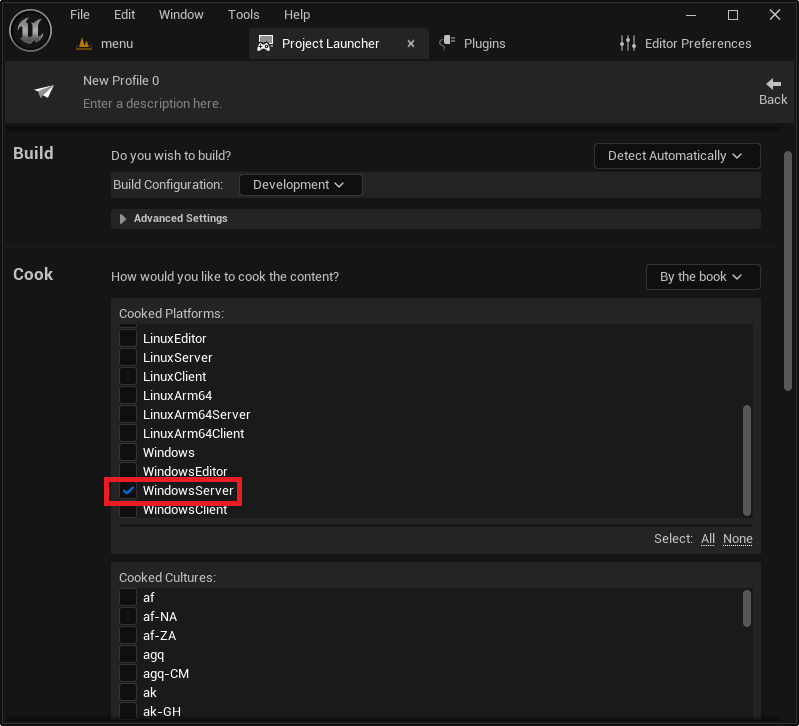
- Configuring the Cook Process: The "Cook" section is the first area of modification. The default "On the fly" cooking method, suitable for iterative testing, is replaced with "By the book." This ensures all content is pre-processed and optimized for a standalone build, crucial for dedicated server performance.
- Targeting Server Platforms: In the "Cooked Platforms" list, developers select the specific server operating system. The guide primarily focuses on "WindowsServer" but also acknowledges options for "LinuxServer" (x86/64) and "LinuxArm64," catering to diverse deployment environments. This choice dictates the architecture of the resulting server executable.
- Including Essential Maps: Developers must then explicitly add all maps required for the server’s operation. This ensures that the server build contains all necessary level data, preventing runtime errors or missing content.
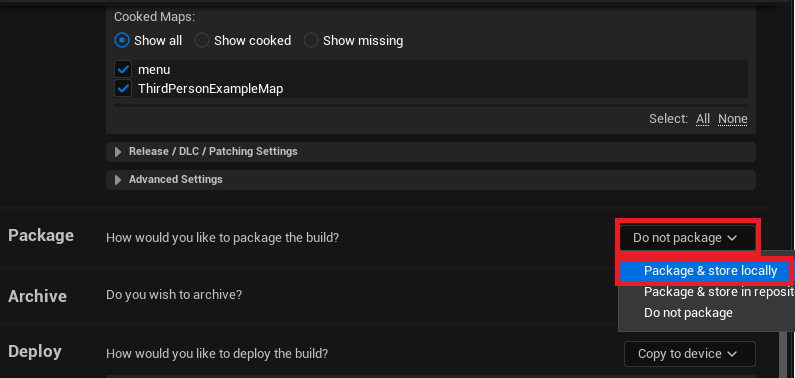
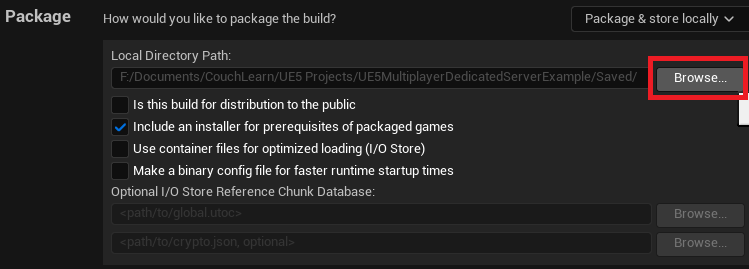
- Defining Package Output: The "Package" section is configured to "Package & store locally" instead of "Do not package." This setting instructs the engine to compile and bundle all cooked content into a deployable package, with the option to specify a custom output directory, although a default path within the project’s
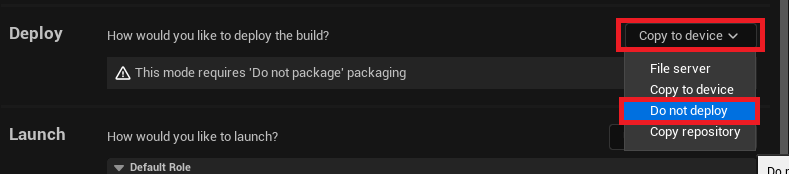
Saved/StagedBuildsfolder is provided. - Disabling Deployment Automation: Finally, in the "Deploy" section, the option is changed from "Copy to device" to "Do not deploy." This ensures the build process focuses solely on generating the server files without attempting to automatically transfer them to a remote device, allowing for manual deployment.
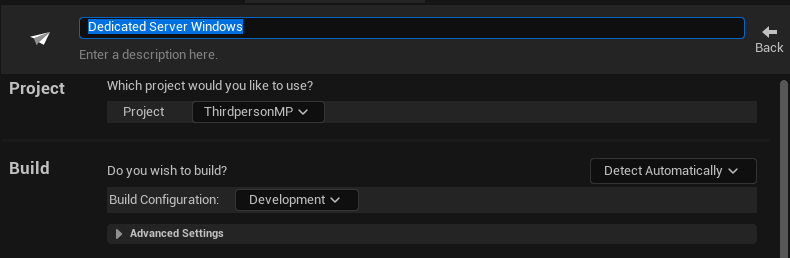
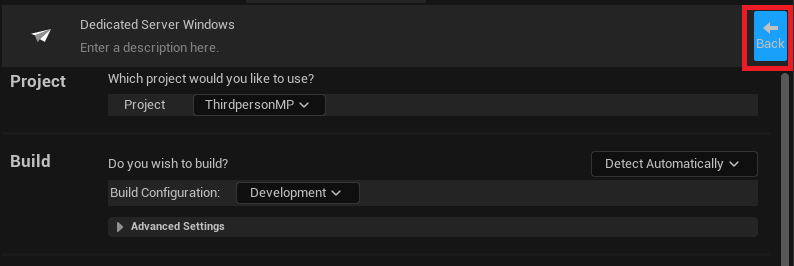
- Naming the Profile: To maintain organization and clarity, the newly configured profile is given a descriptive name, such as "MyGame Dedicated Server," facilitating easy identification for future builds.
Building and Testing the Dedicated Server
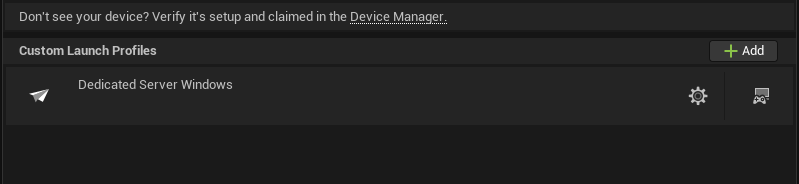
With the custom profile meticulously defined, the final stages involve building the server executable and verifying its functionality. Returning to the main Project Launcher menu, the newly created profile is visible. Initiating the build process is as simple as clicking the "Launch" button (represented by a controller and display icon). The engine then commences an automated compilation process, displaying a console output detailing the various stages of cooking, packaging, and building. This initial build can be time-consuming, particularly for larger projects, and patience is advised until all tasks are reported as complete and successful.
Upon successful completion, the dedicated server executable is located in the specified output folder, typically [YourProject]/Saved/StagedBuilds/[PlatformName], e.g., WindowsServer. To facilitate easier monitoring and control of the headless server, the guide recommends a practical testing method:
- Creating a Shortcut: A shortcut to the server executable (e.g.,
Server.exe) is created. - Adding the
-logArgument: The properties of this shortcut are modified to append the-loglaunch option to the "Target" field. This argument forces the server to open with a console window, displaying real-time logging messages, which is invaluable for debugging and monitoring server status. - Launching and Connecting: Launching the modified shortcut opens the server in a visible window, where a stream of text confirms its initialization and session setup. Concurrently, client instances (even multiple instances running within the Unreal Editor) can then discover and connect to this dedicated server session.
Demonstration and Broader Implications
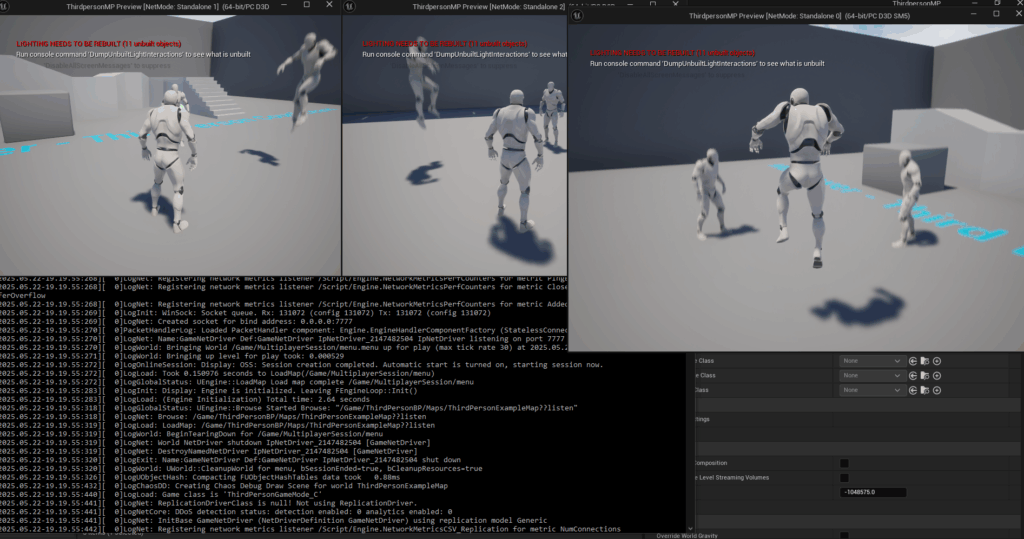
The guide culminates in a practical demonstration, showcasing three client instances successfully connecting to the newly built dedicated server. Players can observe each other’s movements and interactions, confirming that the server is effectively arbitrating the game state without the need for a player-hosted instance. This tangible proof of concept validates the entire setup process.
The availability of such a comprehensive and step-by-step guide from Couchlearn carries significant implications for the Unreal Engine development community. It democratizes access to advanced networking techniques, enabling a broader range of developers, from independent studios to larger teams, to implement robust multiplayer infrastructure. By providing clear instructions and project files, the guide lowers the barrier to entry for what can often be a daunting technical challenge.
This resource supports the industry trend towards more stable and fair online experiences, which directly contributes to player retention and positive community feedback. The emphasis on a source build and third-party plugins also highlights the open, extensible nature of Unreal Engine, encouraging developers to delve deeper into its capabilities and leverage community contributions. In an increasingly competitive game market, where online functionality is a core expectation, the ability to deploy a high-performance dedicated server is not just a technical achievement but a strategic advantage, ensuring games built on Unreal Engine 5 are equipped for scale, security, and a superior player experience. With this knowledge, developers are one significant step closer to launching fully featured multiplayer games that perform well and deliver consistent, engaging experiences for players worldwide.
About the Author