Setting up a dedicated server for an Unreal Engine 5 (UE5) game marks a pivotal transition for developers aiming to deliver robust, high-performance, and secure multiplayer experiences at scale. This crucial infrastructure decision underpins the stability and integrity of any ambitious online title, from fiercely competitive shooters to expansive cooperative survival adventures and dynamic social sandbox environments. The foundational principles and practical steps detailed in this comprehensive guide empower developers to transition from basic networking models to a professional, scalable multiplayer architecture.
The Imperative of Dedicated Servers in Modern Gaming
The contemporary gaming landscape is increasingly defined by its online multiplayer offerings. The global multiplayer online gaming market, valued at approximately $29.2 billion in 2022, is projected to reach $55.1 billion by 2030, according to Statista. This explosive growth underscores an escalating demand for seamless and engaging online interactions, placing significant pressure on developers to provide superior networking solutions. While peer-to-peer (P2P) or "listen server" models offer a lower barrier to entry, they inherently struggle with the demands of larger player counts, competitive integrity, and consistent performance that today’s gamers expect.
Listen servers, where one player’s machine hosts the game for others, are often sufficient for small-scale multiplayer experiences, typically supporting 2-16 players. Their simplicity and reduced development costs make them appealing for indie developers or early-stage prototypes. They facilitate quicker testing cycles and are ideal for games where host advantage or minor synchronization issues are less critical. However, this model introduces several fundamental drawbacks. Host migration can be disruptive if the host leaves, the host’s internet connection and hardware directly impact all other players’ experiences, leading to inconsistent latency and lag. Critically, P2P connections are far more susceptible to cheating and exploitation; players with malicious intent can often manipulate game states or exploit network vulnerabilities more easily when the game logic resides on a client-controlled machine. This inherent vulnerability can severely damage a game’s reputation and player base.
Dedicated servers circumvent these limitations by establishing a centralized, independent game instance that runs on specialized hardware, distinct from any player’s device. This server solely processes game logic, world state, and network synchronization, ensuring an authoritative source of truth for all connected clients. The benefits are manifold: enhanced performance through optimized server hardware, superior security by isolating game logic from client manipulation, and unparalleled reliability, as the server operates continuously regardless of individual player disconnections. For developers leveraging the advanced capabilities of Unreal Engine 5, understanding and implementing dedicated servers is not merely an option but a strategic necessity for achieving market relevance, player satisfaction, and the long-term viability of their multiplayer titles.
Unreal Engine 5: A Platform for Advanced Multiplayer Development
Unreal Engine 5, with its cutting-edge graphics, expansive world-building tools, and sophisticated networking architecture, provides a robust foundation for multiplayer game development. Epic Games has consistently invested in features that empower developers to create complex online interactions, and the ability to deploy dedicated servers is central to this vision. The engine’s networking system is designed to handle high concurrency and intricate game states, making it an ideal choice for ambitious multiplayer projects that demand stability and performance. The process of building a dedicated server in UE5, while detailed, is systematically supported by the engine’s comprehensive toolset, making what might seem daunting into an achievable goal for diligent developers.
Prerequisites: Laying the Foundational Stones
Before embarking on the dedicated server build, several critical prerequisites must be met to ensure a smooth development and compilation process. These foundational steps are non-negotiable and directly impact the success of the server compilation and subsequent operation.
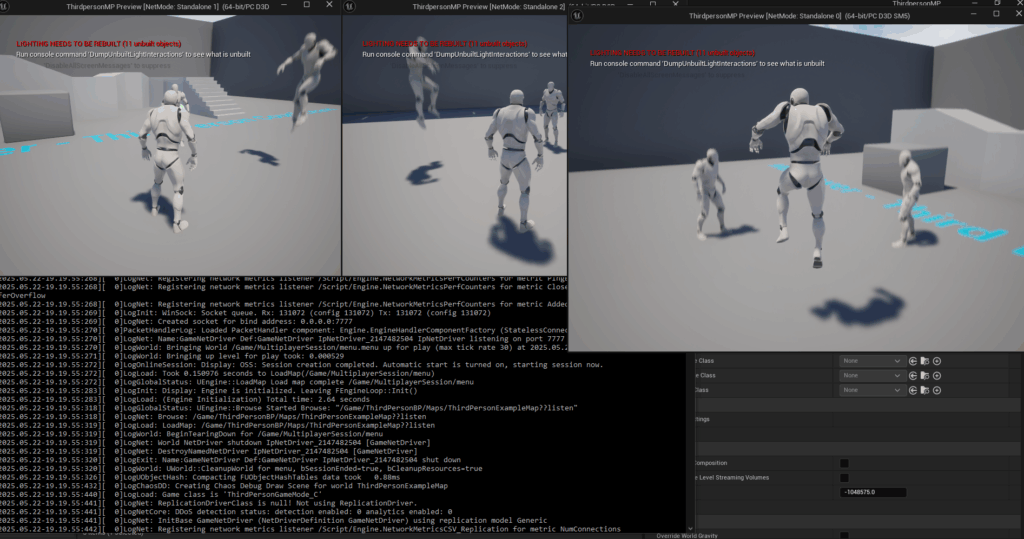
- A Working Multiplayer Unreal Engine 5 Project: The core of any dedicated server is a game designed with multiplayer functionality in mind. This includes properly implemented replication of actors and components, robust player state management, and network-aware game logic. Developers are advised to first establish a functional multiplayer environment, ideally following foundational guides such as the official Unreal Engine 5 Multiplayer Sessions guide, to ensure the project correctly handles player connections, game state synchronization, and client-server communication. This initial step validates the fundamental networking components before introducing the dedicated server architecture.
- Source Build of Unreal Engine: Crucially, building a dedicated server for an Unreal Engine project requires a version of the engine compiled directly from its source code, not the version downloaded from the Epic Games Launcher. The launcher version typically does not include the necessary server-specific build targets and tools required for compiling a standalone server executable. Obtaining and building the engine from source, available through Epic Games’ GitHub repository, provides developers with the full suite of build configurations, including the "Server" target. This process involves configuring a suitable development environment (e.g., Visual Studio for Windows) and compiling the extensive Unreal Engine codebase, a process that can take several hours depending on hardware specifications. This step is a cornerstone for accessing the engine’s full capabilities for server-side deployment.
- AdvancedSessions Plugin: For optimal session management and discoverability, especially in a public-facing multiplayer game, the AdvancedSessions plugin is highly recommended. This widely-adopted, community-developed plugin significantly extends Unreal Engine’s native session interface, offering more robust functionalities for creating, finding, and joining game sessions across various online subsystems. Integrating AdvancedSessions ensures that the dedicated server properly advertises its presence and allows clients to seamlessly discover and connect to it, a critical component for any production-ready multiplayer title. Without it, servers may not appear correctly in session browsers, hindering player access and the overall user experience.
Chronology of Server Configuration: Automating Startup and Map Loading
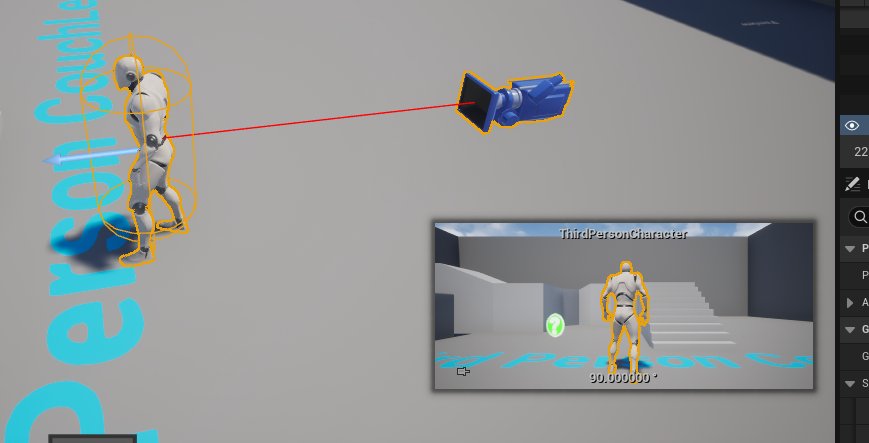
A key distinction of a dedicated server is its autonomous operation. Unlike a client, it doesn’t need a graphical user interface or a player character spawned by default. Upon launch, a dedicated server should automatically create a game session and load the appropriate game map, ready for players to connect. The guide outlines specific blueprint modifications to achieve this streamlined, hands-off startup, ensuring efficiency and resource optimization.
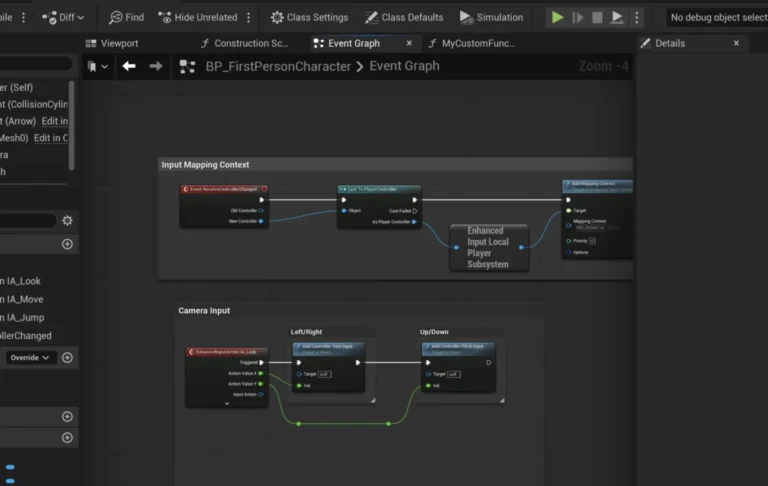
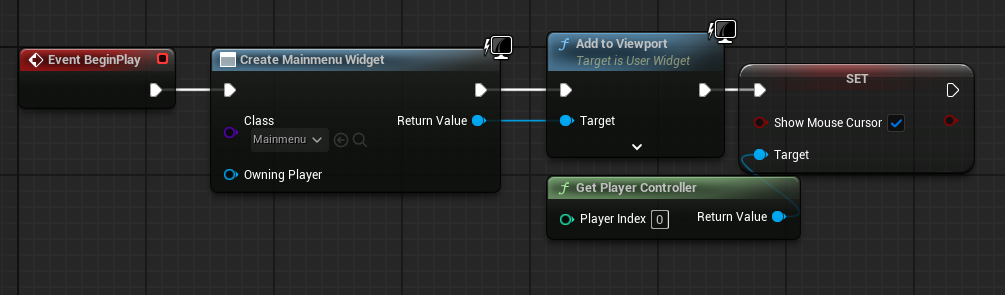
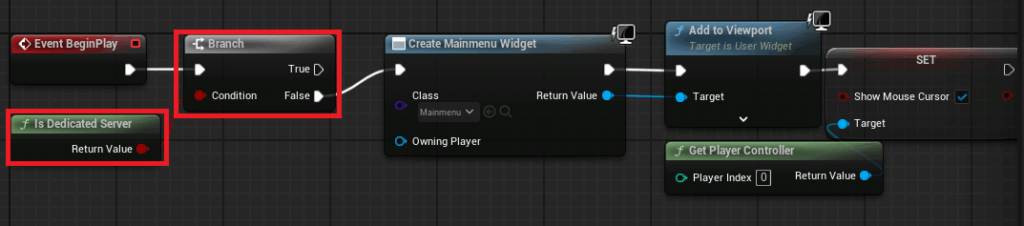
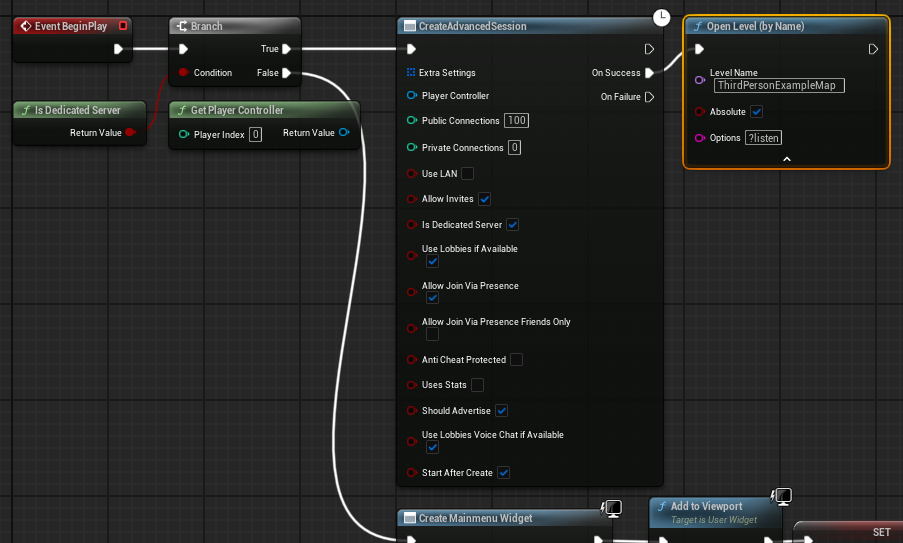
The typical UE5 project might initially create a main menu widget and add it to the screen in the main menu level blueprint. For a dedicated server, this behavior is unnecessary and undesirable. The proposed solution involves introducing a conditional check using the "Is Dedicated Server" node. This node returns True if the current executable is a dedicated server build and False otherwise, allowing for platform-specific logic.
- Logic Branching for Server vs. Client: A
Branchnode is inserted into the main menu level blueprint, with the "Is Dedicated Server" node connected to its condition. - Dedicated Server Path (True Pin): If
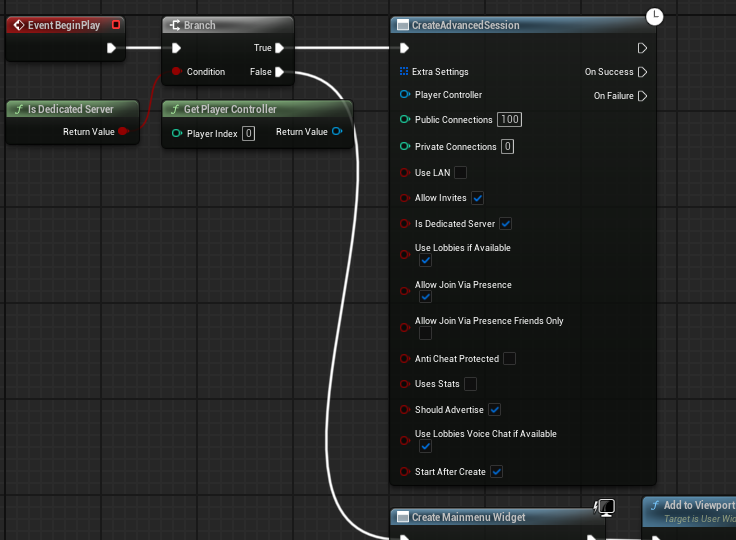
Is Dedicated ServerisTrue, the code bypasses the menu creation entirely. Instead, it proceeds directly to aCreate Advanced Sessionnode. This node, configured with desired settings such as maximum players, server name, and public/private status, initiates the game session. Upon successful session creation, anOpen Levelnode is executed, loading the primary game map. Crucially, the map name is appended with the?listenoption (e.g.,GameMap?listen). This command-line argument instructs the engine to start the loaded map as a listen server (though in this context, it signifies the dedicated server is ready to accept incoming client connections on that map), making it discoverable and joinable. - Client Path (False Pin): If
Is Dedicated ServerisFalse(i.e., a regular client instance), the original main menu widget creation logic is executed, allowing players to interact with the game’s UI as intended.
This modification ensures that the dedicated server efficiently initializes the game world without unnecessary graphical overhead or interactive elements, directly preparing itself for incoming connections and game logic processing.
Establishing the Default Server Map
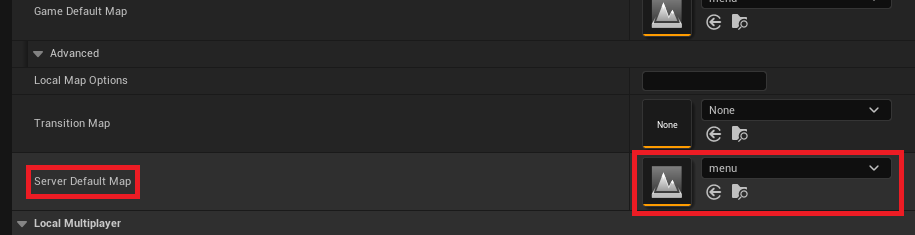
By default, an Unreal Engine server might attempt to load a generic engine map, often named "Entry." This is not ideal for a custom game that requires specific level environments. Developers must explicitly define the map the dedicated server should load upon startup. This crucial configuration is managed within the Project Settings:
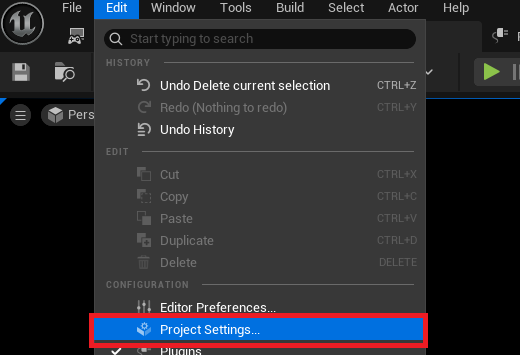
- Access Project Settings: Navigate to the "Edit" menu in the top-left of the Unreal Editor and select "Project Settings."
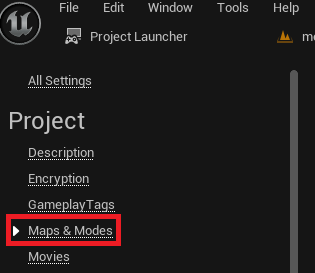
- Maps & Modes Section: Within the Project Settings window, locate and click on the "Maps & Modes" section, which controls default game maps and game modes.
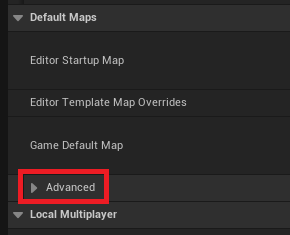
- Advanced Default Maps: Expand the "Advanced" dropdown option within the "Default Maps" section. This reveals additional, specialized map settings.
- Set Server Default Map: Here, the "Server Default Map" option must be set to the desired starting map for the dedicated server. This is typically the main game level where multiplayer action occurs, or a specific lobby map designed for server-side operations. This configuration ensures that the server correctly initializes the intended game environment where players will eventually connect and interact, preventing the server from loading into an empty or incorrect default engine map.
Streamlining the Server Environment: Eliminating Default Character Spawning

A dedicated server’s sole purpose is to host the game world, manage game state, and arbitrate interactions, not to participate as a player. Therefore, spawning a default player character on the server is not only unnecessary but can also consume valuable resources and potentially introduce unexpected behavior or bugs. The guide recommends a simple yet effective optimization: removing any default character blueprints that might be placed directly within the server’s starting level. In many template projects, a character blueprint is automatically placed in the default level to provide an immediate playable character for the first connected player or the local host. For a dedicated server, this character serves no functional purpose and should be deleted from the level. This ensures that the server’s resources are solely focused on managing the game state and network traffic, enhancing performance and stability.
The Project Launcher: Orchestrating the Build Process
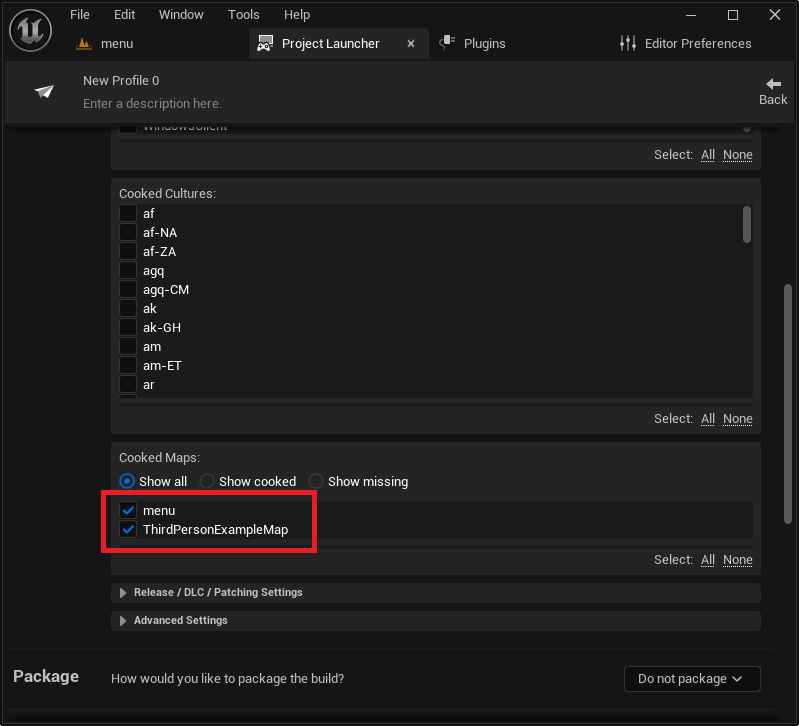
Unreal Engine’s Project Launcher is an invaluable, built-in tool designed to streamline the packaging, cooking, and deployment of game builds across various platforms and configurations. It allows developers to create custom profiles, each meticulously tailored for specific build requirements, including dedicated servers, client builds, and more. This tool significantly simplifies the often-complex build pipeline.
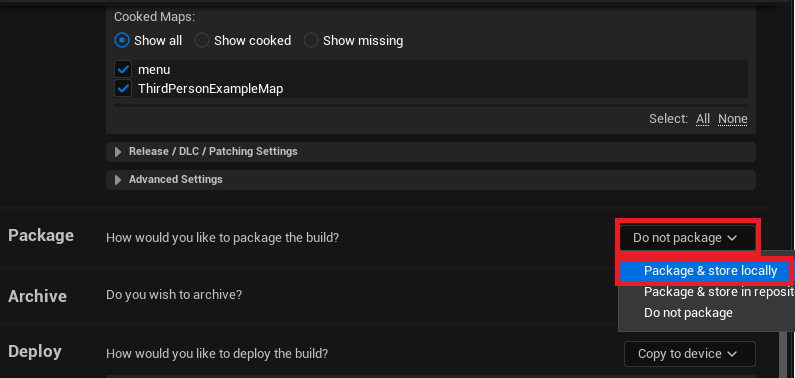
Accessing the Project Launcher is straightforward within the Unreal Editor:
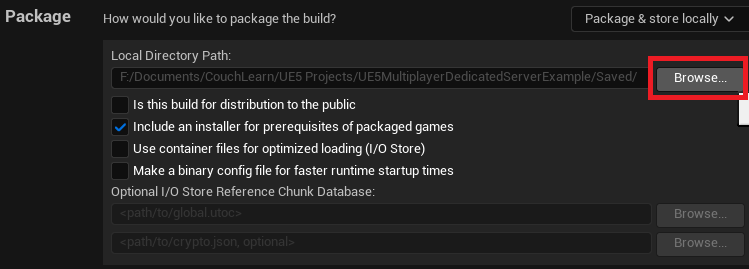
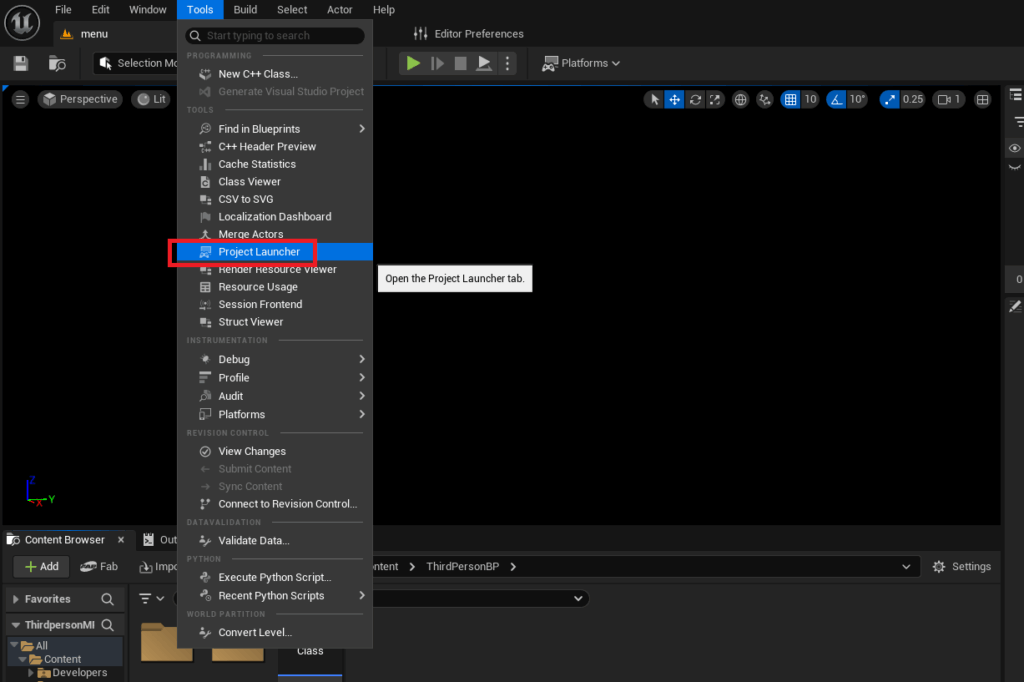
- Tools Menu: In the Unreal Editor, click on the "Tools" menu located at the top of the interface.
- Project Launcher: Select "Project Launcher" from the "Tools" section of the dropdown menu.
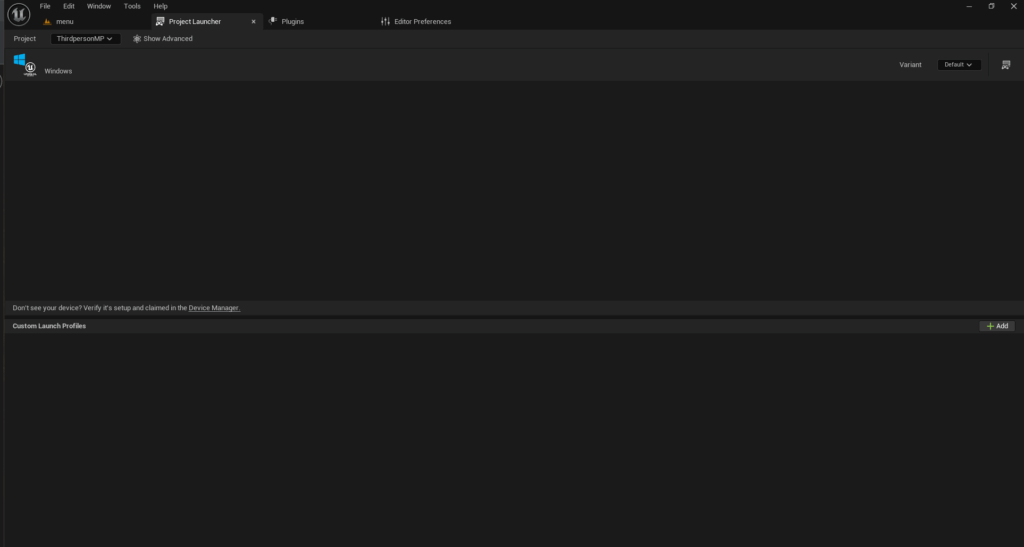
Upon opening, the Project Launcher typically presents a relatively empty menu, ready for the creation and management of custom build profiles.
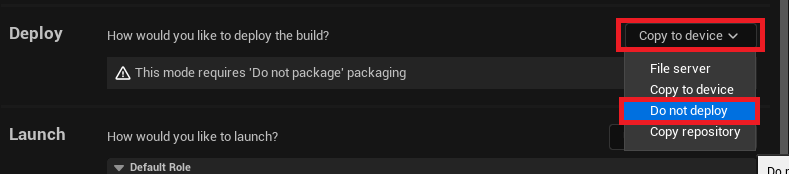
Creating a Custom Profile for Dedicated Servers: A Detailed Configuration
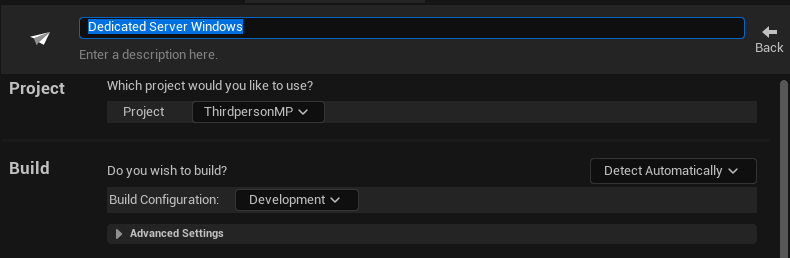
The core of building a dedicated server through the Project Launcher lies in defining a custom profile that specifies the exact parameters for the server build. This involves a series of critical configurations that dictate how the engine compiles and packages the server-side application.
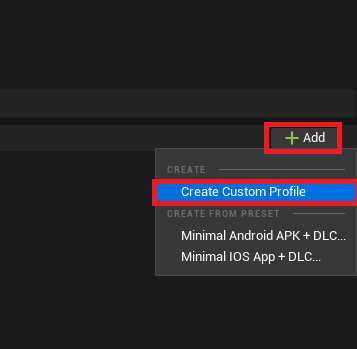
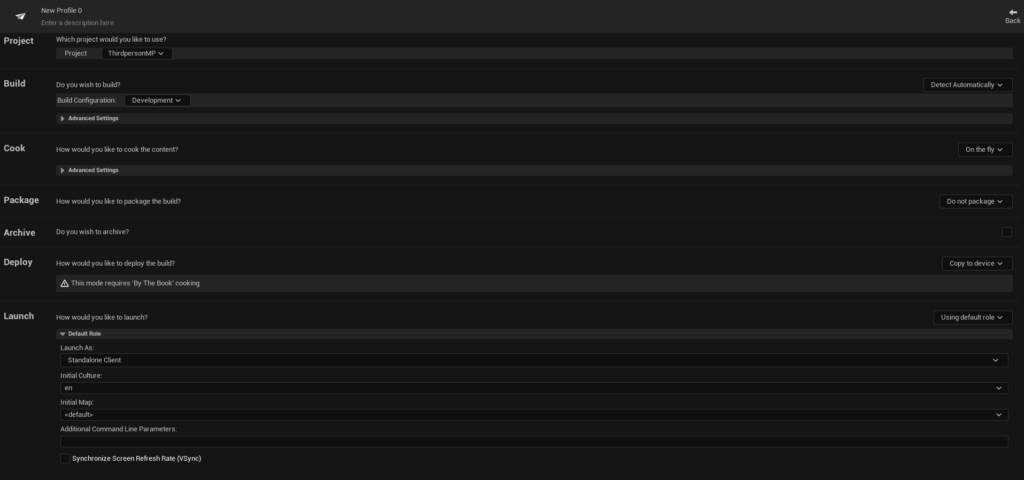
- Initiate Profile Creation: Click the "Add" button in the bottom right of the Project Launcher interface, then select "Create Custom Profile." A comprehensive menu of options will appear, allowing for granular control over the build process.
- Cook Section – Data Preparation: This section dictates how game assets are processed.
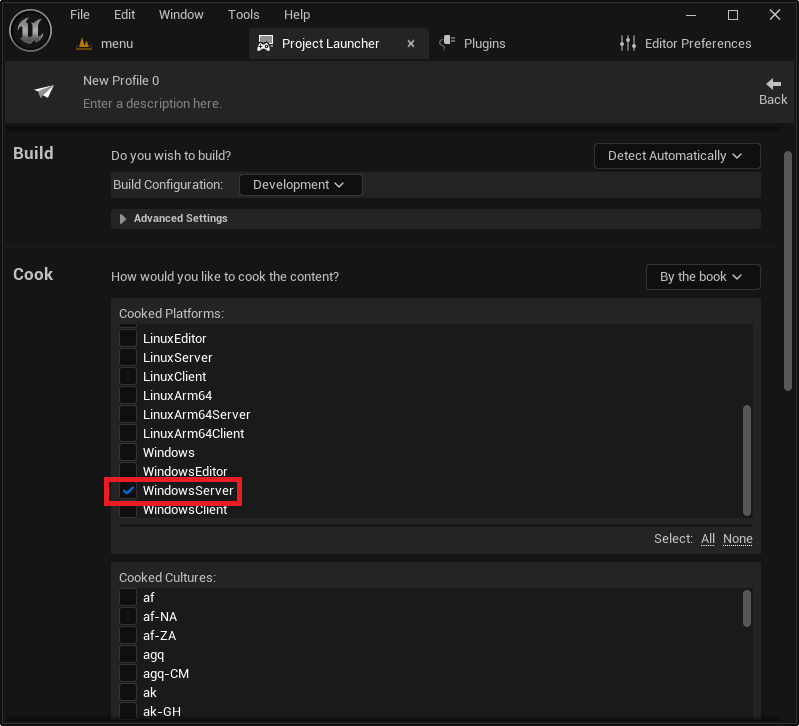
- Cook Method: Change the "Cook" option from "On the fly" to "By the book." "By the book" cooking preprocesses all necessary game assets into a cooked, optimized format before packaging. This is crucial for production server builds as it ensures consistency, reduces load times, and optimizes performance compared to "on the fly" cooking, which happens dynamically during runtime.
- Cooked Platforms: Crucially, select the target server platform. For Windows-based servers, "WindowsServer" must be enabled. For Linux deployments, options like "LinuxServer" (for x86/64 architectures) or "LinuxArm64" (for ARM-based Linux servers) are available, catering to different hosting environments and hardware specifications. This selection determines which platform-
About the Author